
Create an Azure Virtual Environment – Accessing Storage Account File Shares
This article is the fifth in a mini-series that will show you how to build out an Azure virtual environment to do learning and testing with. If you already have a subscription that’s awesome! You can get the first 30 days for free with a Microsoft Azure trial account right here. Check out the first steps for getting logged into Azure Portal and creating a resource group here. Today we are going to look at how to access our file share inside the storage account we created in the previous article here. Let’s dive right in today shall we!
First, let’s get logged back into your Azure portal at https://portal.azure.com.
Now, let’s browse to the resource group:
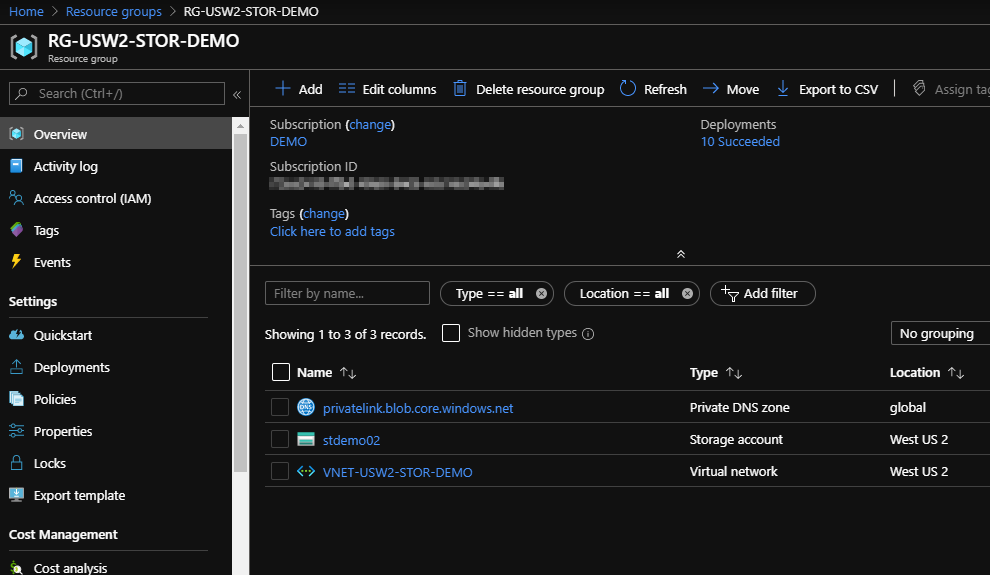
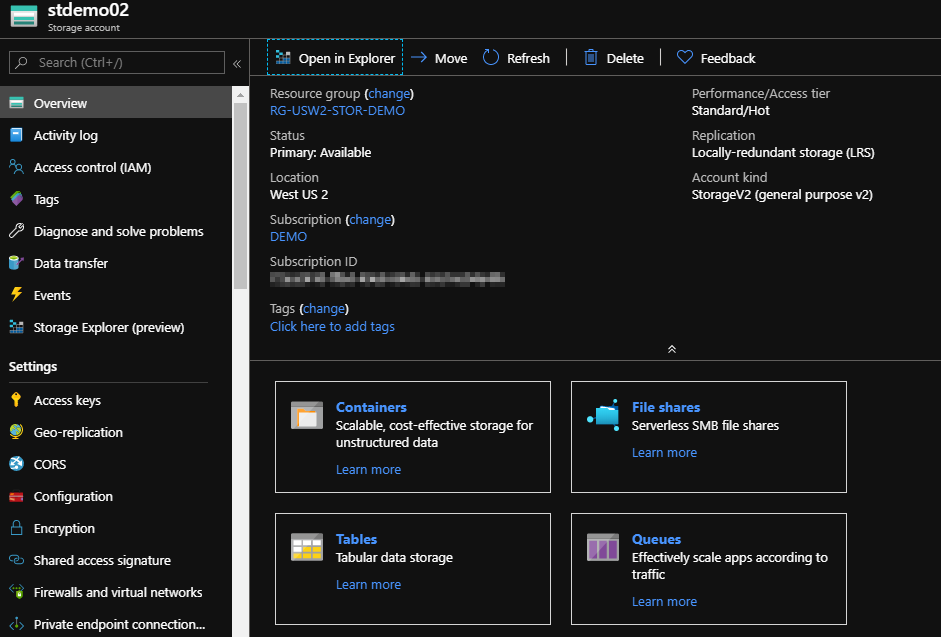
Open your storage account:
Now, let’s secure our data so that we can ensure that we will only access this from within certain locations. We will be locking this storage account down so that we can only access it from our existing Virtual Network that we have our VM’s on inside Azure. We’re going to focus on the lockdown information today and then show you how to access the data.
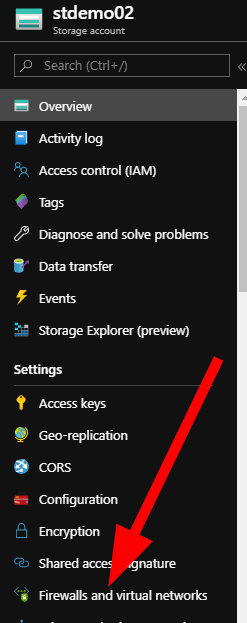
First, click on Firewalls and Virtual Networks in your Storage Account blade.
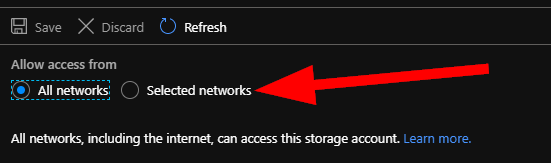
The first thing I’d like you to notice is that the default configuration is that you can access this storage account from any network. Depending on what type of data you have stored in your storage account, that could be risky. Let’s get this locked down so that only our VM network can access this account.
Choose Selected Networks and marvel at the features that will then reveal themselves to you!
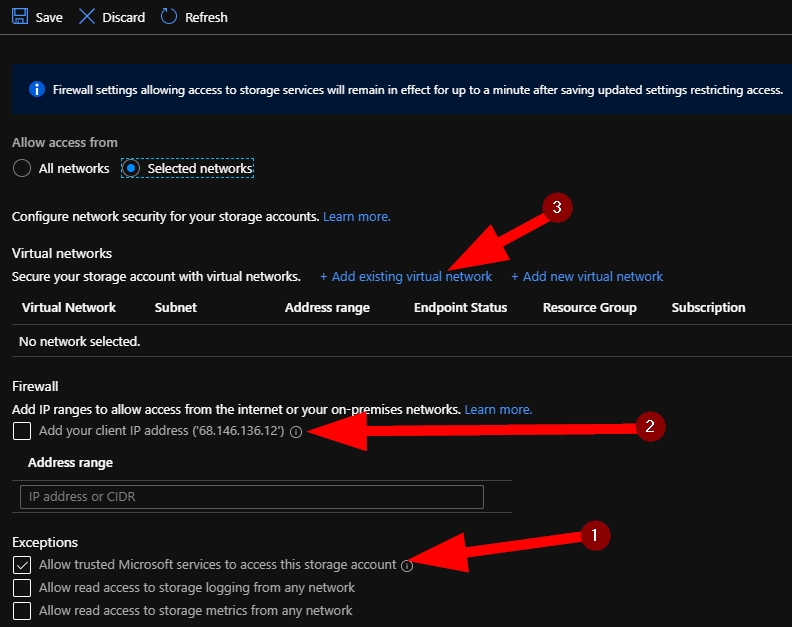
First, let’s note that Microsoft rather smartly gives their trusted services access to this account. This includes things like Storage Explorer preview. It is worth noting if you need to really lock down your accounts based on very tight controls for your business.
Next, note that you can add specific IP addresses and our good friend CIDR addresses. Now, though it’s a bit cold out when I wrote this, it’s a different kind of cider that will warm you up. Now, full disclosure — not shown in this walk through is me adding my public IP address here briefly so that I can later add a file share from my workstation in my home office. The walk through will show you how to add the file share on any Windows system, this security provision here will restrict your data to just this vnet and subnet so that it cannot be accessed by anyone else.
Under the settings for Virtual Networks, click on Add existing virtual network and you will see a new blade display:
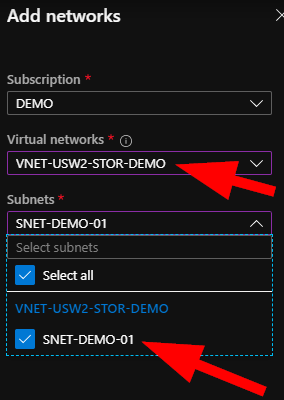
Here you can select your existing virtual network, and then select the specific subnets in that network that you want to allow access into this storage account.
Ensure that you click on Save to save your changes, you will see that you now have a whole defined network that can access your storage account:

Perfect! Now only machines on the selected subnet can access data in your storage account. Much more secure!
Now, let’s see if we can access this data from a VM. Scroll down in the storage account blade and select File Shares, select your demo file share.
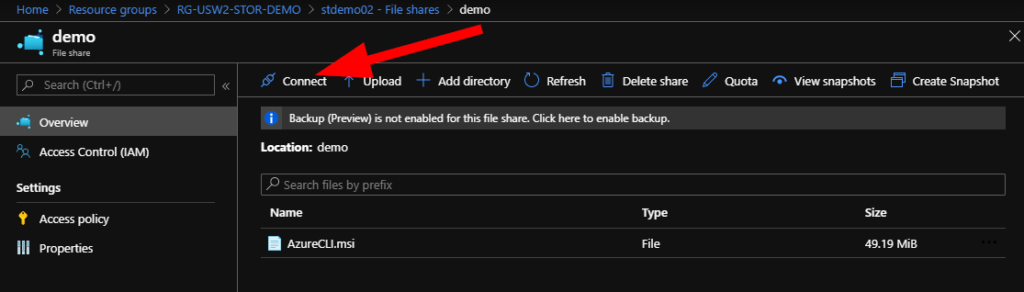
Click on Connect.
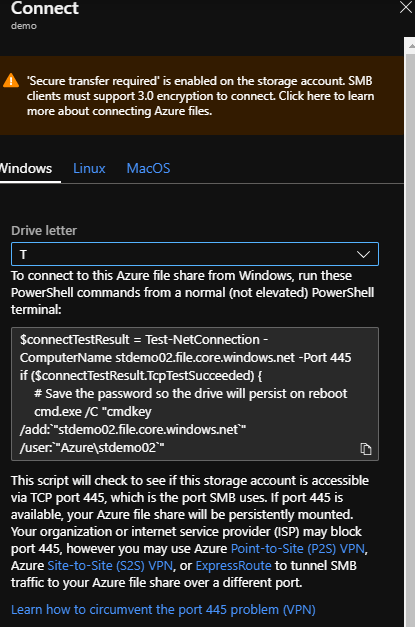
I selected drive letter T (…for Terrific!).
Note that we can connect to this share from Windows, Linux, or MacOS. Terrific!
Note the instructions that advise us to run the PowerShell specifically in a non-elevated terminal window:
$connectTestResult = Test-NetConnection -ComputerName stdemo02.file.core.windows.net -Port 445
if ($connectTestResult.TcpTestSucceeded) {
    # Save the password so the drive will persist on reboot
    cmd.exe /C "cmdkey /add:`"stdemo02.file.core.windows.net`" /user:`"Azure\stdemo02`" /pass:`"xxxxxxxxxxxxxx`""
    # Mount the drive
    New-PSDrive -Name T -PSProvider FileSystem -Root "\\stdemo02.file.core.windows.net\demo"-Persist
} else {
    Write-Error -Message "Unable to reach the Azure storage account via port 445. Check to make sure your organization or ISP is not blocking port 445, or use Azure P2S VPN, Azure S2S VPN, or Express Route to tunnel SMB traffic over a different port."
}
This will check that the file share is available via port 445 (SMB file share port on TCP) then mount your share on the drive letter we chose (or simply edit the PowerShell) in a persistent fashion.
Let’s make this real!
On my Windows 10 workstation behind a router, firewall device, and standard cable modem connection — I’ve run the PowerShell above, except with the real password, and look our results:

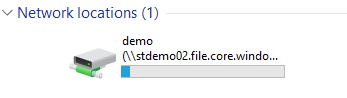
The drive is showing as mapped, with communications successful from the Windows 10 endpoint all that way into Azure! Terrific!
Here’s how that looks on our PC:
…and if I open the file share that is mapped I see the file that we placed in there using Storage Explorer:
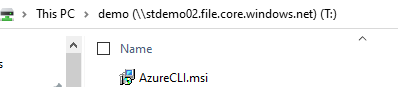
Now, I can finally run my Azure CLI installer to use for some later walk-through’s with you! Go and test out your new easy way to connect your Azure data with users. Do some testing, play with the settings, and I fully encourage you to test different security features to understand how changing different settings and configurations will impact outcomes.
Thanks for hanging in there to get all these steps in place together with me. Next time, we’ll talk about cleaning up a test environment inside Azure; so I’ll see you again soon!