
Azure Lighthouse & Sentinel – Better Together
In this post we walk through creating an Azure Lighthouse offer package to onboard Sentinel into the AzureTracks environment. We look at logical groups, roles, and how it all ties together to create the package.
In this post we will create an ARM Template offer today.
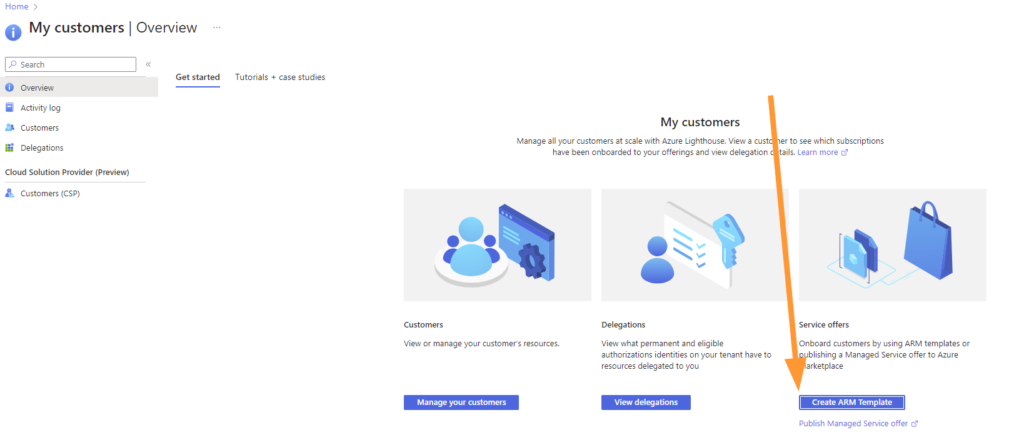
First up, let’s get logged into https://portal.azure.com and head to > My Customers.
Before we jump into creating the ARM template, let’s explore how we need to prepare first. There is a lot of existing documentation on these topics, my mission here is to simplify this and make it easier to understand for customers, and for MSSP’s.
A typical situation that customers face is that they need some help to manage their Sentinel deployment, but they don’t quite know what all this Azure Lighthouse and delegation is about. Check out the previous articles on AzureTracks.com about Azure Lighthouse, there is a lot of in-depth information to help you.
Setting Up the MSSP Side
As the provider (MSSP / MSP), you will need to define a few security groups and understand the native Sentinel Roles in Microsoft Entra ID before creating your offer package.
Let’s first define a few baselines here. We may have a set of security groups that look a bit like this:
- Tier 1 – Reader
- Tier 2 – Responder
- Logic App Operator
- Tier 2 & 3 – Responder
- Logic App Operator
- Tier 3 – Contributor
- Log Analytics Contributor
- Logic App Contributor & Logic App Operator
Note that Logic App Contributor can make changes, create, update, remove logic apps; while the Operator role allows the team members to execute the logic apps. This is important to include!
If we define the roles of our SOC Analysts in a tiered fashion it is easier to align roles to them using the principle of least privilege.
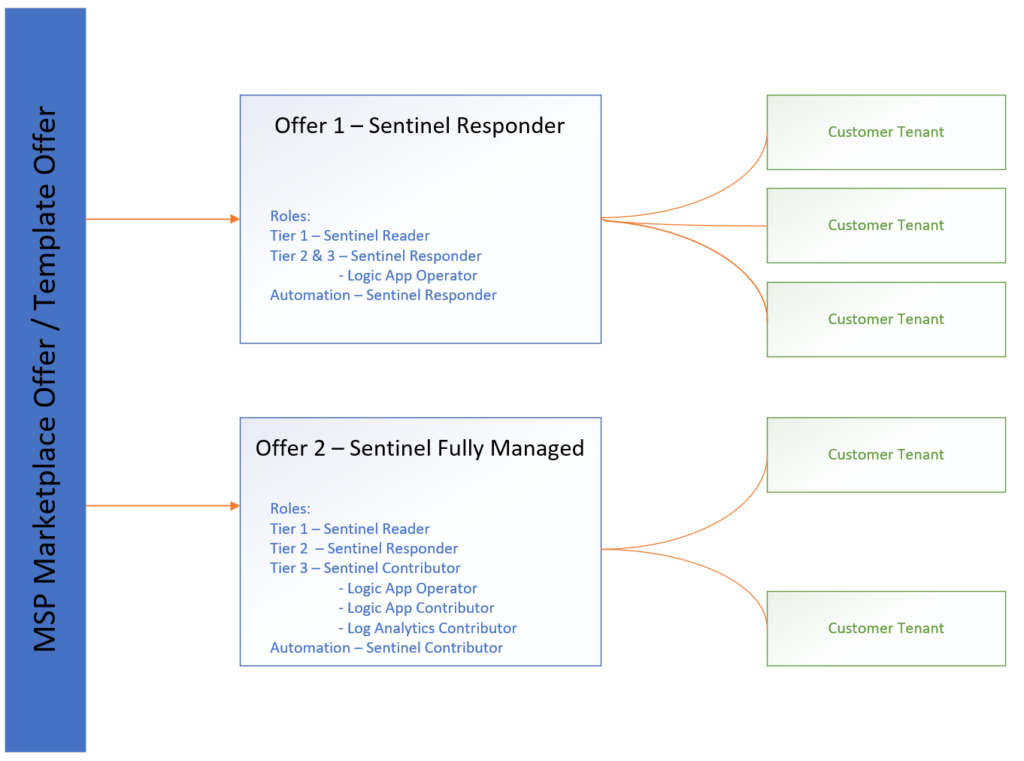
The roles defined above utilize the principle of least privilege, and follow best practices by breaking the tiered work that SOC Analysts may perform into the different roles.
It is important to note that the Log Analytics and Logic App roles are required to perform day-to-day duties in a SOC or SecOps context. The Logic App Operator role is needed to run logic apps in the Sentinel environments.
As an MSSP How do we Remove a Package?
One role that as an MSSP, you may consider including in your package is: “Managed Services Registration Assignment Delete Role“. This will allow the MSSP to remove the delegation package remotely without requiring the customer to use one of their authorized accounts to remove the package. This also removes the dependence on the customer to remove the service provider package.
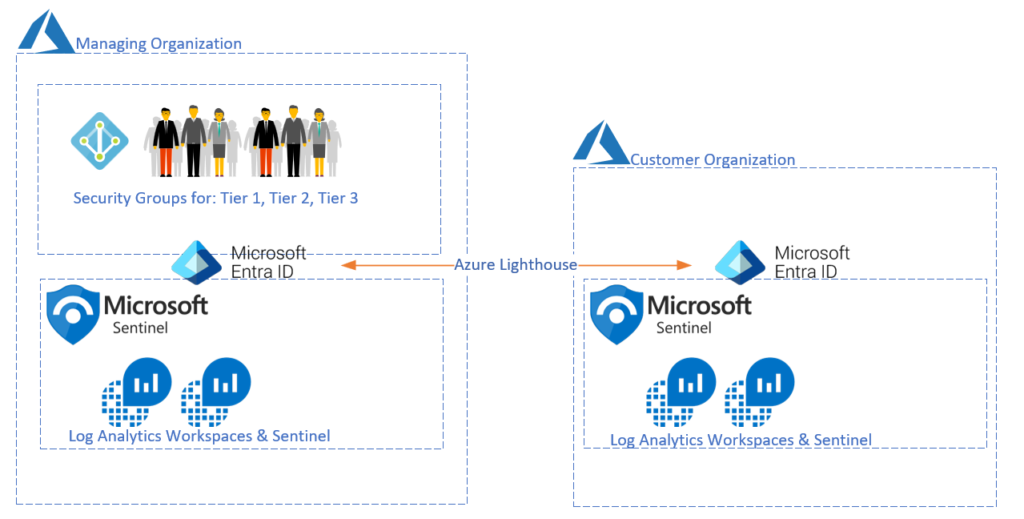
What Does this Mapping of Permissions Look Like?
The permissions are granted between the two Microsoft Entra ID tenant organizations. This allows control for both the provider and the customer, and as the customer the service provider package can be removed at any time from your environment by going to Azure portal > Service Providers.
Creating the ARM Template Offer
To create the template offer, head to My Customers and select CREATE ARM TEMPLATE.
If you wish to create and publish a Managed Service offer, use the link underneath the Create ARM Template button to learn more about publishing packages as public offers. There are some conditions to comply with as a Microsoft Partner, so make sure you ask your Partner Rep any questions or to get support for that part.
Now, let’s create our offer!
Now that you’ve created the correctly aligned security groups to roles in your SOC, you can create the package.
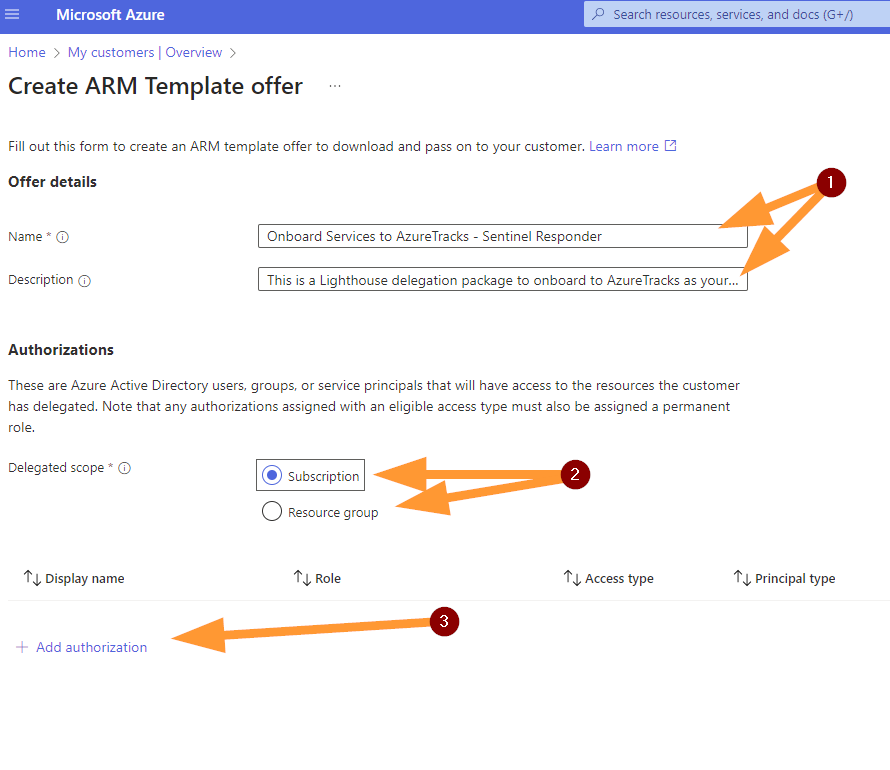
- Enter a name and description. Be descriptive so that there is no mystery.
- Choose your delegation scope between Subscription or Resource Group.
- It is typical for smaller organizations to be delegated at Subscription level.
- More granular permissions management will land you at Resource Group. If you utilize this option you will need the name of the Resource Group(s) to manage.
- Add Authorizations.
- This is where you will need the security group and role information.
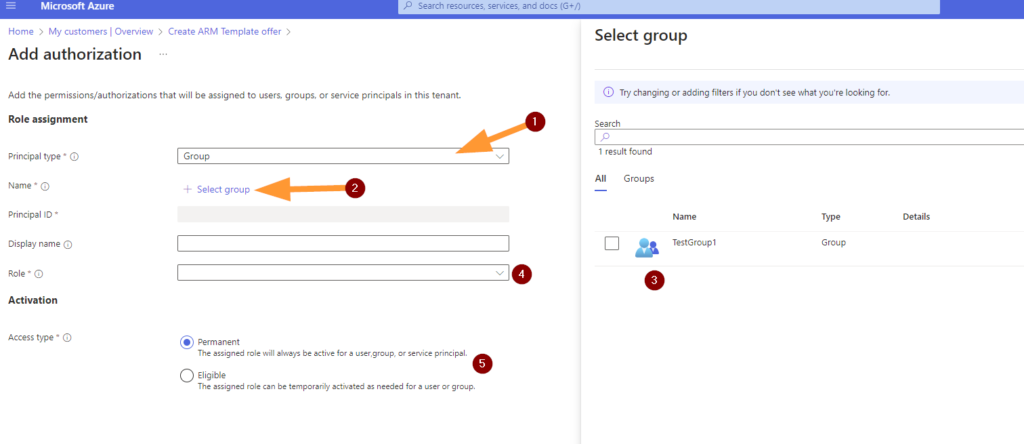
Next choose +Add Authorization. You can add multiple authorizations here, not just one.
Add an authorization for each of the tiers you want to include in your offer to your customer here.
If we follow the principle of least privilege at every stage, we can assign reader roles as permanent and Eligible for elevated roles such as Contributors.
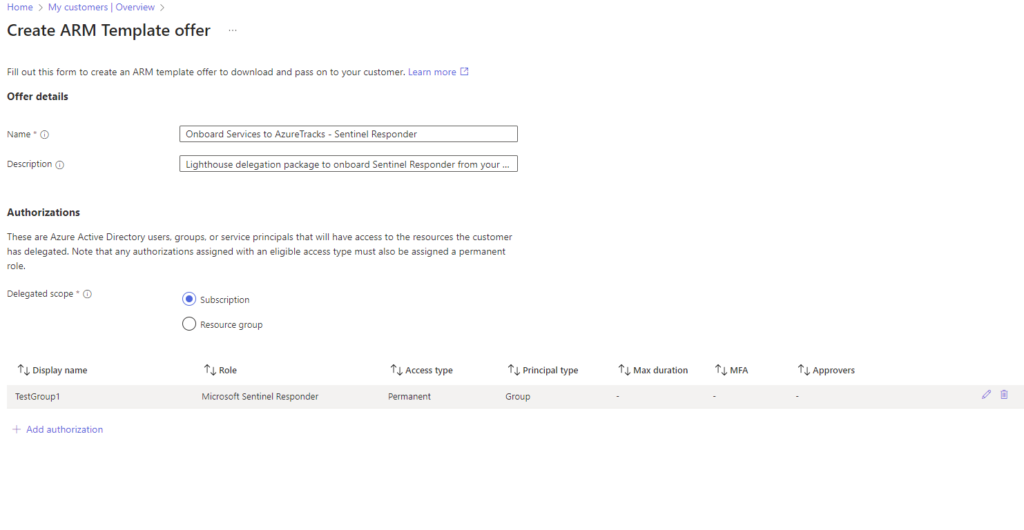
Once you have added your required roles, click on VIEW TEMPLATE to see the results.
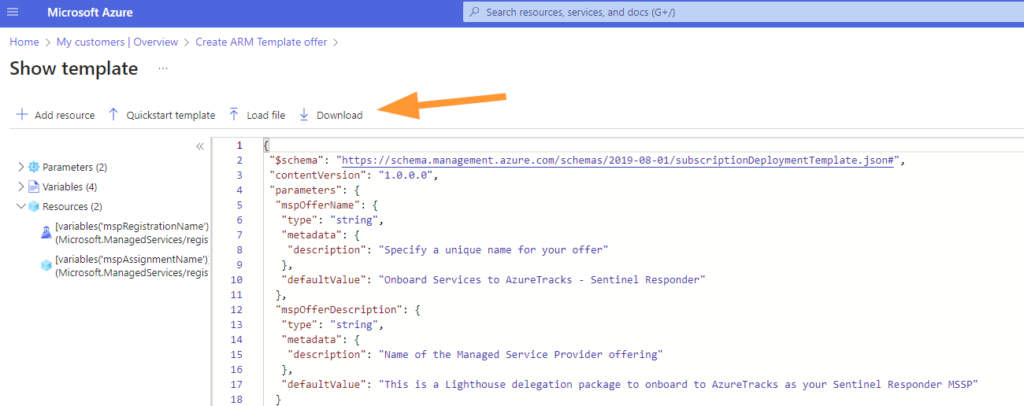
You should DOWNLOAD the JSON ARM template so that you can share this with your customer.
Add the Offer Template on the Customer Tenant
Next in the Azure portal head to > Service Providers.

- Choose Service Provider Offers.
- Upload the JSON Offer Template from your MSSP.
- Choose Upload.
- If you are adding an MSSP Offer from the Partner Marketplace then choose ADD OFFER near the bottom of the screen.
After you upload the JSON template, you can select your parameters.
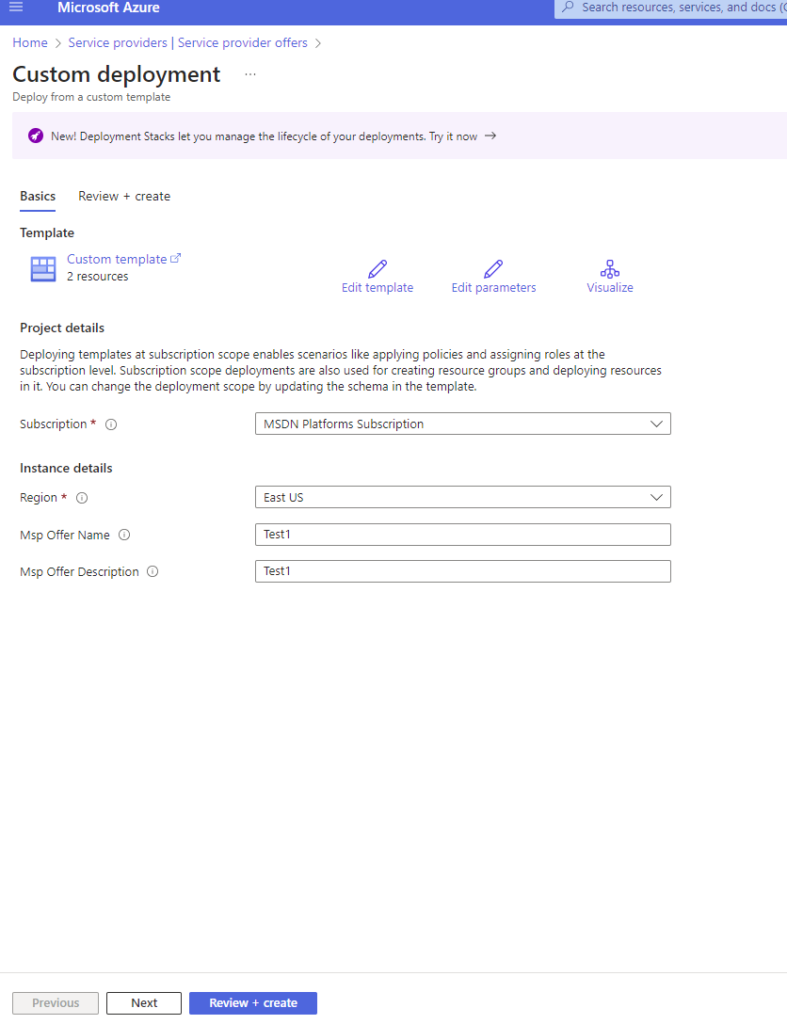
Typically as the customer, you can choose your Subscription or Resource Groups to allow the Lighthouse delegation on.
Next, you can choose the region and you can also edit the existing MSP Offer Name and Description fields.
Click on NEXT to validate the Lighthouse package, when ready click on CREATE.
What Happens Next?
Next, your provider (creator of that JSON or Offer) will wait a few minutes for the permissions to show in their Azure Portal, then the MSSP can start managing the delegated resources.
Conclusion
Thank you for reading this post on AzureTracks.com! I hope that this has helped to remove some of the mystery around creating Azure Lighthouse offers and what it means to put one in place as a customer.
Until the next time we meet in the clouds! Stay curious!