Responding to Threats with Microsoft Sentinel
Today we explore monitoring and responding to threats using Microsoft Sentinel to detect threats and how to start the incident investigation. Knowing where to start will help team members to find the information they need to begin remediation and make decisions. Let’s take a look at monitoring and responding to cyber threats using Microsoft Sentinel.
As businesses and organizations rely more and more on digital technologies, the threat of cyberattacks increases. The proliferation of data breaches, malware, and ransomware attacks, it has become more important than ever to have a robust security system in place to detect and respond to threats.
Step 1: Setting Up Microsoft Sentinel
The first step in using Microsoft Sentinel to detect threats is to set up the solution. Microsoft Sentinel is a cloud-based solution, which means that it requires an Azure subscription to use. Once you have an Azure subscription, you can create a Microsoft Sentinel workspace. The workspace is where all the security data is collected and analyzed. Check out my previous articles on https://azuretracks.com to learn how to deploy and begin setting up your Sentinel workspace quickly.
Step 2: Collecting Data
The next step is to start collecting data. Microsoft Sentinel can collect data from a variety of sources, including Azure, Microsoft 365, and other third-party security solutions. To collect data, you’ll need to set up data connectors. These connectors allow you to connect to different data sources and collect security data.
Step 3: Detecting Threats
Once you have set up data connectors and started collecting data, you can use Microsoft Sentinel to detect threats. Microsoft Sentinel uses artificial intelligence and machine learning algorithms to analyze the data and identify potential threats. You can set up custom detection rules and alerts to help you identify suspicious activity. For example, you can set up an alert to notify you when there is an unusual spike in network traffic or when a user tries to log in from an unknown device. Setting up custom Analytics Rules is a key to customizing your SIEM alerting solution and Microsoft Sentinel makes it easy to do this using KQL queries, pre-made Solutions, and vendor published Analytics Rules.
Step 4: Investigating Incidents
When Microsoft Sentinel detects a potential threat, it generates an incident, which is a collection of related security events that may indicate a security breach. Incidents are grouped together based on their common attributes, such as the source of the attack, the affected asset, and the type of threat. Each incident contains a summary of the events that triggered it, as well as a severity rating and other relevant information.
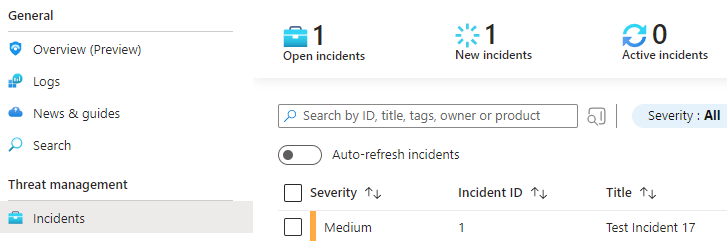
To investigate an incident, you’ll need to open it in Microsoft Sentinel. You can do this by navigating to the Incidents tab in the Microsoft Sentinel workspace and selecting the incident you want to investigate. Once you open the incident, you’ll see a summary of the events that triggered it, as well as a timeline that shows when the events occurred.
From the Incident View, you can use a variety of tools and features in Microsoft Sentinel to investigate the incident further. Here are a few of the key tools and features that you can use:
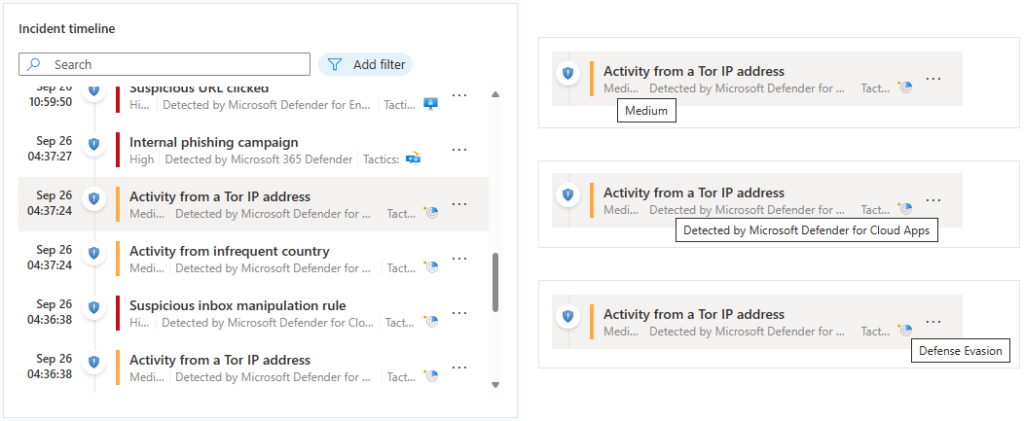
- Timeline analysis: The timeline view in Microsoft Sentinel provides a visual representation of the events that occurred during the incident. You can use this view to identify patterns, correlations, and anomalies in the data.
- Visualizations: Microsoft Sentinel provides a variety of visualizations that can help you understand the data and identify patterns. For example, you can use the “Map” visualization to see where the events occurred geographically, or the “Stacked Bar Chart” visualization to see which assets were targeted.
- Search capabilities: Microsoft Sentinel includes a powerful search feature that allows you to search for specific events or keywords within the incident data. You can also use search to filter the data based on specific criteria, such as the time of the event or the source IP address.
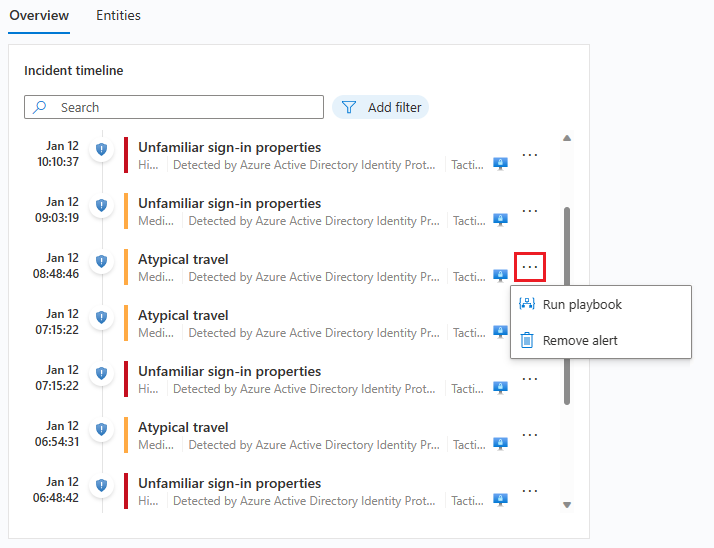
- Playbooks: Playbooks are pre-built workflows that automate certain tasks or actions in response to an incident. For example, you can create a playbook that automatically quarantines a compromised device or disables a user account.
- Integration with external tools: Microsoft Sentinel integrates with a variety of external tools, such as Azure Automation and PowerShell, which you can use to perform more advanced investigations or respond to incidents.
Overall, the investigation process in Microsoft Sentinel involves using a combination of these tools and features to identify the source of the threat, the extent of the damage, and the appropriate response. By using these tools effectively, you can minimize the impact of security incidents and prevent future breaches.
The flow between blades and tabs is very natural and has been optimized and improved greatly coming into Spring 2023. If you tried Sentinel incident investigation in the past — it’s time to give it another go! Doing a limited Proof Of Concept (POC) may just change your mind. Seriously!
Step 5: Responding to Incidents
Once you have investigated the incident, you can take action to respond to the threat. Microsoft Sentinel provides a variety of automated response capabilities that you can use to respond to threats in real-time. For example, you can quarantine an infected device or block a suspicious IP address. You can also create custom workflows that automate the incident response process.
We will start to explore this a bit more in our next couple of articles. Using automation to build out your incident response is a key success factor for small IT and Security teams.
Conclusion
Microsoft Sentinel is a powerful tool that can help organizations detect, investigate, and respond to threats in real-time. By setting up data connectors, detecting threats, investigating incidents, and responding to threats, you can strengthen your organization’s security posture and protect against cyberattacks.
I always encourage all AzureTracks readers to jump in and try all the topics and configurations that we discuss here. If you haven’t spent much time in the Azure Portal, or you are an old friend; remember to shut down and remove unused resources to save your testing spend!