Create an Azure Virtual Environment – Cleanup
This article is the last in a mini-series that has shown you how to build out an Azure virtual environment to do learning and testing with. If you already have a subscription that’s awesome! You can get the first 30 days for free with a Microsoft Azure trial account right here. Check out the first steps for getting logged into Azure Portal and creating a resource group here. Today we are going to look at what cleanup we should do once we are done testing something. Let’s dive right in today shall we!
There are a few different ways to do this, so I’m going to keep this short and sweet.
Before we can delete anything inside our resource group, if you followed article 2 in this mini-series, you will have a resource lock enabled to prevent accidental deletion. Inside your resource group, select Locks and then select your resource lock.

Now choose Delete, confirm, and wait a few moments for that action to commit in your Azure environment. Now you can continue to do your clean-up.
First, let’s say that we are going to keep most of what you’ve created, but you want to remove the highest cost item…storage.
Ensure that you go to https://portal.azure.com and log into your testing environment, select your resource group then select your storage account. Now select File Shares and let’s clean up the file share that we published and connected our workstation into.
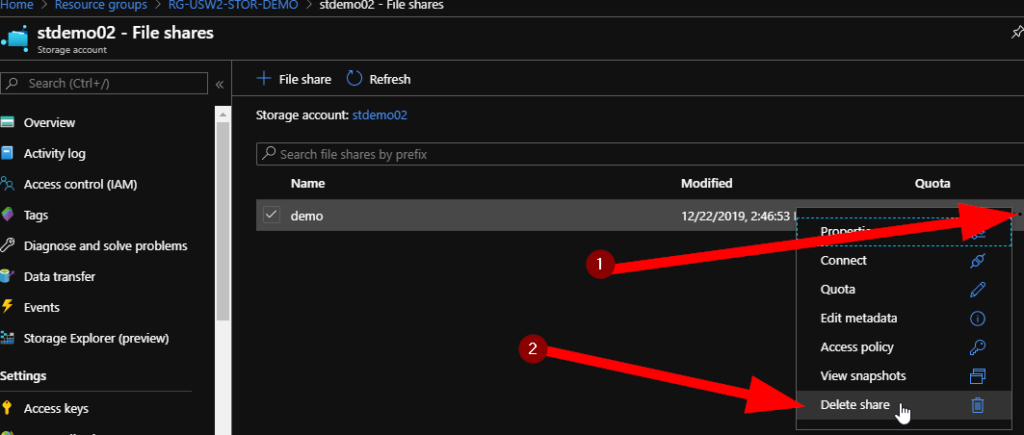
Click on the ellipses beside the storage account quote. Next select Delete share.
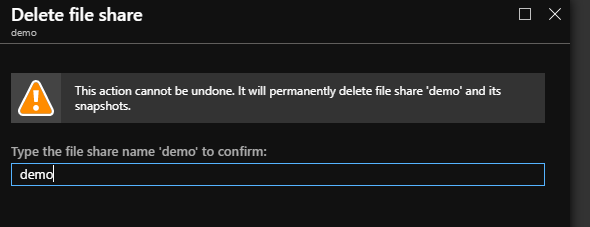
Confirm and click on OK.
It seems to take a lot less time to delete a file share, but I suppose that’s about the same in Windows Server environments. Once your request to delete processes in Azure, the share and the credentials for your mapping are all removed from the storage account.

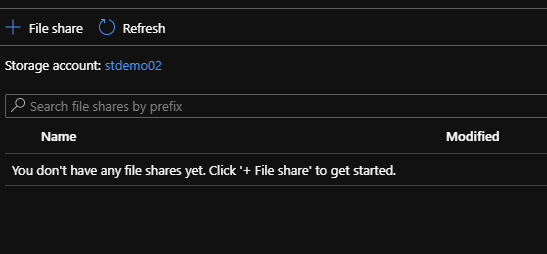
There are no shares inside the storage account now.
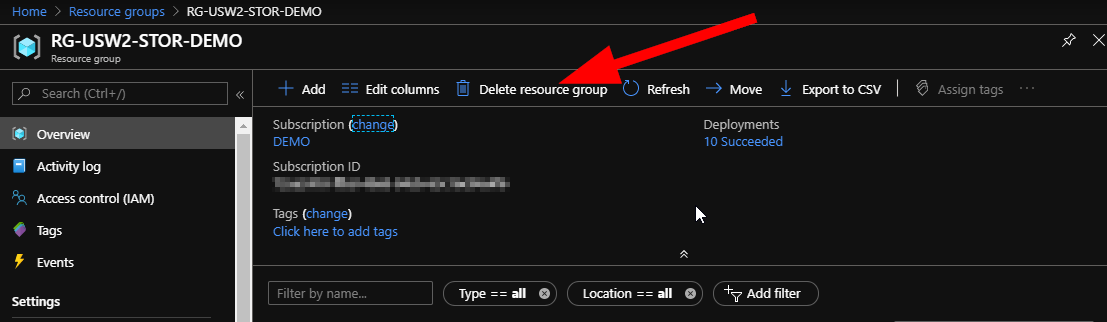
If you want to remove all the resources that we’ve created, the best way to do this is through our like-grouping system the “resource group”. If you go to Resource Groups in your Azure portal, then select the resource group that we used for our demo you should see something like this:

Now select Delete Resource Group. This will remove your whole storage account, vnet, and any other resources that you’ve created in here.
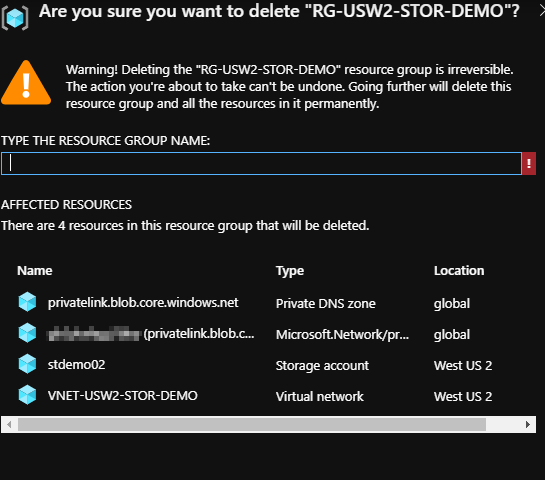
Now, pay attention carefully in here. Once you do this there is no reversing it and you’ll need to re-create any required resources that you should not have removed!
Ok, so if you are good to remove the whole group of resources that we’ve used for our learning demo, enter the name and click on Delete at the bottom.
Done!
This helps us to ensure that we do our part to control costs, and keep our Azure resources cleaned up and current. This is important as we don’t want to consume resources we aren’t using, but we also want to be aware of the costs we are consuming inside Azure.
Have a great week and come visit again soon for more fun in Azure!