Azure Storage – Restrict Storage Accounts to a Virtual Network
In the last article, we setup a resource group, virtual network, and storage account to prepare you for today’s walk-through. Take a look at the previous article here to get ready if you missed it!
Today, we will restrict the access to the storage account to a single virtual network to ensure that it is more secure and not accessible over the internet directly. This is something to consider when designing your Azure storage as there are specific use cases where the design should be more secure. This does not mean it is harder for users to get data! It just means that we as Azure builders need to build our systems thoughtfully. In this case, your file servers or an application server would be segregated onto a single VNET (virtual network) and would be the only systems able to freely access that storage account. You can still use Azure Backup and other services to ensure that you meet all business requirements and recovery objectives.
Ok, now that that’s out of the way, let’s get logged into Azure and go to your resource group that you created last article.
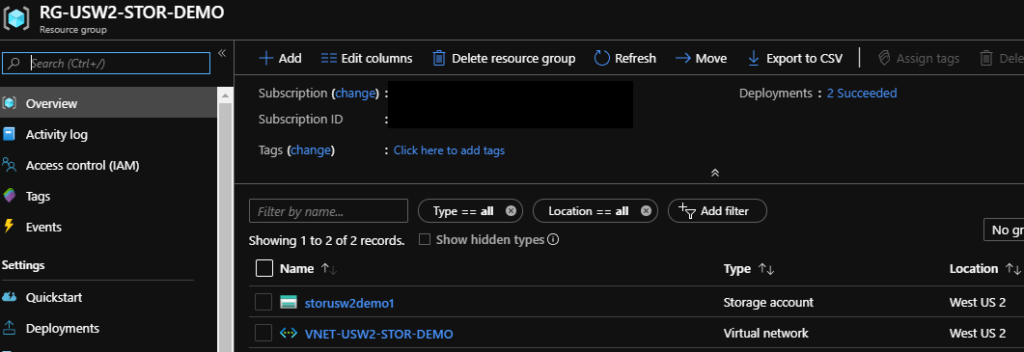
We should have a virtual network and a storage account inside the resource group. Now, let’s open up the properties of our storage account and make a few changes to restrict access:
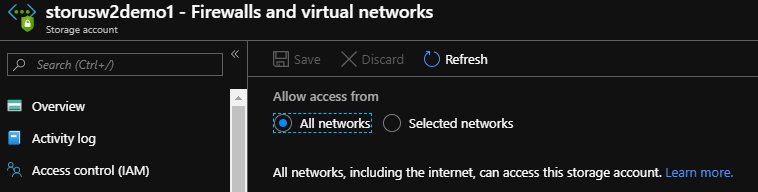
Inside your storage account, scroll down the menu blade and select Firewall and Virtual Networks.
Choose Selected Networks and then select your VNET that we created last time. Now, here’s where you will see another blade pop-up asking you to create a Service Endpoint within your Virtual Network; go ahead and choose Enable to create that endpoint.
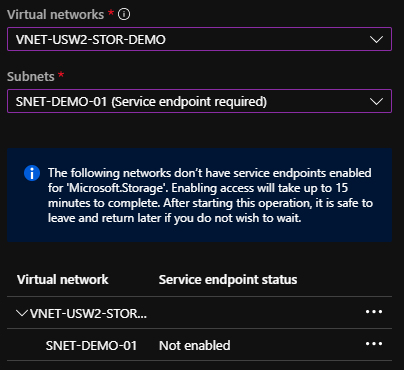
The service endpoint will allow your data movement to stay within the Azure backbone instead of flowing through Internet channels. This reduces your data egress and means that you get that awesome backbone speed within the Azure datacenter!
After a few moments, you’ll see a wonderful green box that says:

Now we can go ahead and click on Add.
You will now see on the Storage Account > Firewalls and Virtual Networks blade that your VNET has been added. Go ahead and click on Save.
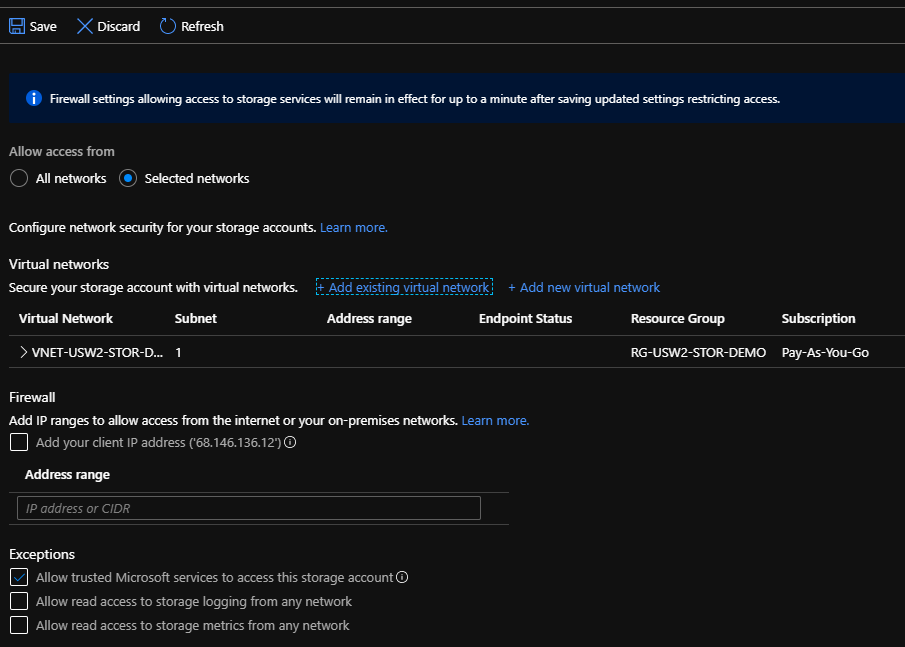
You now have a storage account that will both keep your data inside Azure, and is only accessible to your defined VNET and any exceptions that you selected (Default is trusted Microsoft services such as Azure Backup).
Congratulations on your storage account that has improved security by design now!