Azure Updates Management
Azure Updates Management helps you keep your virtual machines updated without intervention and using an automated schedule. No need for additional third-party products with all the functionality build right into your Azure subscription. The ability to patch regularly addresses major security concerns and requirements for compliance by reducing risk footprints, patching flaws and bugs, and automating the process to remove human error.
Supported Operating Systems:
- Windows Server (2008 and newer)
- CentOS 6 (x86/X64) and CentOS 7
- Red Hat Enterprise 6 (x86/x64) and 7 (x64)
- SUSE Linux Enterprise Server 11 (x86/x64) and 12 (x64)
- Ubuntu 14.04 LTS, 16.04 LTS and 18.04 (x86/x64)
The following Azure Components are utilized to perform assessment and deploy updates:
- Microsoft Monitoring Agent (MMA) for Windows or Linux.
- PowerShell Desired State Configuration (DSC) for Linux.
- Automation Hybrid Runbook Worker.
- Microsoft Update or Windows Server Update Services (WSUS) for Windows computers.
If you are already using Ops Manager (Operations Manager Management Packs – Specifically), there will be three additional management packs deployed onto connected computers:
- Microsoft System Center Advisor Update Assessment Intelligence Pack
- Microsoft.IntelligencePack.UpdateAssessment.Configuration
- Update Deployment MP
Steps to get your virtual machines updating automatically:
- You’ll need an active Azure subscription.
2. Create a VM with the B2s spec.
-Use a new resource group called ‘vmupdates’.
-Add inbound port rules for HTTP, HTTPS, and RDP when you create the VM (or in the NSG afterwards if needed).
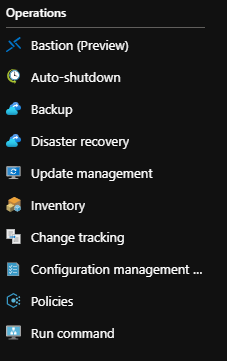
3. Select the VM you created and on the left panel under Operations select Update Management.
4. In the Update Management pane, select Enable for this VM. Accept the default configurations then click Enable.
5. Wait about 15 minutes for all the processes to complete on the virtual machine.
6. The Compliance configuration is now complete with the Failed Update Deployments counter having been configured. If you have updates to be deployed, click on the INFORMATION LINK you will see displayed any KB listed.
Now let’s take a look at Hybrid Worker Groups
1. Browse in Azure portal to All Resources > Automation Account, then click the Automation Account.
2. Go down to Process Automation and in that section select Hybrid Worker Groups > System Hybrid Work Groups tab and you should see your configured virtual machine here.
Review Agent Connectivity to Log Analytics
1. In the Azure Portal > Virtual Machines and select your virtual machine that is configured for updates.
2. In the Overview section, make a note of the public IP address assigned. You’ll use this in the next step.
3. On your local computer, open the Remote Desktop Connection app and enter your public IP Address that you noted in step 2 > Connect.
4. Enter your credentials for the virtual machine.
5. You will get a certificate warning window, click on Yes. Once logged into the vm, open the Control Panel.
6. Open Microsoft Monitoring Agent > Azure Log Analytics (OMS) tab > Check for the message ‘The Microsoft Monitoring Agent has successfully connected to Log Analytics’.
7. Close Azure Log Analytics.
8. In Control Panel > Administrative Tools > open Event Viewer > Expand Applications and Services Logs.
9. Click the Event ID column to sort the list and look for events 3000 and 5002. Select them and read the General tab messages.
10. Close Event Viewer and log out of the Remote Desktop.
Schedule Your Updates to Recur Regularly
1. On the virtual machine you configured first > Go back to Operations > Update Management > Click on Schedule Update Deployment.
2. Enter a name such as ‘Monthly Critical Updates’ in the Name Field.
3. In the Update Classifications field select your desired updates > We will select Critical and Security Updates.
4. In the Schedule Settings field enter your start date and time, time zone, select Recurring and enter the frequency. Only you and your business can determine the correct frequency for updates to be applied.
5. Click on Create.
*Remember that a testing strategy would be the smart choice to have implemented here to run ahead of this schedule!*
The discussion of how thoroughly and frequently to test patches has been a hot topic for long time and is likely to stay that way. I typically suggest to companies to choose what fits right for them. In a small company with <100 virtual machines monthly testing is actually just as much of a challenge as a medium company with 500 or 1500 virtual machines. It’s easy to overlook the scaling of IT staff numbers with the size of the IT infrastructure…so I can’t really ever say it’s easy for anyone. With that said, I try to keep most companies on a monthly testing schedule that aligns with Patch Tuesday, then deploy to production after they’re comfortable — for some it’s 2 days, or others it can be one month behind. It truly depends on your requirements and how aggressive your patching requirements/strategy really is.