Managing Azure Resources – A Primer
Today we’ll take a ground-level look at managing your resources in Azure. I want to introduce a few different methods to control your resources such as virtual machines, databases, storage accounts, and anything that you keep within a resource group really. Let’s dive right in and find some different ways to work with and control our resources!
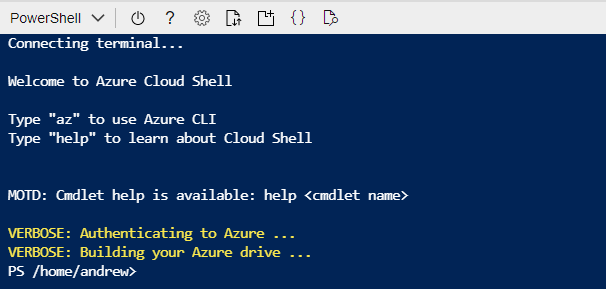
Those of you who have read previous articles here will fully expect that we’ll start by creating some ‘test subjects’ in Azure Cloud Shell…..so, not to disappoint, let’s get into the shell!
On https://portal.azure.com get logged into your testing subscription and let’s create some resources. I have a tutorial on how to do this right here.
Today, I’ll use the following code to create our quick demo environment inside a resource group:
az group create --name rgDemoControl1 --location westus

az network vnet create --name vnetDemoControl1  --resource-group rgDemoControl1 --subnet-name default

az storage account create --resource-group rgDemoControl1 --name storbuild71 --location westus --sku Standard_LRS --kind StorageV2

az vm create --resource-group rgDemoControl1 --name wdemoRG2-1 --image win2019datacenter --admin-username thortheadmin
 --tags testing:demo

az vm create --resource-group rgDemoControl1 --name wdemoRG1-2 --image win2019datacenter --admin-username spiderpig
 --tags testing:demo
Please watch the spacing with the parameters on the above code segment. I’ve noticed that sometimes the publishing of this does not respect spaces the way we need and gets rid of them. Helpful for regular words but not so awesome in code segments….anyways….if you get an error just know to look there first and save some time.
This is what I see with incorrect spacing before a parameter:

Moving on….
Once your demo is built out, let’s look at some different ways to make changes to things!
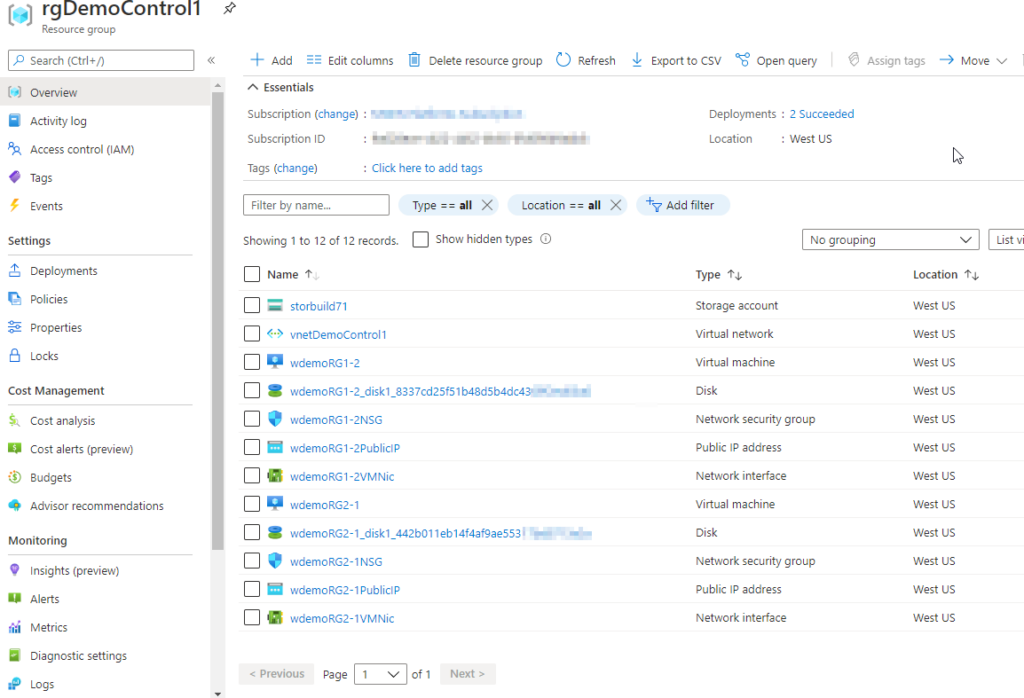
Let’s go into our Resource Group ‘rgDemoControl1’ and see that our resources are all listed here:
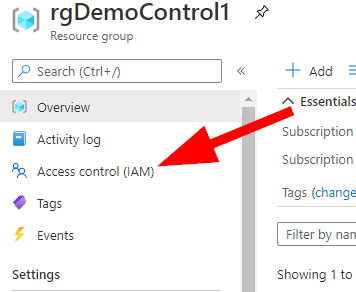
The first thing I’d like to talk about is RBAC (Role Based Access Control) and where we do this is under the Access Control (IAM) blade for the resource group.
Once you’re in the Access Control (IAM) blade, there are a few things to look at. Let’s start with your own access, then View Access to this Resource.
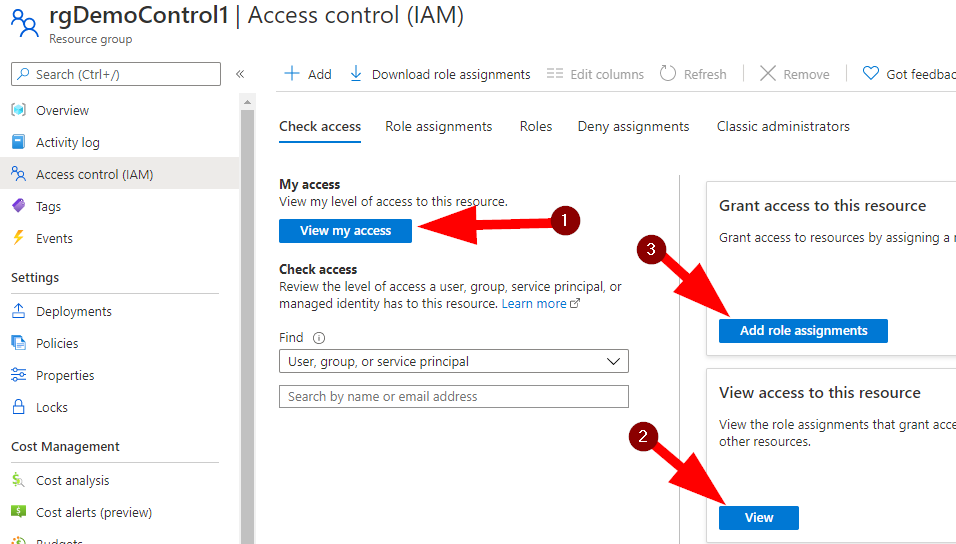
View Access allows you to check – at a glance – what roles have access to this resource group. Now let’s click on Add Role Assignments — you may need to go back to the Access Control main blade then click on this. Once you do, a new blade opens and we can Add roles to this resource group for access. Let’s take a look:
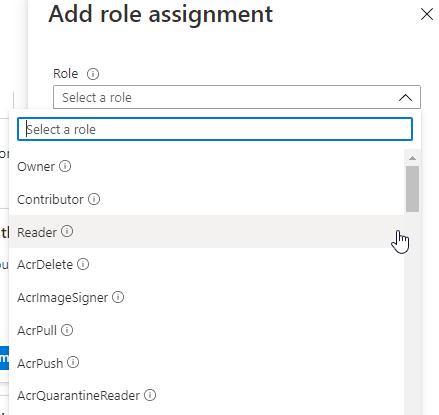
Clearly there are a lot of roles here. Let’s choose Device Update Administrator from the list, then select ‘User Group or Service Principal’ and select your own name. This won’t impact any changes in our little test, but you can see how easy it is to manage adding users and roles here. Now as a little check, hop back into the View Role Assignments and see that ‘Device Update Administrator’ with your name has been added to ‘This Resource’. There are a lot of different ways to do this, but this allows you to assign roles and users to a resource group which is useful if you have a consultant or vendor helping you with a limited scope project.
Virtual Machines
Alright, now let’s look at how to update our virtual machines at scale. In our case here it’s a small scale, but let’s take a look at getting this. Back in the Azure Portal home screen, let’s go to Virtual Machines. Next, select the virtual machine you want to work with first > then select Guest & Host Updates. This will open a new blade where you select the following:
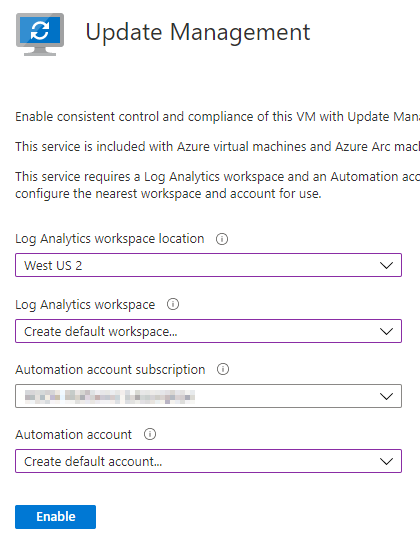
Once you select the desired options, the wizard (no…not a real wizard…well maybe) will create a Log Analytics workspace and enable update management on the virtual machine. Side note: we are doing this in a way that is easy — for production environments you should consider creating a Log Analytics Workspace in the correct resource group and locations for improved data efficiency and manageability. Side note 2: notice that if you use Azure Arc that this is included!
Let’s jump back to the Virtual Machine main blade, then select both our virtual machines in this rgDemoControl1 resource group. Now select Services > Update Management near the top right in the blade.
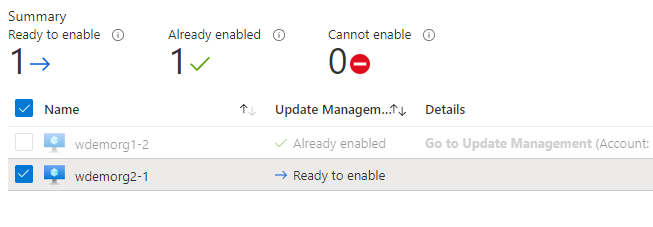
Notice that we have 1 machine enabled now and we are ‘ready’ to enable the next one(s). Now we are ready to roll out managed updates across a group of machines. We are stopping short by not deploying a schedule to push out these updates — I’ll leave it with you!
Controlling Cost
Remember the code you used to create the virtual machines? Yeah, it was a while ago now — well it had a tag attached to it called ‘testing’. We’re going to use that tag to automatically shut down those virtual machines when we are not working to save some money!
In the next article we’ll cover how to set up automation to shut down machines on a schedule to reduce and control costs.