Azure Automation Account – Adding PowerShell to the Mix
Let’s take a look at adding Runbook to our Azure Automation account that we created in our last article together. Today, we’ll add a simple script as a runbook and see how to get it running in a simple way.
Check out the first article here to get your Azure Automation account setup.
First, get logged back into your dev/test subscription where we created the Azure Automation account.
Next, browse to your automation resource group or straight to your automation account.

Now, let’s add a runbook that we can do a proof of concept with first — but before we do that I want to acknowledge that there are a lot of ways to add runbooks from the built-in gallery (GitHub Gallery is the new way to do this!) so feel free to play around in here with the Runbooks gallery….cool stuff shared from many folks as samples to get you started.
Go ahead and click on Runbooks, then Create a Runbook:


In the Create a Runbook blade, go ahead and enter your name, the type will be PowerShell, and enter a description so you can read it later-on and remember what it was for. Click on Create when you’re ready.
Ok, now you’ve got an Azure Automation PowerShell Runbook….but wait…what does it do?
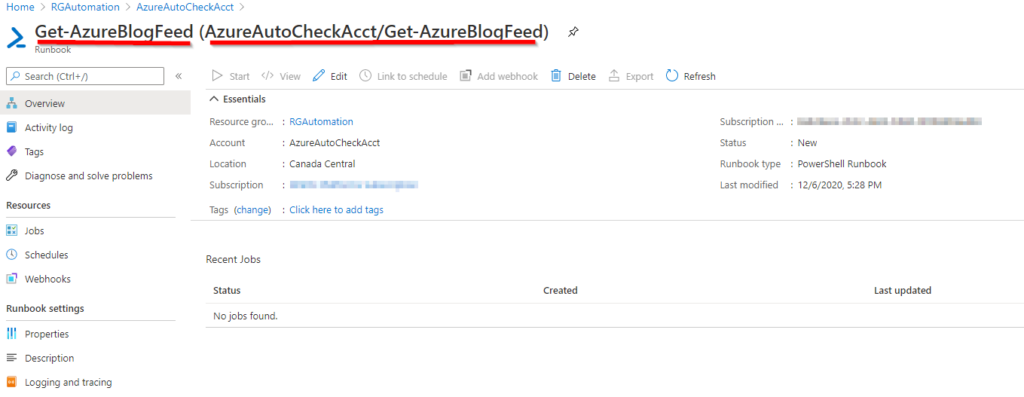
So we have an empty runbook. No big deal here, but let’s see what we have this far:

In the screenshot above, notice that the breadcrumb path to where we are in navigation of the portal tells us a lot about our setup. First, notice the Azure Automation account name is ‘AzureAutoCheckAcct’ and we’re inside the Runbook called ‘Get-AzureBlogFeed’. We can also see the recent job status for our runbook — this will be helpful later or another day for trouble-shooting.
Let’s edit this runbook. Go ahead and click on Edit near the top.
Alright, so here’s the big secret — the PowerShell to grab an RSS feed is pretty darn easy, so here it is:
Invoke-RestMethod -Uri "https://azurecomcdn.azureedge.net/en-ca/blog/feed/"
Enter the PowerShell, I like to use some good comments to keep up good habits. I agree – one liners don’t really need a big explanation, but the point here is to be consistent so that the next person can understand what we were doing.

Cool. Now let’s save this by clicking on Save, then click on Test Pane.
Now, we did not write this as a function so we’ll only be able to run it based on the entered or hard-coded URI in the PowerShell script.
So, now you can test the PowerShell Runbook and see what happens!

Check it out! We created a runbook, added PowerShell code, and tested that the code runs and it completed with no errors – awesome! As a checkpoint, I checked the Azure Blog website to see if my results were accurate, and they indeed are. Awesome again!

Looks like we got this running and kept things simple.
Now, let’s take this to the next level! Let’s get this automated.
Go ahead and click on Publish:

Back on your Runbook’s blade, click on Schedules.

Now select Add Schedule and the new blade will load.

Notice that the schedule is specifically to do with the runbook that you are currently browsing inside. This is where we should remember to use the breadcrumb navigation at the top of our portal window — this tells us what Azure Automation account and Runbook that we are working with while creating the new schedule.
We can create the schedule by following all the prompts, Enter the name and description, select a starting date and time and timezone; then choose ONCE in our case as we’ll use this as a test. Next, click on OK.

Now you’ve got the runbook scheduled to run. I’ll leave it up to you to write code to do other awesome things, but remember to set your schedule to recurring so that it is automated and runs on a regular basis.
Remember to be careful setting up automation — especially since we can do other more impactful things like: Get-AzVM -ResourceGroupName “ResourceGroupExample”. We can use the results list of VMs running inside that resource group to then make changes or shut them down as an example.
Have fun playing with your new PowerShell runbook entirely in Azure!