
Evaluate Microsoft Defender for Endpoint – Part 3
In this third article in our mini-series on setting up a Microsoft Defender for Endpoint labs environment we will be getting things running this week by adding devices and deploying simulations into the labs environment. This will effectively be like sending viruses out to our devices inside the labs simulator! Let’s do what we always do….dive right in!
This article we’ll pick back up and complete the next steps so you can do some further testing! Let’s start by getting right into the Microsoft 365 Security Dashboard at https://security.microsoft.com/
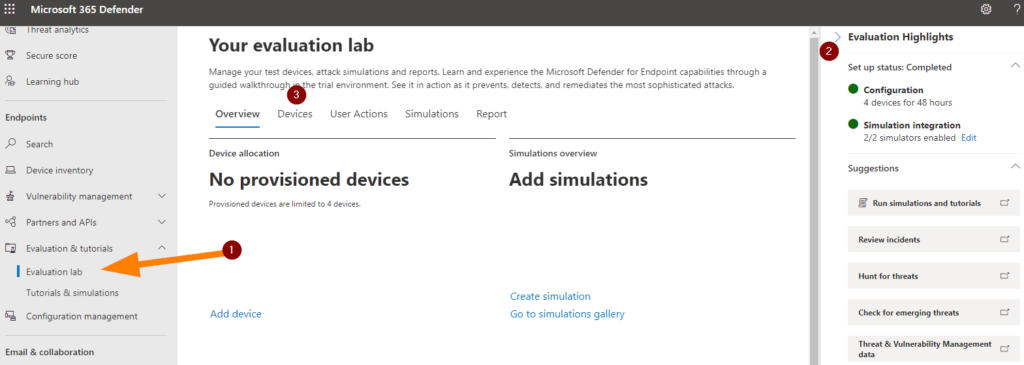
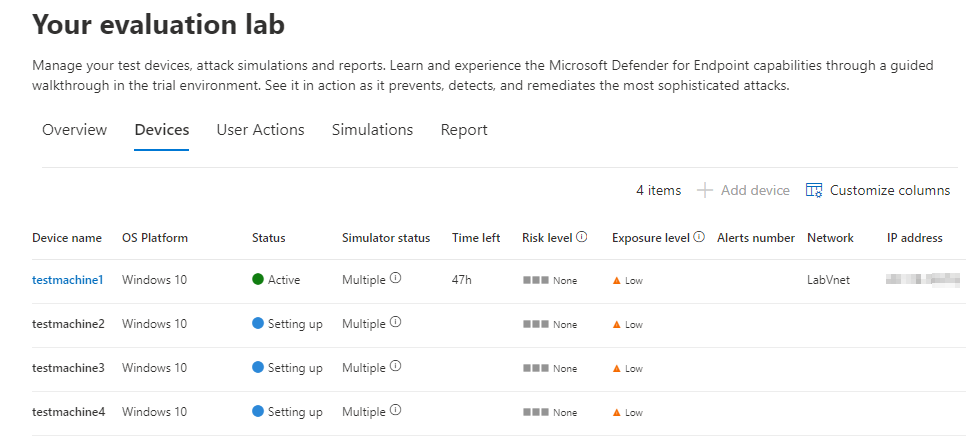
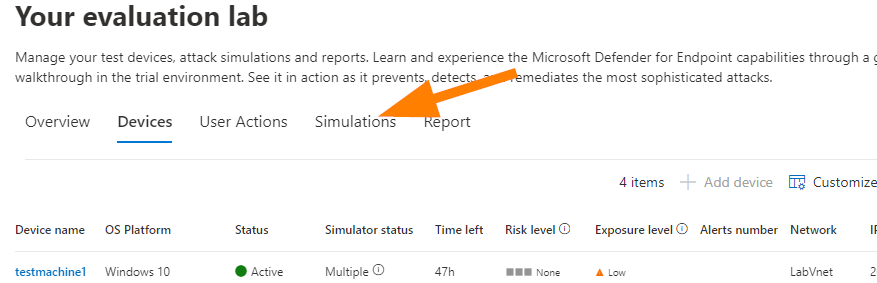
Ok, so first let’s load up our Evaluation lab environment as shown above. Next, note on the right-side blade we can see the current status of our labs, configuration, and devices. Let’s note #3 now and go to DEVICES.
At first there are no devices, we need to add some. Click on + DEVICE.
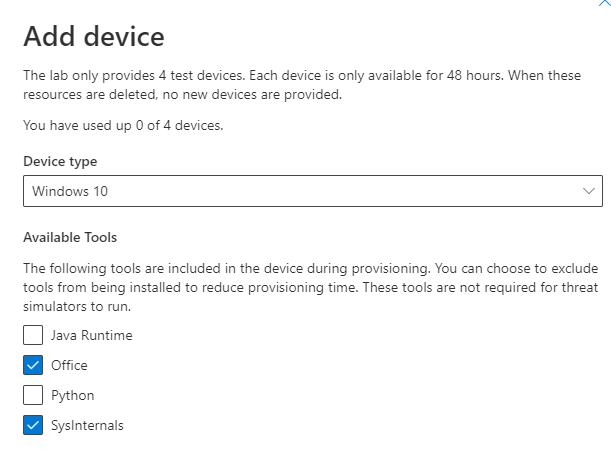
Choose the operating system (Device Type), and the available tools to include on your device.
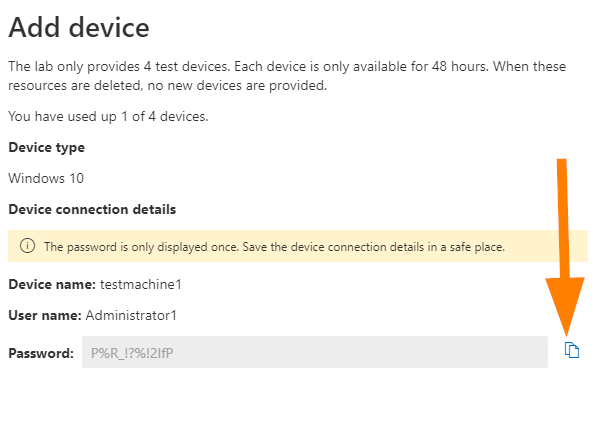
Make sure you note the device, username, and password for your records. This is important as you’ll need them to log in the first time and then change that password.
Now, notice that we’ve got our first test machine all ready to roll now!
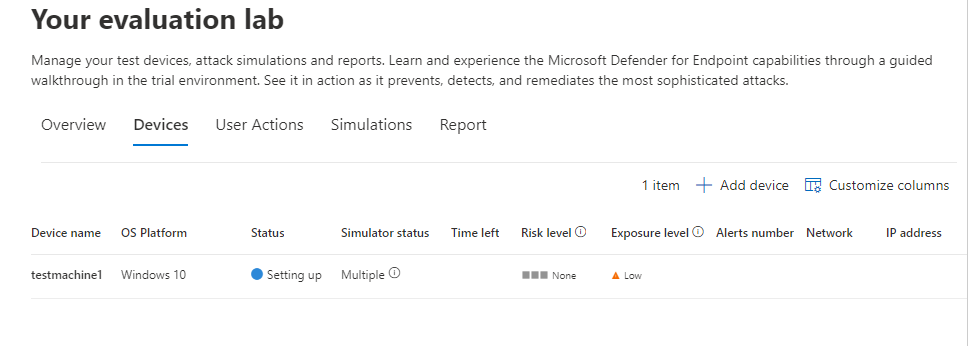
It takes about 30 minutes (in my lab experience at least) for the VM to get provisioned and be usable. Usable in this case means that we have an IP and are able to log into the machine to validate tests and findings on the machine. It also means we can get to having some fun!
The device will automatically be onboarded to your tenant with the recommended Windows security components turned on and in audit mode – with no additional effort required.
The following security components are pre-configured in the test devices:
- Attack surface reduction
- Block at first sight
- Controlled folder access
- Exploit protection
- Network protection
- Potentially unwanted application detection
- Cloud-delivered protection
- Microsoft Defender SmartScreen
Now, the one thing to not with the default configurations is that the automated investigations are configured to semi-automated as that default. You’ll need to change this configuration if you want to have fully automated investigations as part of your testing. Check out the how right here.
Alright, let’s take a look at some of our settings here really quickly while we wait for these machines to fully provision……
Head down to settings:
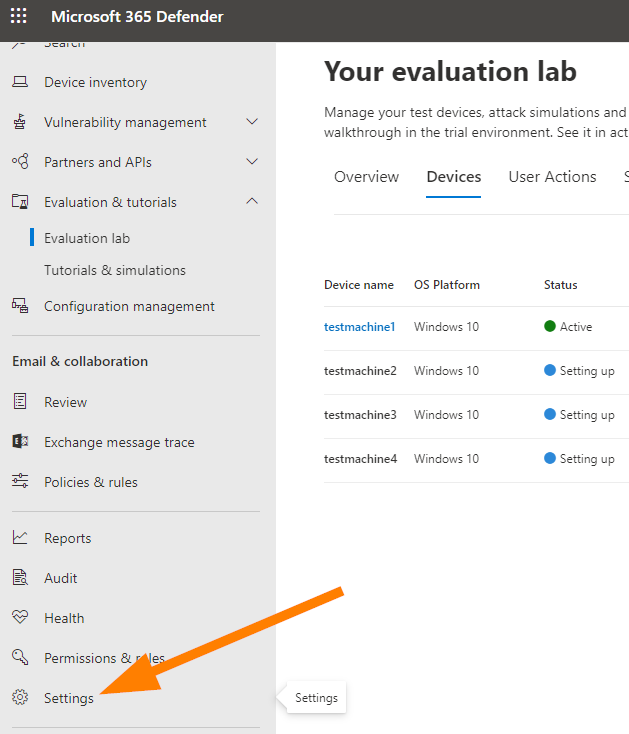
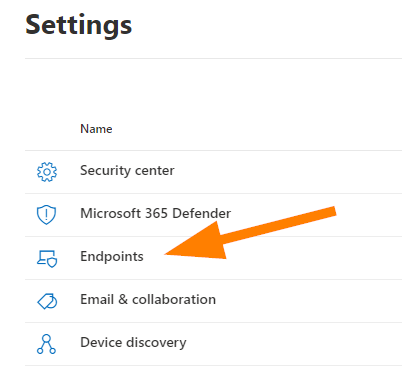
Next, choose Endpoints.
In the Advanced Features, I want you to review the available settings and enable the ones that you need to have configured to complete your testing accurately.
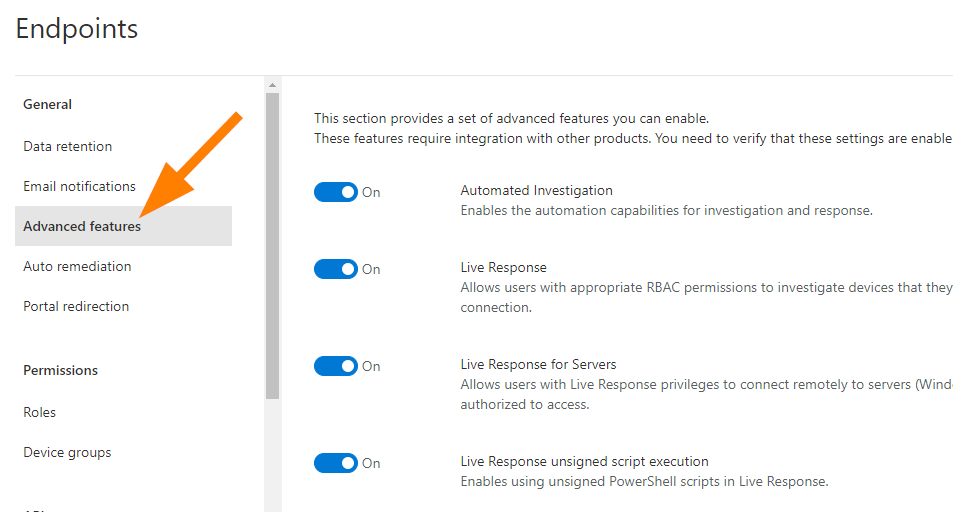
First, turn on Live Response. Next enable the following: Enable EDR in block mode, allow or block file, automatically resolve alerts, tamper protection, show user details, Skype for business, Microsoft Defender for Identity Integration, and review the rest to understand all the available functionalities and integrations.
Save your Preferences when you are ready.
Next, head back to the Evaluation Lab > Devices. Now after all that light reading about features and functionality in Microsoft Defender for Endpoint Plan 2; you no doubt have your test machines fully provisioned and ready!
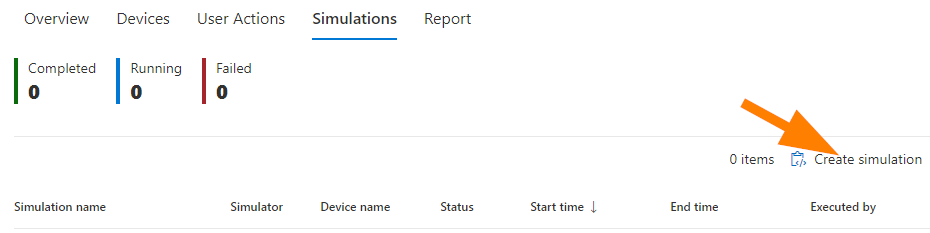
Ok, let’s jump right in and create a simulation now — head over to simulations.
Choose Create Simulation.
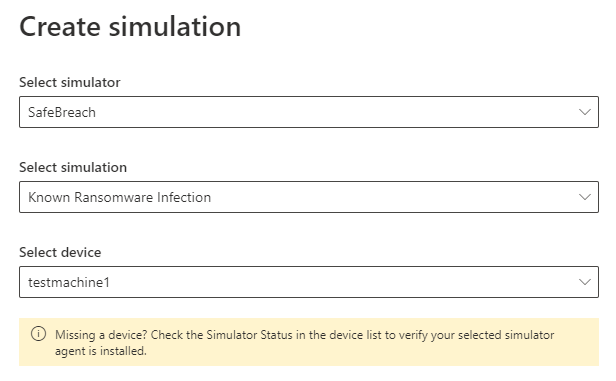
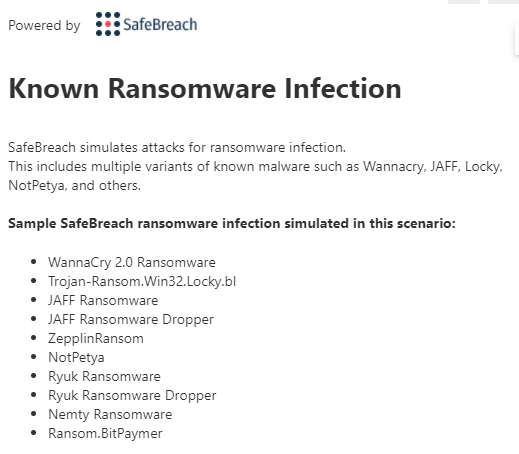
Here are the options that I’ve selected for my first simulation….I went with Ransomeware!

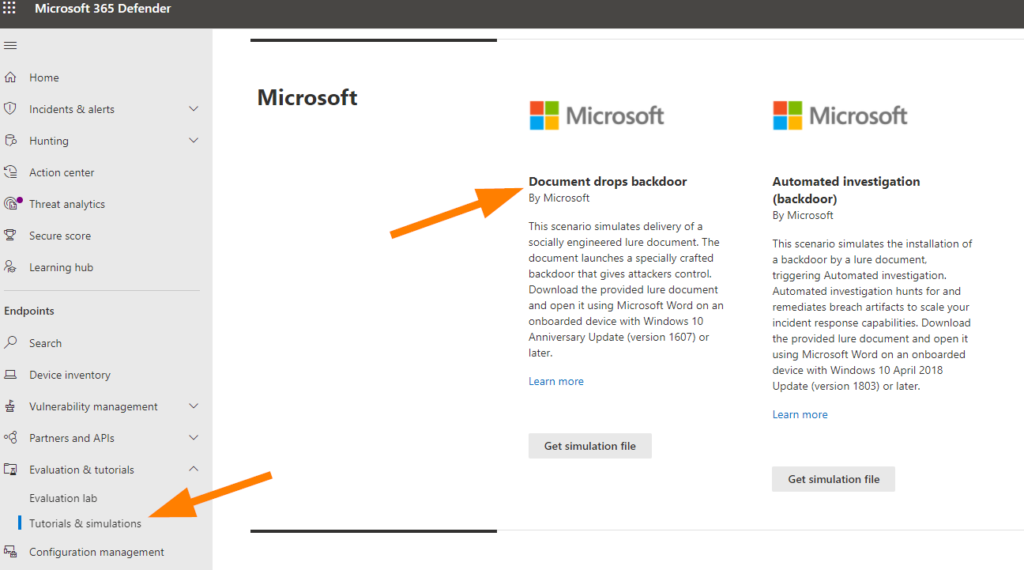
Now, while that fun little simulation runs in the background for us, let’s head over to Endpoints > Evaluation & Tutorials > Tutorials & Simulations.
Let’s check out something really cool together, ok? Have a look at the Document Drops Backdoor that simulates a real attack scenario where a user gets socially engineered into opening a document that loads a specially crafted backdoor that leads to a compromised system.
You can learn all about this specific attack in detail right here.
Sorry for my browser being in dark mode for this next screenshot, but here is the downloaded file to simulate the compromise:
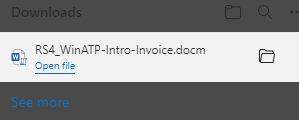
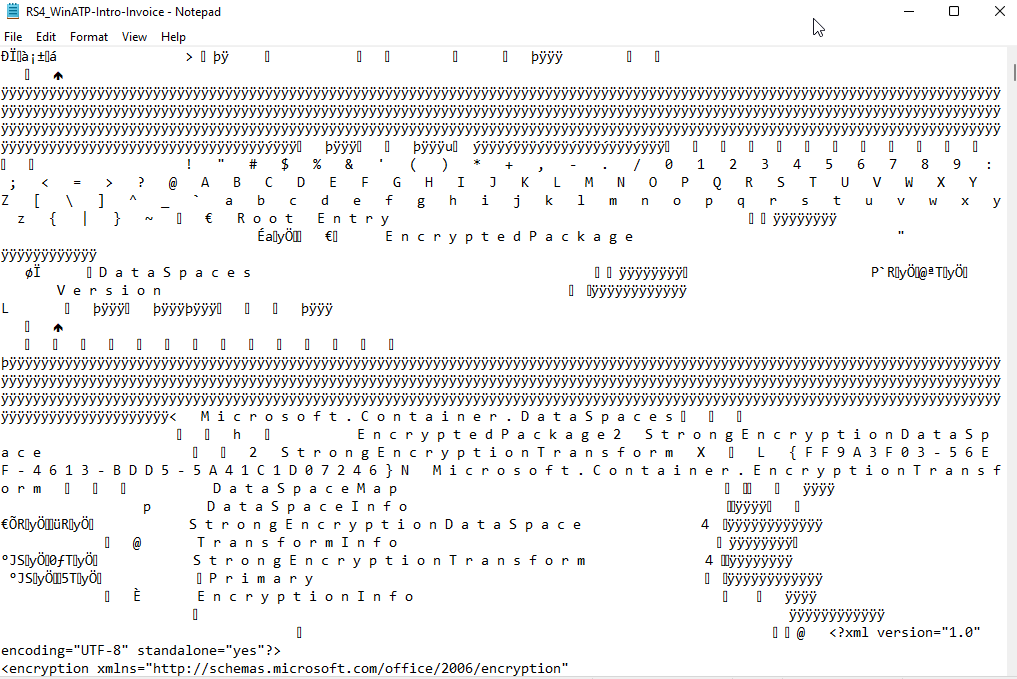
Excellent, now go ahead and follow the instructions to open that file inside one of your testing machines. This is a safe testing file. Just to give you an idea of how things are rolling behind the scenes a bit, here’s what the inside of that file looks like:
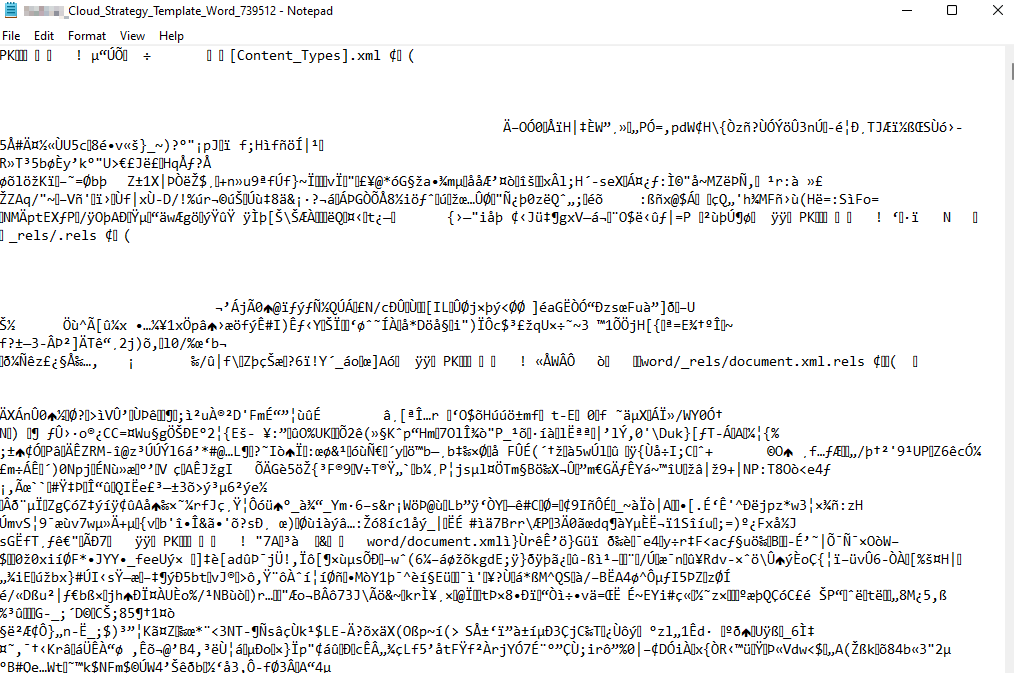
…and here is a normal Microsoft word document just for comparison without the added payload:
Ok, very cool to take a look and explore these things as we go right! Feel free to do your own exploring & really learn as much as you can by poking around at these types of things in a safe environment when you have those opportunities!
Cool.
So, let’s jump back to our simulation now that’s it’s had some time to bake.
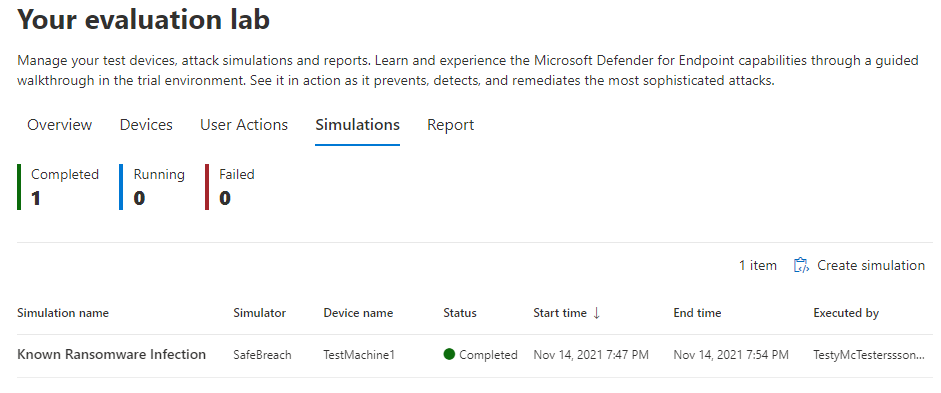
It’s done! Nice!
So when I select the simulation, I can see the infections simulated in this scenario:
Really cool.
Uh oh….if we hop over to Incidents we can see that something is up…..
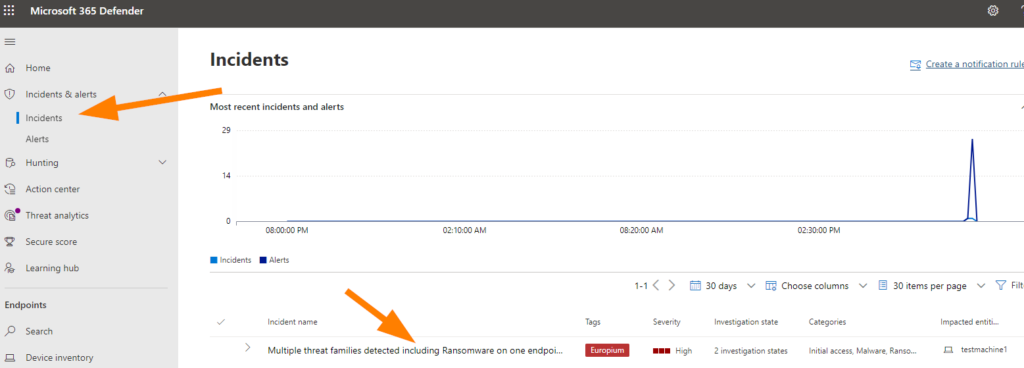
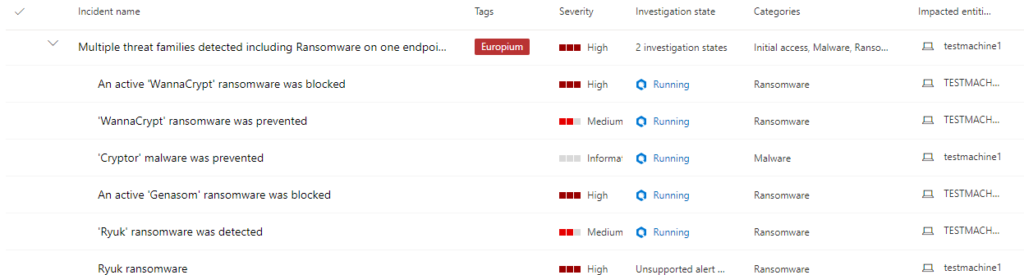
So now we can see all the compromise attempts. If we open up that top level event we can drill down and see exactly what has happened, what was successful/blocked/detected/logged, etc.

Choose Investigation and explore around again for a few minutes…I’ll wait here until you’re done.
Ok, cool. Now, let’s click on Evidence. Notice the Remediation Status column here….
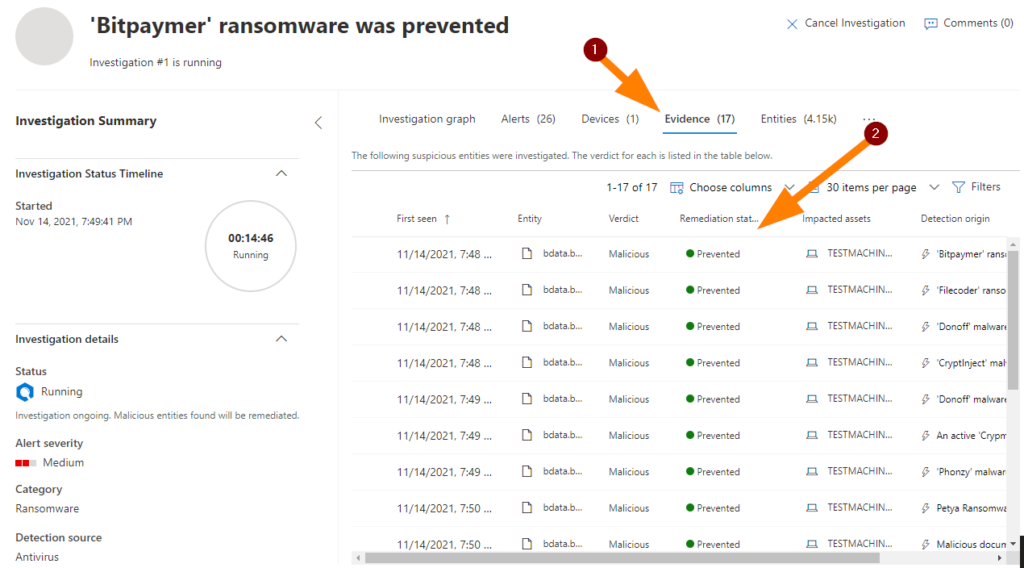
Pretty awesome that all these compromise attempts are actually fully blocked right? You can use the IP address of the testmachine and RDP in to validate findings, test whatever you like, drop custom test files, validate findings, run other simulations if your security team has other tests to run , etc. You can really have A LOT OF FUN in here friends!!
Ok, now, check out the Overview section back in the Evaluation Lab.
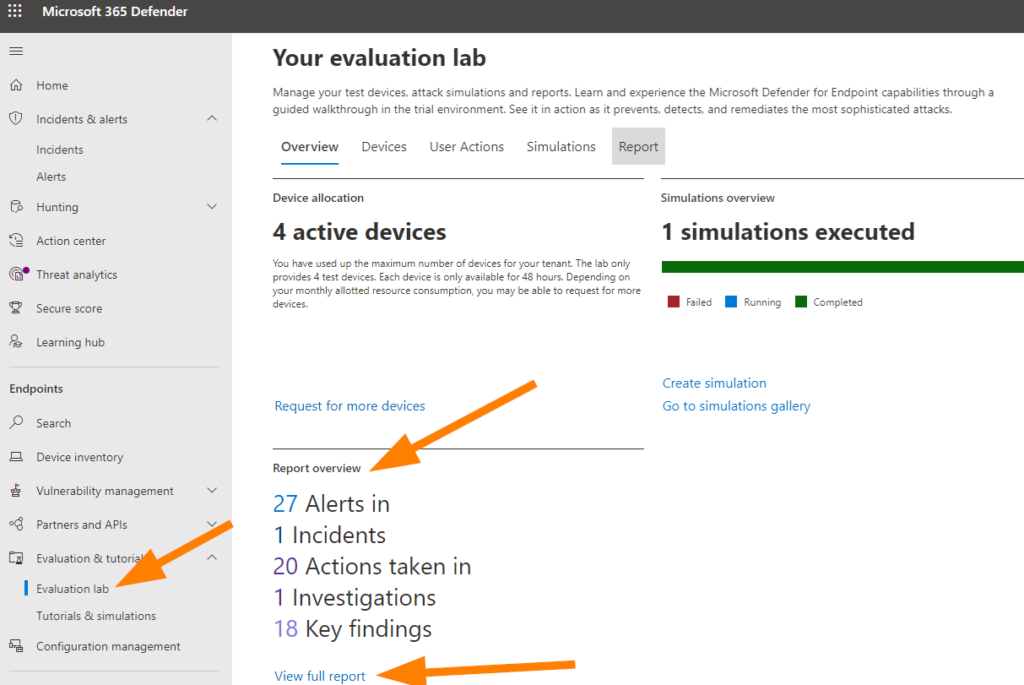
You can see the full report and the number of alerts generated within our simulation testing here. Head’s up that you will notice I did not ask anyone to connect the labs into your production tenant….that’s because if you already have Defender configurations in place it will generate some excitement for your team monitoring these alerts. Some excitement can be fun, but remember to smartly co-ordinate with the rest of your IT Organization if this is the case for your situation.
Hop over to Reports and check out the different reports that we can utilize in here to help us present our findings after running some additional simulations.

I hope that you’ve enjoyed this series of articles on getting into the world of testing Microsoft Defender for Endpoint Plan 2, configuration, and deployment of the Labs environment so that you can run simulations. This is just one of the coolest features around, and I really enjoyed sharing this with you! Thanks for joining me on this little adventure and until next time — keep learning!