The Humble Application Gateway
Azure Application Gateways offer an easy way to present web based applications without exposing your systems or content to the public Internet. Additionally, the App Gateway also provides a number of pretty advanced features such as URL based traffic routing, Web Application Firewall (WAF), and the traditional stability of a rock solid Layer 4 Load Balancer for web traffic.
I have noticed that many systems are designed with an App Gateway missing from their architecture. I’m not sure if it’s because those system builders were not aware of App Gateways or someone decided to exclude them — I’ll never know that answer.
Today, we will look at the humble and affordable App Gateway in Azure.
We’ll look at a straight forward configuration, how to make it resilient to changes within your infrastructure, then we’ll look at how to check the health of your systems.
Let’s take a quick look at the architecture and how an app gateway can be implemented into an app design. Microsoft Docs provides us the intended usage:
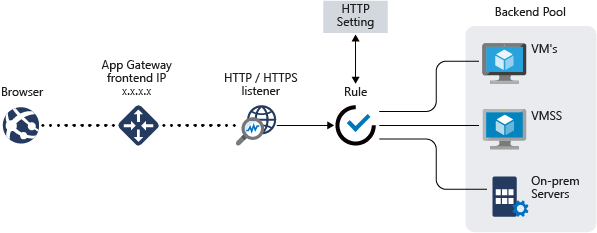
We can see that only public Internet exposed piece is the App Gateway frontend. This is wonderful for most of us because the App Gateway is hardened and ready to start load balancing and routing the web traffic within minutes of deploying it in your subscription.
We can add HTTP or HTTPS listeners that trigger rules that we configure and then can route traffic based on those conditions within the rules. Sounds simple right? Well, it is!
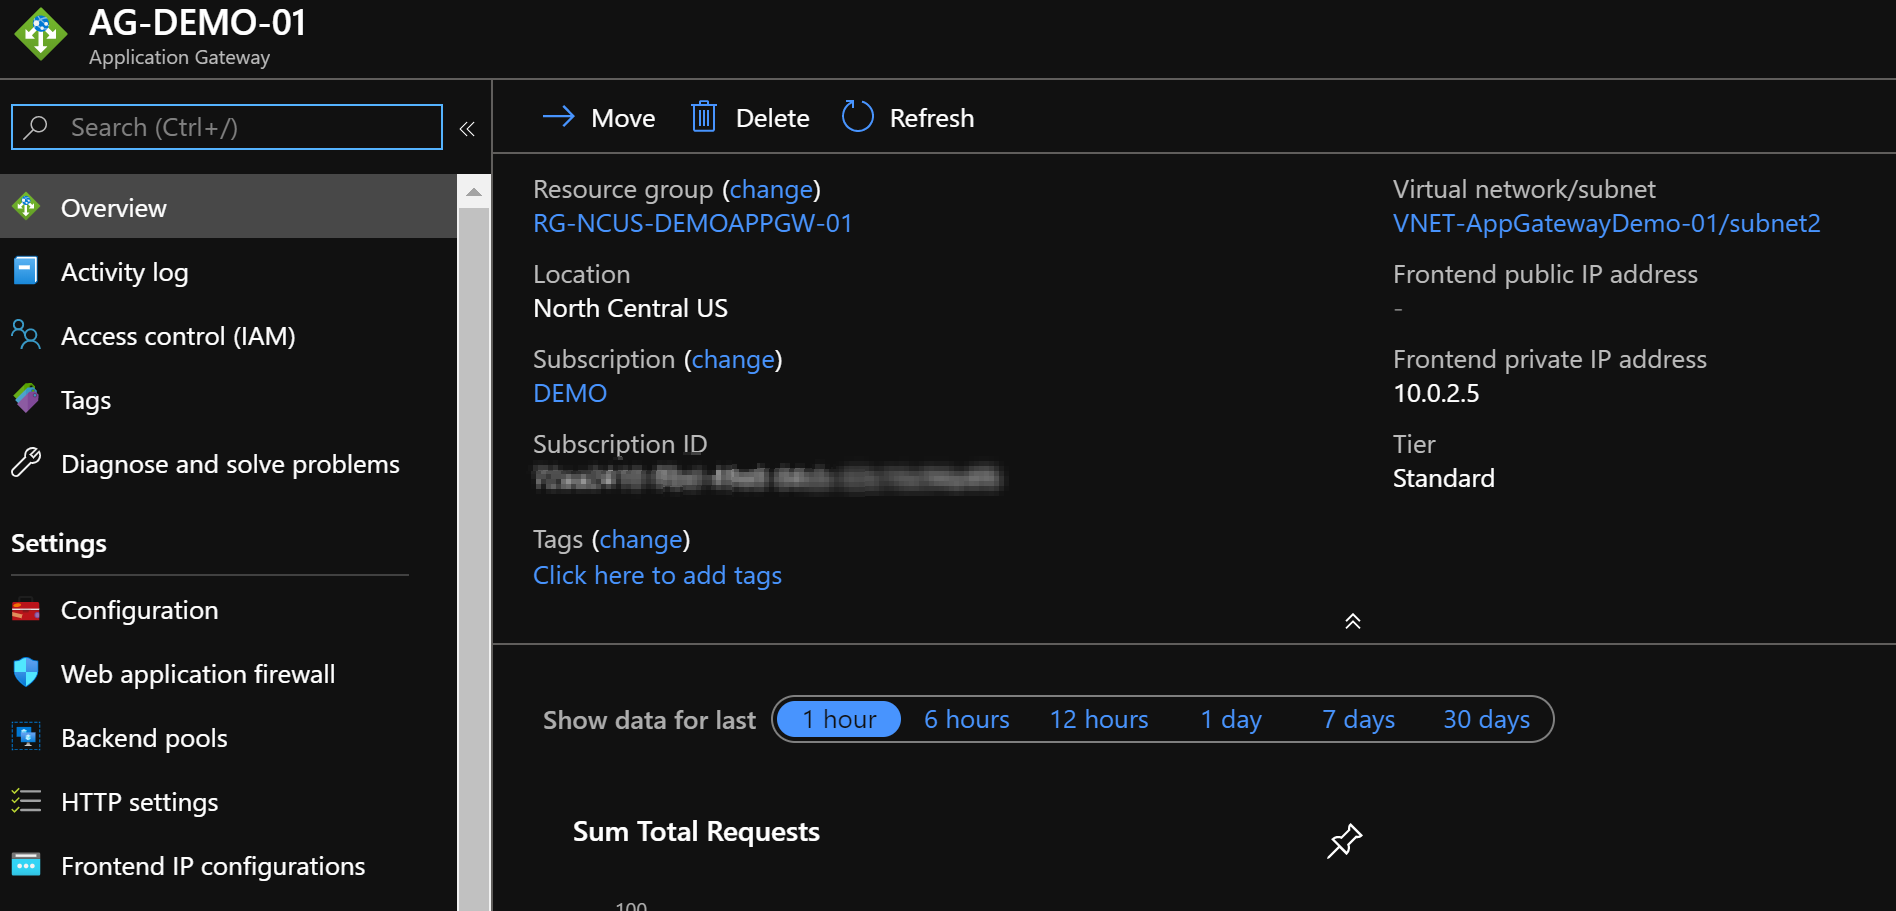
Below, we have a pre-built app gateway that is configured with some basics.

Let’s build one together so we can see how easy it is to make our apps more secure!
Now, I already have some other prerequisites setup, so here’s what you’ll need to add ‘just’ the app gateway:
- Resource Group (If you wonder why, please see previous this.)
- Virtual Network with a range that has at least 4 usable IP addresses
- Storage Account to hold a couple virtual machine disks and the usual configuration files of miscellaneous Azure bits
- 2 Virtual Machines
- 1 of those virtual machines needs to have IIS installed on it
This will get you set for success. Create your resources inside the resource group, setup IIS on at least one of your vm’s and do the standard test to localhost 127.0.0.1 in IE to see if you can get the IIS load page. You can? Wonderful, let’s proceed.
If you would like more instruction on how to build out this environment, let me know on Twitter or LinkedIn and if I have a few requests I’ll build out the instructions for a future post for you.
Ok, now let’s get to it!
Inside your resource group click on Add, type in “application gateway”.
Click on Create. Now on the Basics tab, first change the Tier to Standard. We’re not doing auto-scaling or WAF today, and this will lower our cost right out of the gate.
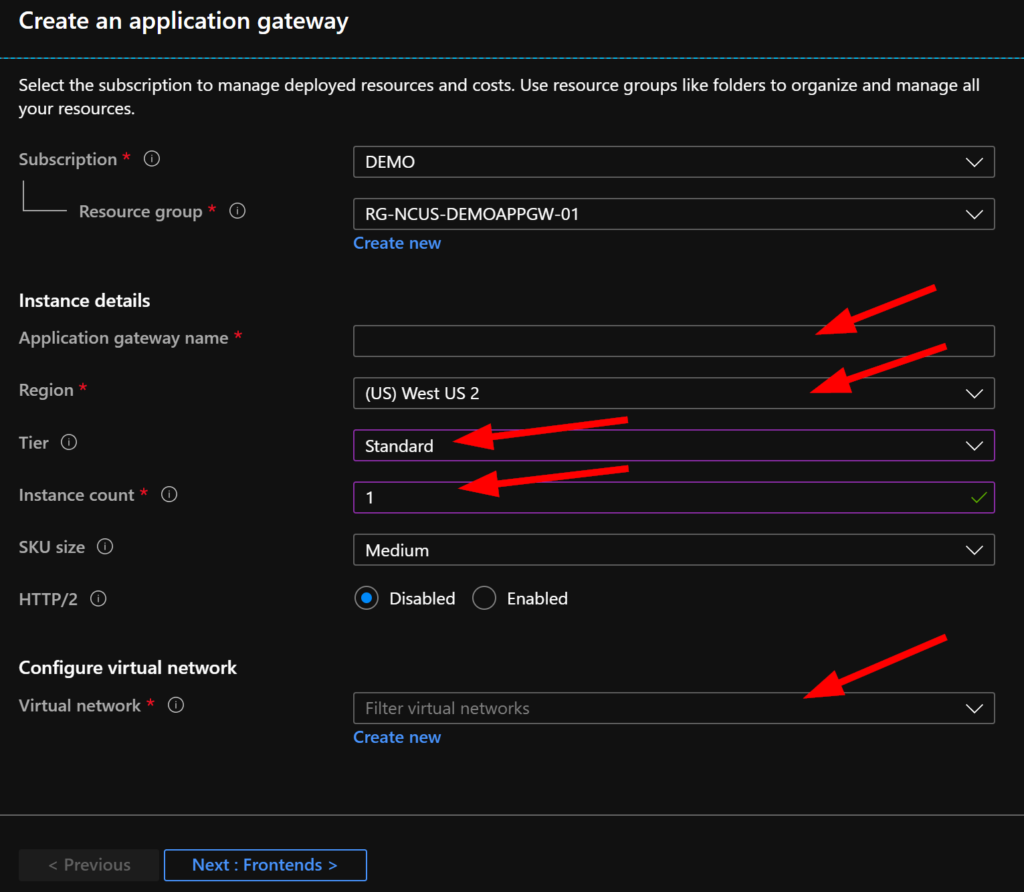
Now, enter an app gateway name, select your matching region to your compute resources if possible (saves on egress data charges and will make your app feel as responsive as possible by grouping the resources together). Then enter your Instance count as 1 (you can use more if you want to balance a heavier load of web traffic), Set your SKU size to small, leave HTTP/2 Disabled, select your virtual network, then select your subnet.
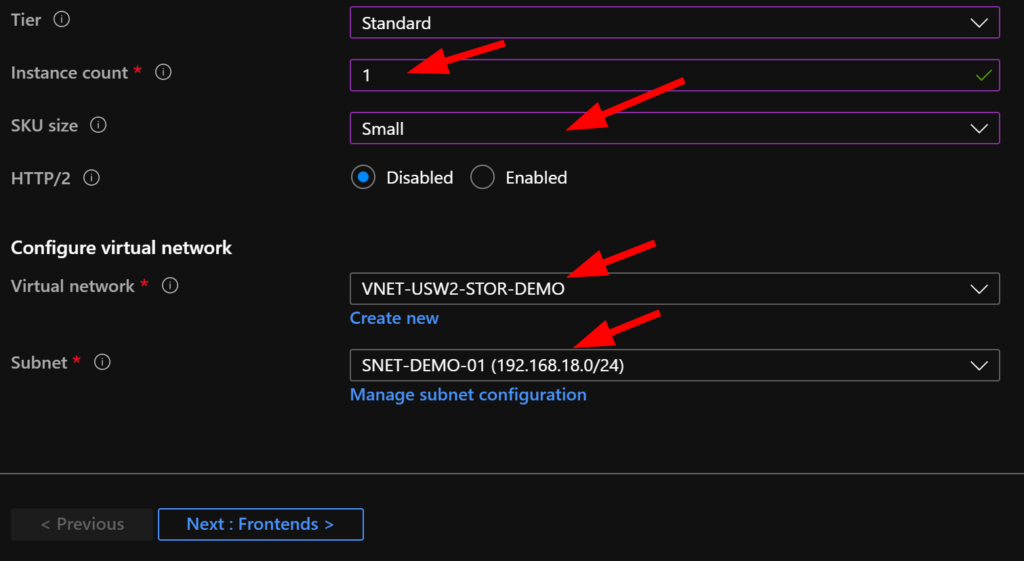
Click on Next when you’re ready.
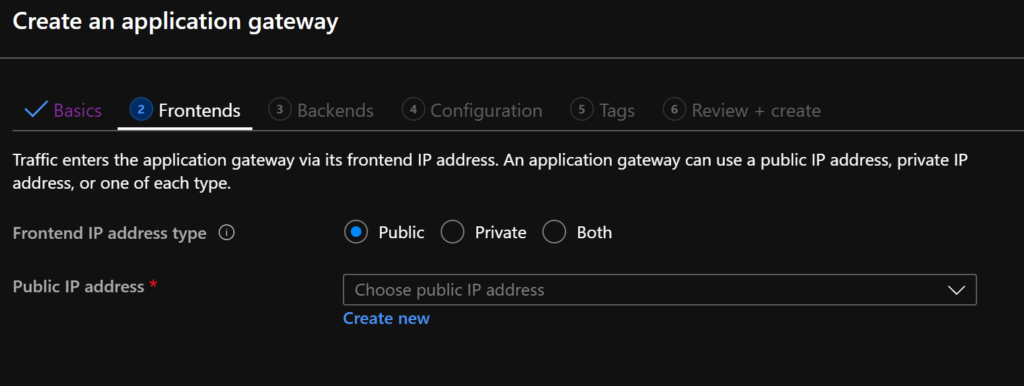
Here you get to choose.
If you want to test your app gateway using public Internet, you will need to choose Public here, then create a new public IP address and select it.
If you will test your app gateway on your private network using a virtual machine on the same network, you can choose Private.
If you are building this for a production environment, there will be times where you need to choose Both so that the app gateway is accessible both internally and externally. Here we would use DNS to handle getting our users to the right IP based on their network location.
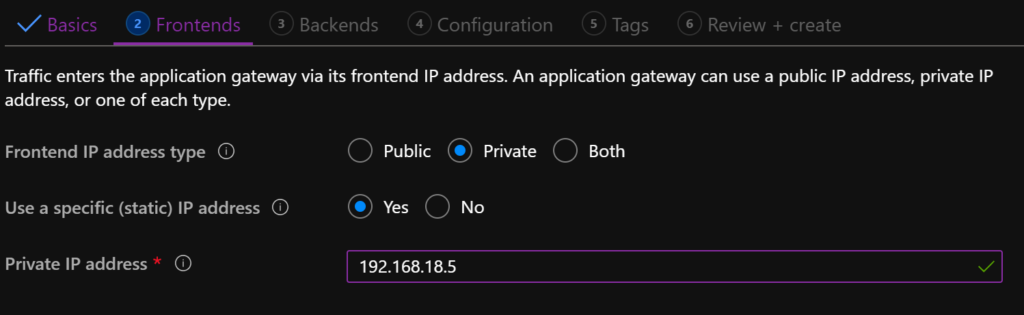
For my demo, I’m choosing Private, static so I can use DNS if I wanted to, and entering the IP address that available in my subnet.
Click on Next again and let’s setup the Backend Pool now.
Click on Add Backend Pool and the new blade will display. Enter the name, select Virtual Machine from the Target Type drop-down and then select the interface of your virtual machine that is running IIS. If you’re running two IIS vm’s, then add the other below for load balancing….it’s that easy! Click on Next when you’re done.
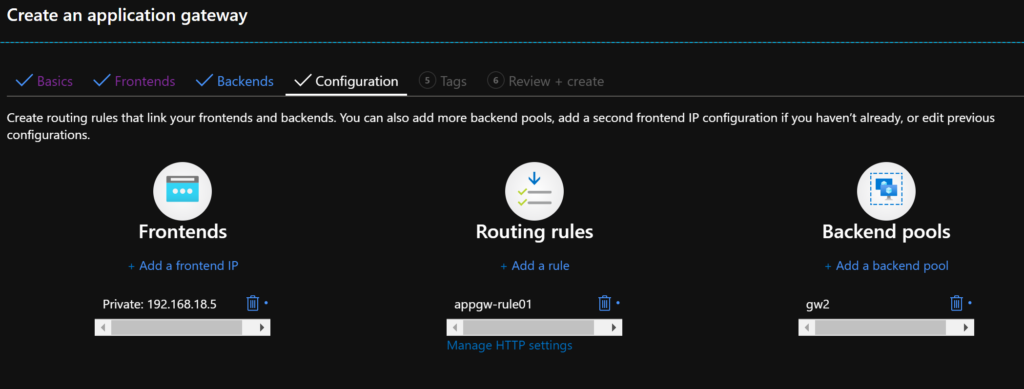
Now we have a configuration summary tab. Let’s add a routing rule — or listener.
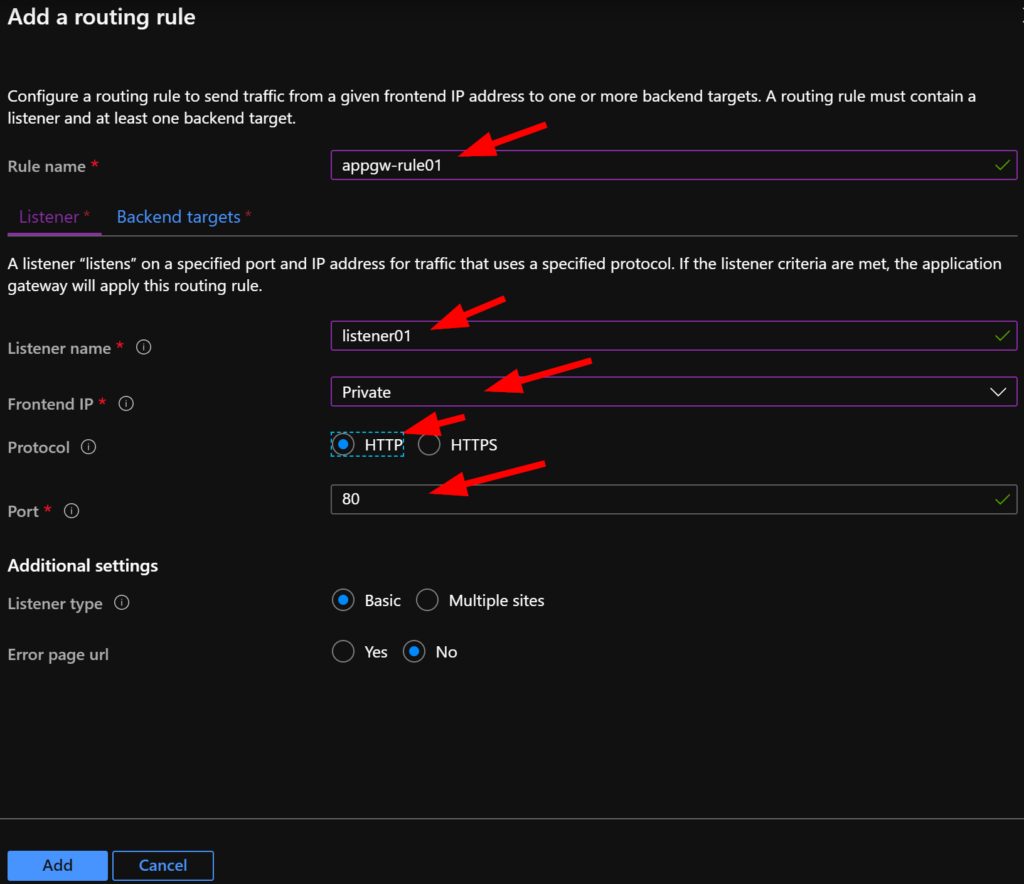
Enter a Rule name, Listener name, select your Frontend IP type that you configured earlier, choose your protocol and enter your port number.
You can choose HTTPS on 443 or another port if you wish, and upload your certificate, but today we will use only port 80 since we are staying on an internal network.
Select Basic Listener type then No to Error Page URL and click on the tab Backend Targets in the top-left of this blade pop-up.
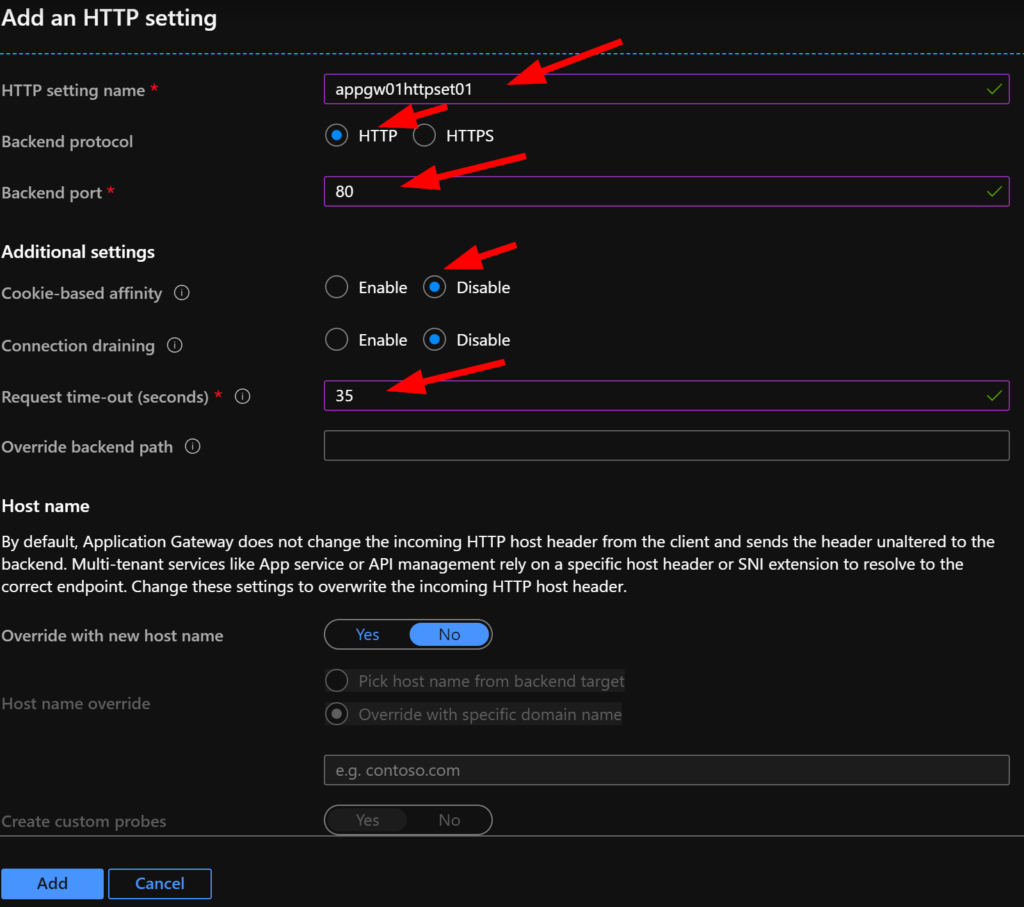
Enter an HTTP setting name, ensure we are aligned for HTTP on port 80 still. Notice that we could use Cookie Affinity here to help our browser based clients store settings — we used to call this session persistence…nice!
I also tend to increase the timeout up from 20 seconds, I went with 35 today. Click near the top to Save and return. Then click on ADD.
Now we have all the requirements setup to make our Application Gateway run!
Click on Next for Tags, we won’t create any tags today but this is a good idea to track your billing correctly.
On the Review + Create tab, we should see that beautiful green checkmark before we proceed.
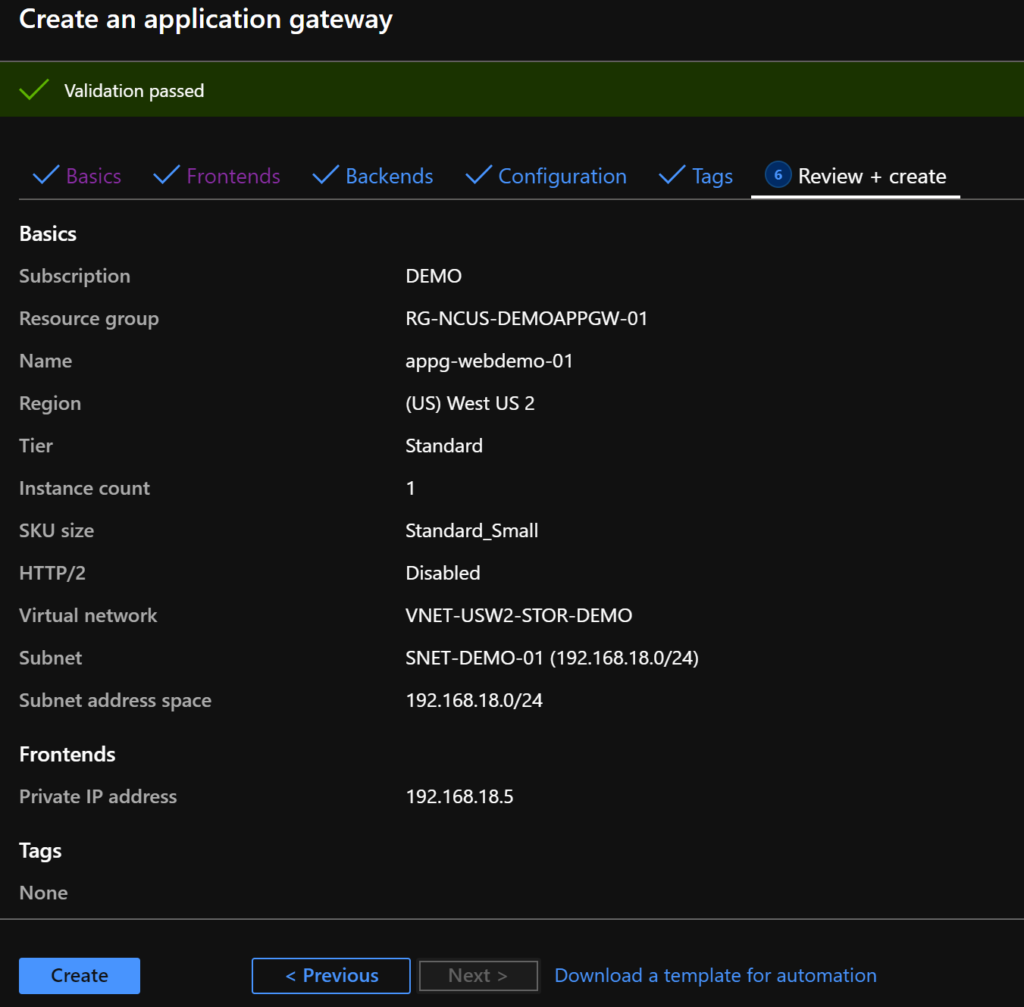
Now sometimes Azure can take some time when creating these objects. I suggest you make a coffee and stretch your legs.
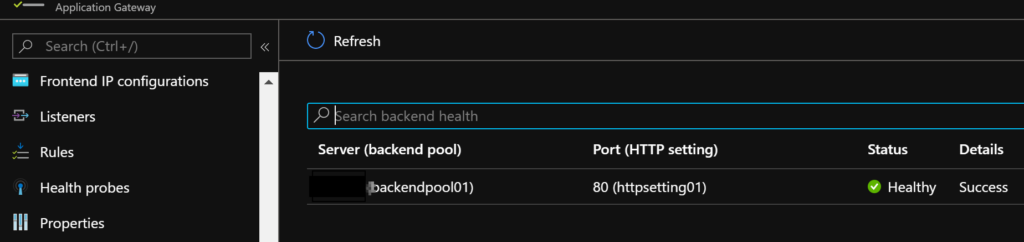
Once your app gateway has provisioned happily, simply browse to Backend Health and view the current communications status of your gateway’s backend pool. This isn’t very impressive with one server added, but imagine you have auto scale enabled on your app gateway and have 20 servers in your backend pool. This will save you a lot of time as a quick check when you’re trouble-shooting issues.
Have fun playing with your application gateway in Azure! It’s a great way to add security, resilience, and scaling to your infrastructure!