Create an Azure File Share – Server-less File Sharing
There has been a shift towards server-less computing happening for some time now. What does it mean for storage, files, and how we access data such as files? I’ve had the good fortune to work with some amazing technical people over the years and I’ve recently had a couple of colleagues ask me about what it may mean for their career with this shift to server-less computing. While I’m going to steer well clear of making predictions – I’ve seen great opportunities for learning new technologies and been able to use that knowledge to help businesses evolve their use of technology to better serve their customers, users, and improve cost models. So to answer the question of what does this shift in technology mean? I would say that it means that we approach this like any other shift in technology when we as IT professionals have the opportunity to move forwards with the next steps in technology.
Microsoft Azure provides stable production services to use such as Azure File Shares. Using Azure File Shares, you can create and use cloud storage without any virtual machines or on-premises servers needed for you to tie the storage back to. Imagine you are in a small company and want to keep your costs as low as possible. Azure File Shares gives you a way to deliver data to your business, staff, and contractors securely, and with the lowest overhead possible.
On-premises file shares typically require infrastructure such as storage, processors, RAM (IE: a Server), and an operating system. There’s a bit more to it really, but supporting the environment and hardware that enable creating a file share on your own infrastructure is much more complex compared to Azure File Shares. Let’s take a look at setting up a quick file share you can access in Azure, from a remote location.
Now, fair disclosure that today you will create a file share accessible via the Internet. We will include some very basic security, but you should not put anything sensitive inside this demo file share — just sayin’ folks.
If you’ve been through some of my other articles you will notice that today we will be combining a few things together to get a result quickly. One of the great things – and I love this – about Azure is how Microsoft has really worked hard to push these products and services to us in a way that we can roll things out to our business and users quickly; and on a stable platform. Before I get too far off topic today, let’s get back on task.
Log into your Azure subscription for Dev or Testing, or create your very first subscription to begin learning right here.
Next, let’s dive right in.
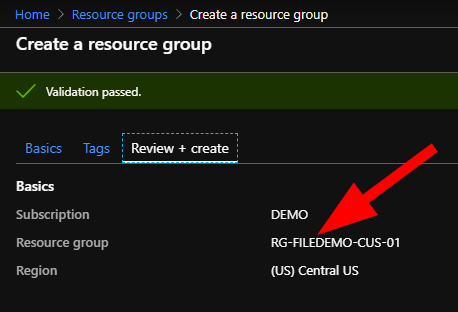
First let’s create a resource group to keep things tidy and organized (and easy to delete from Azure when we are done).
Wait a few moments, then go into your new resource group and click on Add.

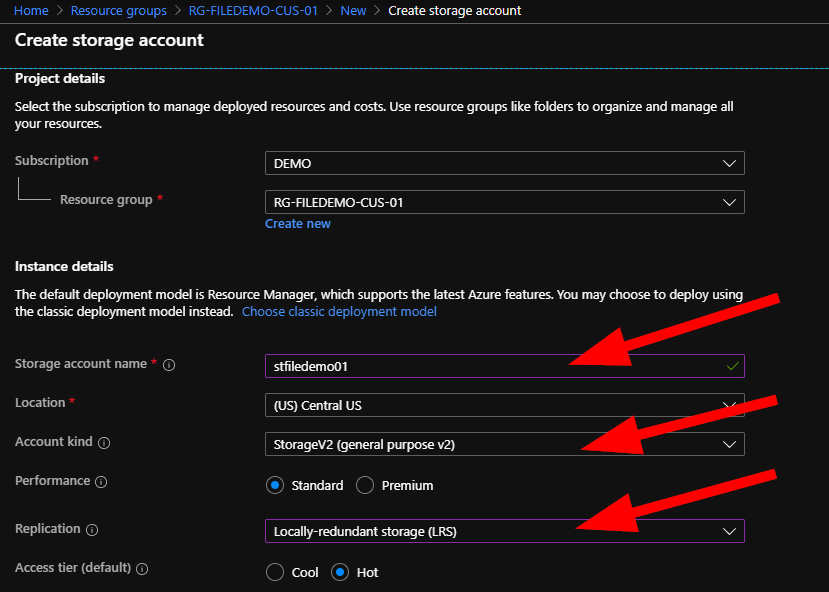
Type in ‘storage account’ and then select storage account. You will see the add storage account screen. Add a name in lowercase for your storage account, select the region, and the options.
Pay attention to the redundancy options as these will be a bigger factor in your cost. I choose LRS for locally redundant storage which is storage in one rack vs multiple racks, datacenters, and regions…translation is cheaper. Also, it is not critical to put your resource group and storage in the same region, but it is logical in this case so I’ve selected the matching Central United States region.
Click on Next.
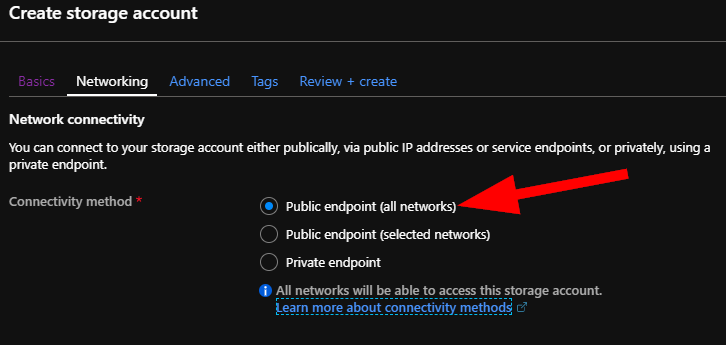
On the next screen, leave the default as Public (all networks) and select Next again.
On the Advanced tab, note that if you may notice that as we selected Standard Tier storage on the first tab, now we have the option to enable Large File Shares for sizes up to 100TB:
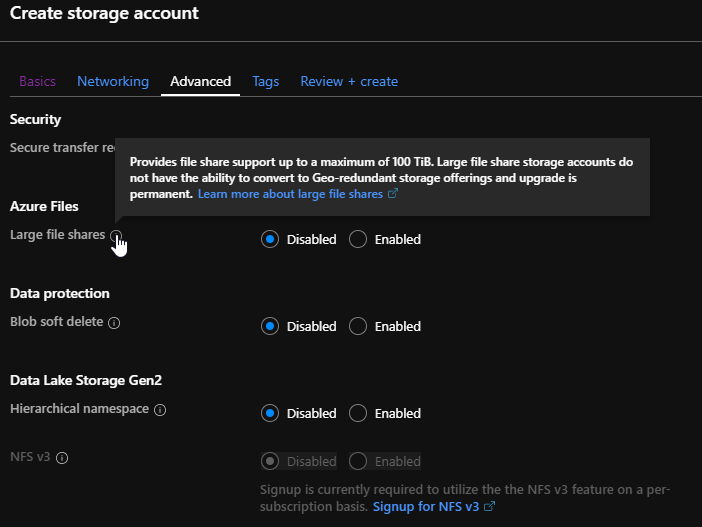
If we selected Premium, large file shares are enabled by default already.
For the rest of the options, ensure you select Secure Transfer = Enabled, then all other options can be Disabled today. Click on Next after making your selections.
If you want to read more about Large File Shares, Microsoft has a great Planning for an Azure Files Deployment document here.
Today, we will not be adding tags so we can move to the Create screen. Ensure your account validates first and there are no errors with the selected options. When you’re ready, click on Create.
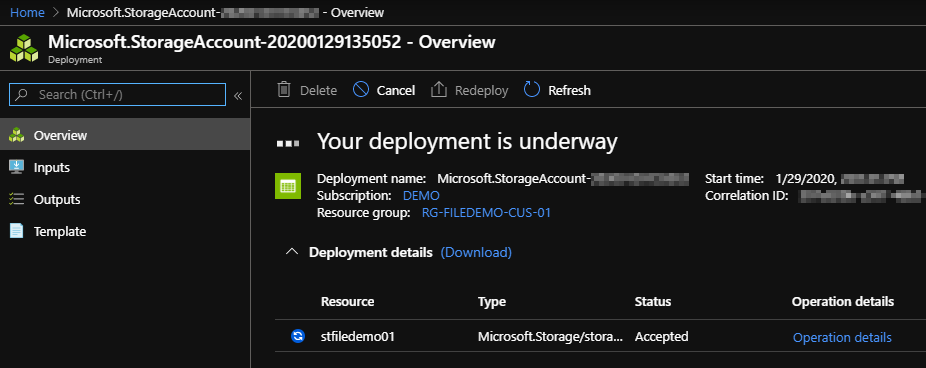
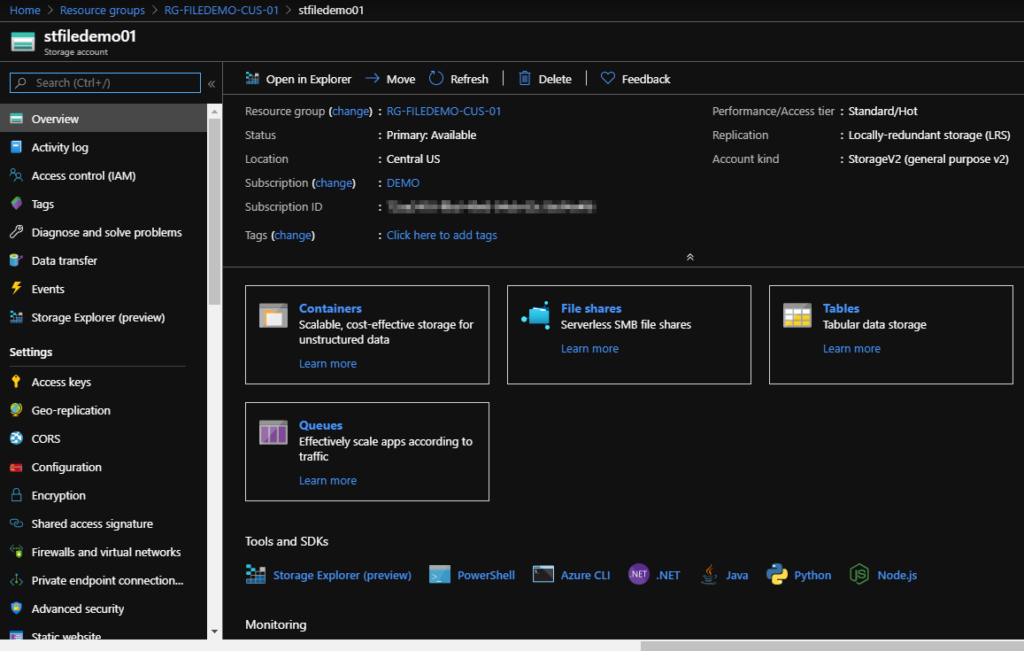
Once your storage account is created, let’s create a file share that we can map to our desktop in short order. You will notice that not once have we touched a server or virtual machine; and yet, we are ready to make a file share. How awesome is Azure!
Open your storage account and click on File Shares.
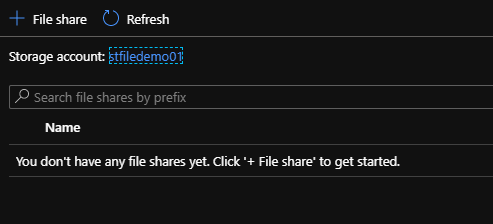
Now click on +File Share to add a new share.
Enter a name and quota (size). I’ve entered 2GB to keep things small and cheap for our demo today.
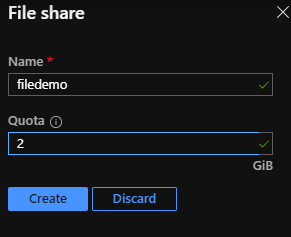
Click on Create when you’re ready.

Refresh your File Share blade if needed, then select the file share that you just created.
Click on Connect.
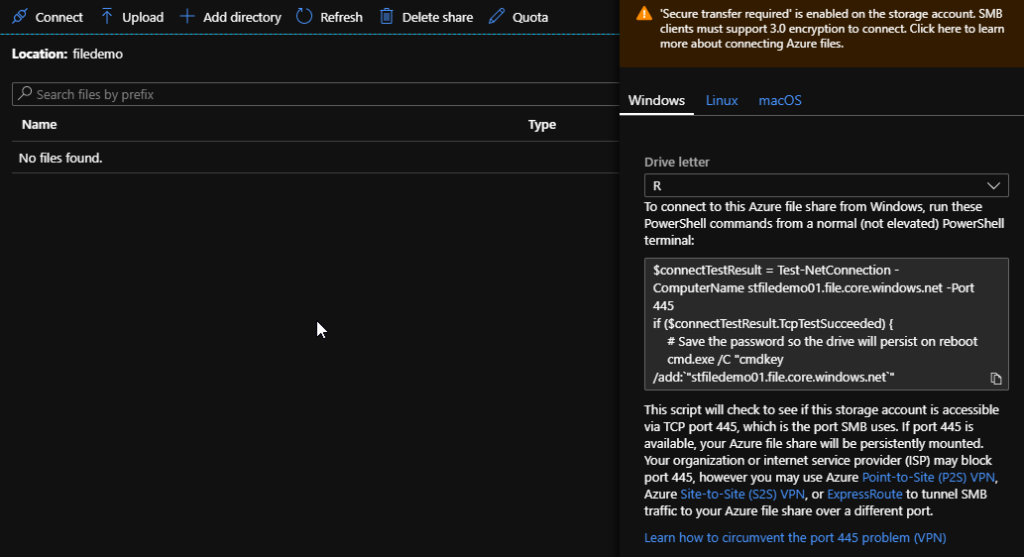
Now, here’s the magic of Azure.
Azure presents a file share mapped to an address through the PowerShell script it generates for us. Without us once looking at a server at all — we now have an FQDN (Fully Qualified Domain Name) mapped storage account that has a name, storage quota, and a way for us to map to it within just minutes! I chose drive letter R today for ‘Really Awesome Azure!”. I just can’t help myself sometimes.
So, if you run PowerShell on your local desktop (Windows in this case today), you will need port 445 open to allow the file access to work between you and Azure; just ensure you run PowerShell in an elevated window to execute the code. It will look similar to this:
$connectTestResult = Test-NetConnection -ComputerName stfiledemo01.file.core.windows.net -Port 445
if ($connectTestResult.TcpTestSucceeded) {
    # Save the password so the drive will persist on reboot
    cmd.exe /C "cmdkey /add:`"stfiledemo01.file.core.windows.net`" /user:`"Azure\stfiledemo01`" /pass:`"FGKJvf2RazYN/7jc/u6EN631ve3bZU2p+/kRTQMZnMuwfK98PWg2lKih1bwfU4O78vuxDCvudJrL6FX1AJacjA==`""
    # Mount the drive
    New-PSDrive -Name R -PSProvider FileSystem -Root "\\stfiledemo01.file.core.windows.net\filedemo"-Persist
} else {
    Write-Error -Message "Unable to reach the Azure storage account via port 445. Check to make sure your organization or ISP is not blocking port 445, or use Azure P2S VPN, Azure S2S VPN, or Express Route to tunnel SMB traffic over a different port."
}
Now, by the time you read this article I will have removed this storage account and invalidated the account info used for the above code demo; so don’t worry about that part….I know you were concerned about my account security, so thank you!
Once you map the drive, you will get Drive letter R mapped in your ‘Computer’ now. Also note that the first segment of PowerShell is Test-NetConnection on port 445. If this fails, you will know that you have a firewall challenge to work on before completing this step.
If you are using MacOS, your code is slightly different but has the same outcome with a mapped remote drive that lives in Azure. Open Terminal and run your generated code that will be similar to this:
mount_smbfs -d 777 -f 777 //stfiledemo01:FGKJvf2RazYN/7jc/u6EN631ve3bZU2p+/kRTQMZnMuwfK98PWg2lKih1bwfU4O78vuxDCvudJrL6FX1AJacjA==@stfiledemo01.file.core.windows.net stfiledemo01
Once your done testing, you can remove your file share and this will re-secure your storage account. Ensure that you never use any production environments, data, or anything you love when you’re doing testing and learning like this!
Thanks for joining me again today and I hope that you’ve had some fun while getting to know Azure a little bit better.