Application Gateway – The Listener
Application Gateways provide a secure way to load balance and route incoming web requests to your Azure resources. Today we will look at getting HTTPS requests to come inbound from a browser to your App Gateway, then get sent to the correct server to handle secure requests. A configuration may use this design if you are using an insecure site on port 80 on HTTP to support usage of an internal web app that is not HTTPS ready.
If you missed the last article on getting your app gateway setup in your Azure subscription see that great write-up here or get yourself a shiny new Azure trial account if you’re new to Azure.
Let’s review what the Azure app gateway does for us a little bit. At a basic level, app gateways provide an HTTP listener or HTTPS listener to the frontend configuration (frontend IP). This allows inbound traffic to be inspected and the app gateway to act like a load balancer for that inbound traffic. Using a routing rule that is setup during configuration, or added after deployment, that traffic is routed to the correct backend pool of Azure resources.
To get our HTTPS requests you will need a certificate to install on your IIS server and your app gateway. If you aren’t sure where to start with certificates you can visit LetsEncrypt to check out free SSL certificates. If you are doing this for production, I would typically suggest that you use a paid service such as GoDaddy or CloudFlare — I’ll leave those choices up to you today.
Let’s get this started!
Browse to your app gateway that we created in the previous article and open the Overview tab.

Browse to Listeners and click on Add Listener.

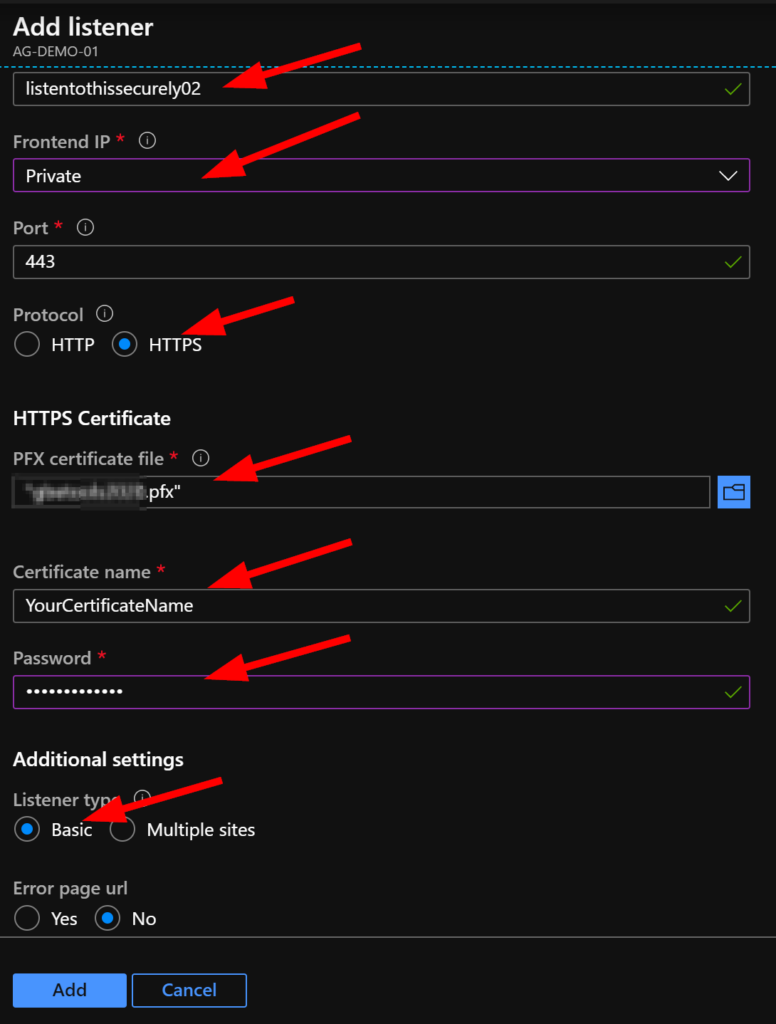
Enter a name for your listener, select your frontend IP – the demo uses an internal Private IP, select HTTPS as your protocol and confirm 443 is in the port number field.
Next, browse and add your PFX certificate, enter a name for it that will be used – note that this name will be visible for other listeners so use something descriptive. Enter the PFX password that you set when you created your certificate and ensure that Listener type is set to basic, and we will select No for Error page url today.
Click on ADD when you’re ready.
When the Listener is added you should see something like this on the Listener blade:
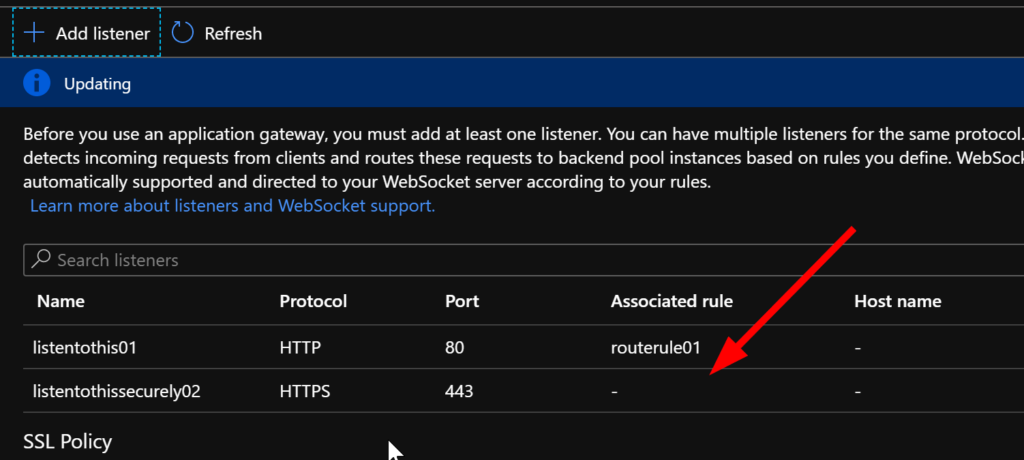
Notice that there is no rule associated to your new listener. Let’s fix that.
Click on HTTP Setting in the app gateway menu blade. Then click on Add.
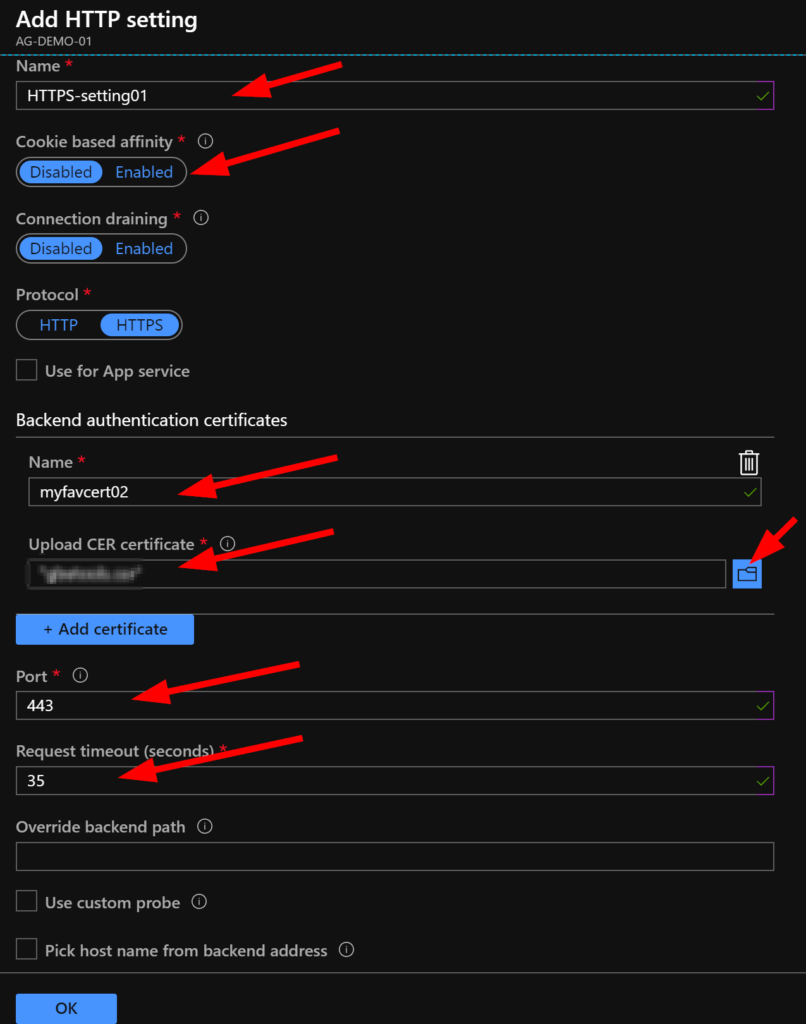
There’s a few settings here, but don’t worry — it’s easy!
Enter a name for your HTTP Setting, choose HTTPS, upload your certificate .cer file, ensure port 443 is entered, and as usual I’m a bit cautious with timeout values so I set that to 35 seconds. It is important to make sure your other Azure changes have completed before clicking on OK. Once you’re ready, click on OK.
Once it saves, you should see 2 entries under HTTP Settings blade now.

Now let’s bring this all together under a rule.
Click on Rules and click on +Basic to add a new basic rule.
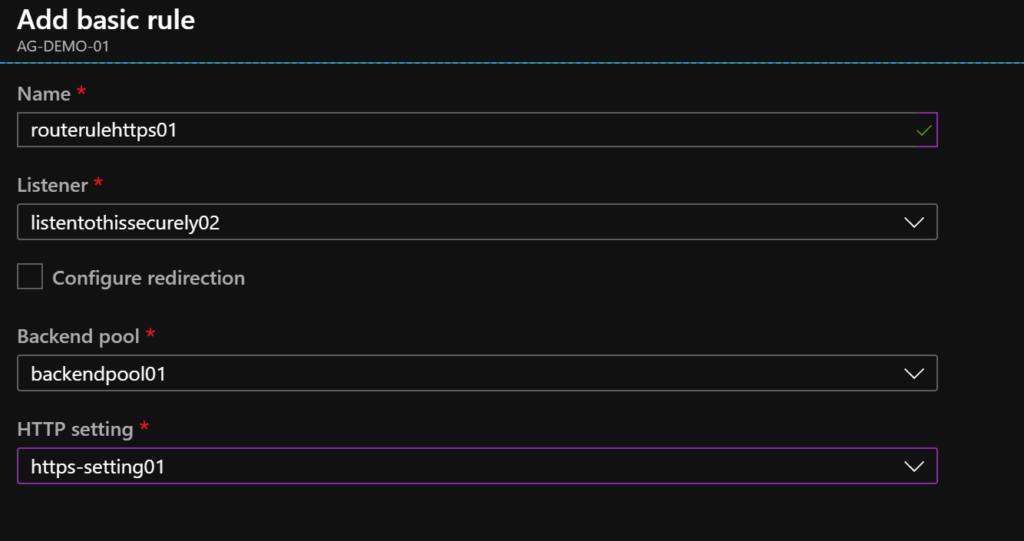
Enter a name for your new rule, the new Listener should be selected – if not choose it, select the backend pool that will handle your HTTPS requests, and choose your new HTTP Setting to handle the HTTPS requests. Click on ADD when you’re ready.
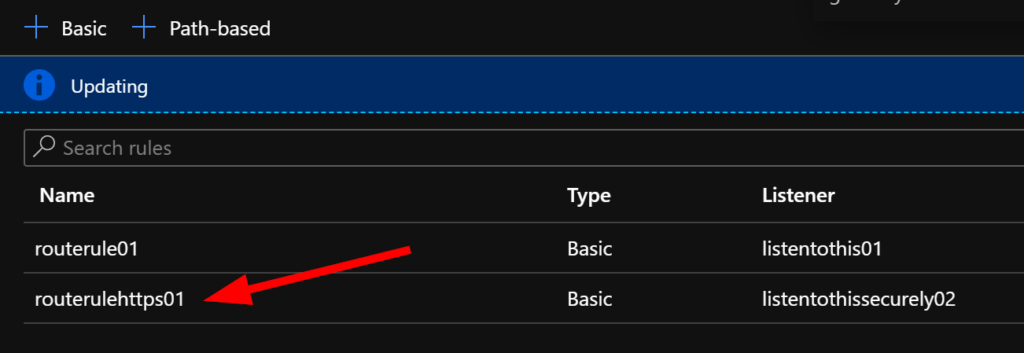
Now you should see your new routing rule added after a moment.
Now you can test your configuration for HTTPS traffic. Browse to your VM inside Azure if you used a private address, or use your web browser and browse to the IP of your App Gateway Frontend.
Browse to your Frontend IP – in my case I’m using https://10.0.2.5 because I used Private IP configuration.

It works! Wonderful! Now we know how to configure an app gateway to handle both HTTP and HTTPS traffic. If you wanted to separate your backend even more, you could configure one backend pool to handle each traffic type.
We did all of this without ever exposing our IIS server to the public internet. Really awesome! Don’t forget to shut down & clean up your Azure resources if you are doing learning and testing!