Azure CLI Introduction
If you are just getting comfortable using Azure or want to start learning a bit more about how to provision virtual machines using a method that can be automated and repeated quickly – stay tuned as we’ll cover some simple commands on using your free Azure account, connecting to Azure CLI, learning some test and demo commands, create a virtual machine, look at the potential to automate your code, and some common commands in Azure CLI.
Let’s get started.
The prerequisites for this exercise are that you already have created a Resource Group, Virtual Network, and you are comfortable working within the subscription you’re logged into. Make sure it is not a production environment.
First, use your free Microsoft Azure account or your dev subscription to start learning hands-on. If you need to setup your free account, go here: https://azure.microsoft.com/en-ca/free/ and get started.

After you’ve sorted everything and you have a subscription ready to go, log in and let’s connect to Azure Cloud Shell by selecting the ![]() icon.
icon.
It will load up a screen to create some storage first if this is your first-run:

Select your subscription, then click on Create. Grab a sip of coffee and wait for your Cloud Shell interface to load up. Once you see the beautiful blue background and some text, you’re ready to go!
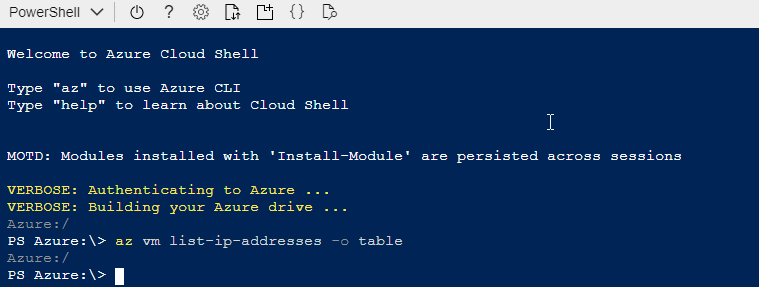
Now, to see what VM’s you have already running in your subscription try running the statement shown here: az vm list-ip-addresses -o table
As you can see from the empty results shown above, we have no VMs listed. The statement above would show us a list of VMs with IP addresses in a clean output table.
The Azure CLI (command line interface) is a powerful tool that can allow you to access the power of Azure from any HTML5 supported browser. In our examples in this article I’m using the Edge Chromium Dev browser and it works very well. You can use this perform demos or test your code from anywhere. The true power is harnessed during our learning process by allowing you to start and stop your learning whenever you want, and on almost any device. You can use the published Azure app for mobile and tablet devices, and of course any supported browser on most any other platform or device.
Let’s take a look at creating a virtual machine now using default sizing. You will need to substitute your own Resource Group ID to get started. Now, you can use the Azure portal at https://portal.azure.com to go to Resource Groups > Select your Resource Group that we will use > Select it and view the properties to see the ID. Copy the ID to use later in the command line. Now, my preferred method is to stay within the command line, so you would run the statement: az group list.
To see your existing virtual networks run: az network vnet list
To view existing NSG (Network Security Groups) run: az network sngs list, or to see NSG rules within an existing resouce group run: az network nsg list -g <GROUP NAME>
Keep track of the resource group that you want to use for your testing. Now, let’s create a virtual machine using a small statement with a few parameters:
az vm create \
  --resource-group <GROUP NAME> \
  --name TestVM1 \
  --image UbuntuLTS \
  --admin-username azuretestuser \
  --generate-ssh-keys \
  --verbose
Be sure to edit 3 lines from the above statement to customize it for your environment.
- <GROUP NAME> should be your resource group id
- Name should be the name of your VM
- Admin-username should be the name of your admin user to use over SSH in one of the next steps
I should note here that the –generate-ssh-keys parameter will generate ssh keys and save them to your attached storage account for the Cloud Shell.
Once you’re happy with your edits to the -az vm create- statement, go ahead and run it. You can paste it into Cloud Shell via SHIFT + INSERT or right-click and paste. It will create your VM using a default size specification. If you’d like to change it up, go ahead and run see what your options are:
az vm list-vm-resize-options \
  --resource-group <GROUP NAME> \
  --name TestVM1 \
    --output table
Make a note of the spec you’d like to change your server to. In my example, I’ll move it from the default 1CPU to a 2CPU spec:
az vm resize \
  --resource-group <GROUP NAME> \
  --name TestVM1 \
  --size Standard_D2s_v3
Choose something relatively low cost so that you don’t go through all of your free resource dollars in one small example!
Now, let’s see what’s running in that resource group. Edit and Run the code: az vm show --resource-group <GROUP NAME> --name TestVM1
You’ve learned about resource groups, virtual machines, changing virtual machine sizes — and all from the command line Azure Cloud Shell. Well done!
Let’s pause for a moment to think about how we could take this into an automated use-case.
If you had 20 VMs that needed to be created, or you needed to shut down a specific sub-set of VMs at a certain time – or even manually for some reason – you could structure a code segment to use a variable in a loop to perform a repeated action on a numbered sequence of objects. For example:Not proper syntax*
For intVMCounter = 0 to 19
az vm restart -n TestVM$intVMCounter -g <GROUP NAME>
Next intVMCounter
This would allow you to restart your 20 VMs in a scheduled job or just nice and fast!
The last section that I’d like to cover here is about restarting, stopping, starting, and deallocation of virtual machines. It’s really important that we always think about overall cost and effective utilization of our resources inside our Azure tenant. With all that in mind, when you stop a virtual machine it is still allocated to resources in the physical Azure datacenter and therefore will cost you money. Once you’re done with a resource, you should remember to deallocate it or set an automated schedule to handle this automatically. Scheduling of resource allocation and deallocation is an excellent way to govern your development or test environments if you know that everyone is done working with them by 6pm, you can always schedule that group to deallocate at 6pm nightly. Perfect!
To restart a virtual machine:
az vm restart \
  --resource-group <GROUP NAME> \
  --name TestVM1
To stop a virtual machine:
az vm stop \
  --resource-group <GROUP NAME> \
  --name TestVM1
To start a virtual machine:
az vm start \
  --resource-group <GROUP NAME> \
  --name TestVM1
Check the status of your virtual machine:
az vm get-instance-view \
  --resource-group <GROUP NAME> \
  --name TestVM1 \
    --query "instanceView.statuses[?starts_with(code, 'PowerState/')].displayStatus" -o tsv
To finish your demo work and save your money, deallocate that testing VM:
az vm deallocate --name TestVM1 --resource-group <GROUP NAME>
Now that you’ve deallocated your VM it will stop the billing clock. You can check the current status of the TestVM1 virtual machine via the Azure CLI again by running the ‘az vm get-instance-view’ statement again to view the status of VM object.
Remember, any data you are storing or objects that are allocated will incur billing charges in your Azure tenant. Make sure you are aware of what costs money so that you are helping to control costs and teaching others about best practices every time.