
How to Deploy Azure Virtual Machines
Let’s talk about how to deploy a Microsoft Azure virtual machine. There are many ways to do this – some manual – and some that support automation; we’ll look at quite a few of the options starting with some simpler ones first. A great way to get started with your Azure Infrastructure deployments is right in the Azure Portal, so let’s dive right in!
The first way I’ll show you to deploy a VM in Azure is via the Portal so let’s head to https://portal.azure.com and get started.
Azure Marketplace gives us a lot of options to choose from when we deploy in Azure but today we’re covering some ways to get started deploying a VM so we’ll choose some more standard options and leave it open for you to customize as needed to meet your business requirements.
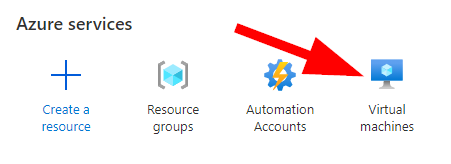
First, let’s get to the Virtual Machines blade. To do this you can select Virtual Machines if you see it listed in your recently accessed blades:
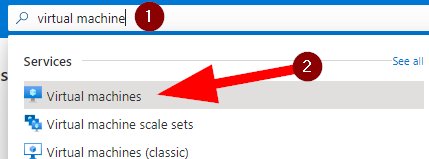
….or you can use the search box at the top of the Azure Portal and enter ‘virtual machines’, then select the virtual machines option:
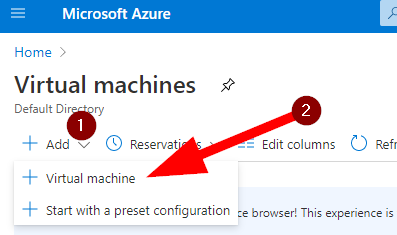
Alright. Now we’re on the virtual machines blade in Azure portal. Next, let’s click on Add, then select Virtual machine.
Now you will see a new blade load here to create your virtual machine:
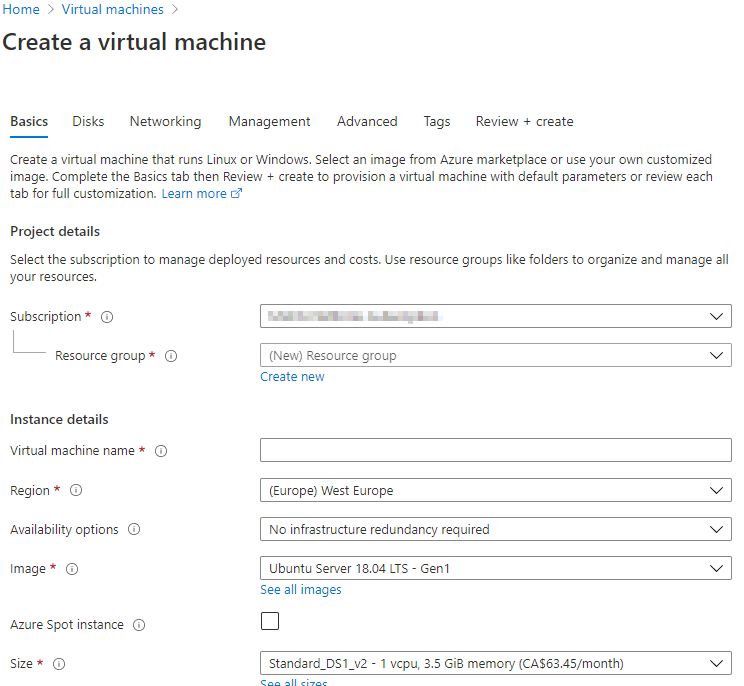
So, because with this I make the assumption that we may be newer to Azure, let’s talk about what we see here. First of all, there are a lot of fields – don’t worry about that! We’ll go through them and keep layering things to build out a virtual machine.
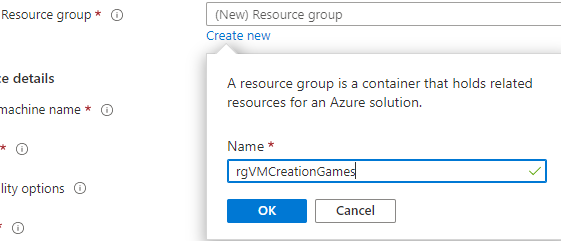
First stop is subscription — make sure you are in your testing subscription or your free Azure account if you’re here for the first time! Next is resource group. Today we’ll create a new resource group so go ahead and click on ‘create new’ now. Enter ‘rgVMCreationGames’ as we’ll use this resource group throughout our tutorial here for virtual machines.
Excellent! Now we can set some instance details:
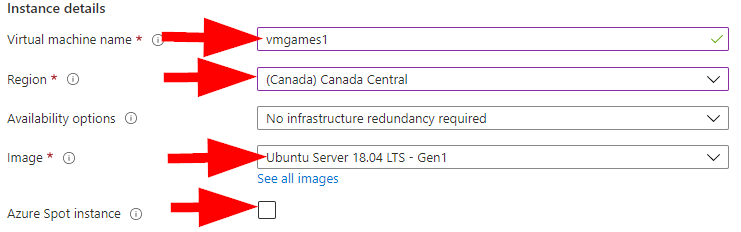
Enter a name for your vm, choose Canada Central as the region, no infrastructure redundancy required, and let’s use Ubuntu Server 18.04 LTS Gen 1 today for our vm image. We will also leave Azure Spot Instance unchecked.
Ok, now we have a tough choice to make here. What size of vm do we make?

For testing like this I like to go really small and low-cost so I can stretch my budget really far in Azure. There are better choices for production infrastructure, so let’s stay focused here. If you click the ‘see all sizes’ link you can go and choose another option. It is really nice here because we can actually see what all our options are for this image in the Canada Central region. You’ll be able to see different specifications here, pay close attention to Max IOPS and Cost.
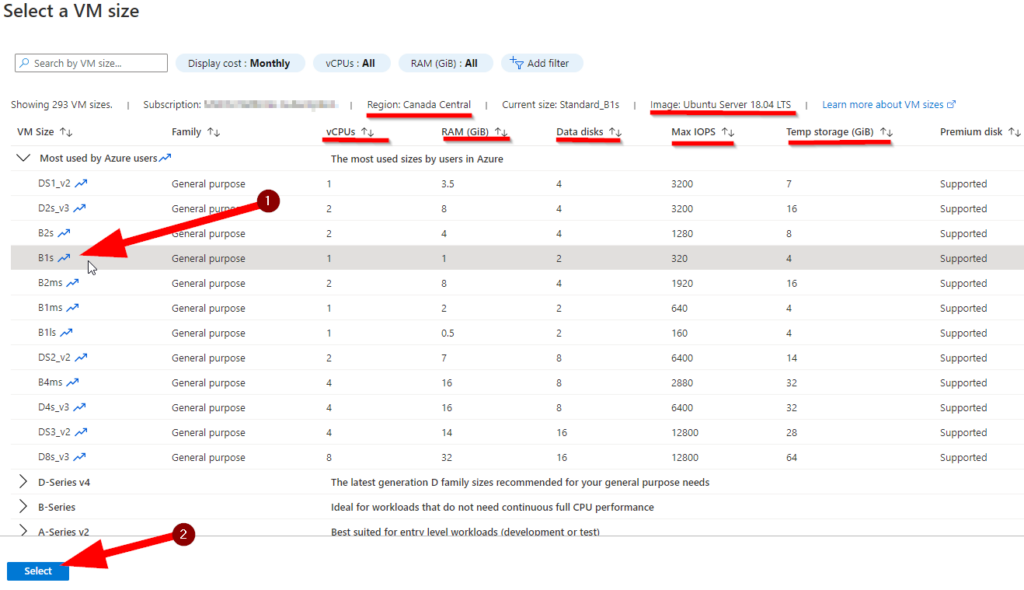
I’ve highlighted a few things to look for in the screenshot above, but select the B1s Size then click on Select when you’re ready. I encourage you to expand the different classes and sizes to see how things stack up in Azure for VM sizing and cost. You’ll be surprised how much power you can get for good pricing in Azure.
Ok, now let’s get the admin account configured:
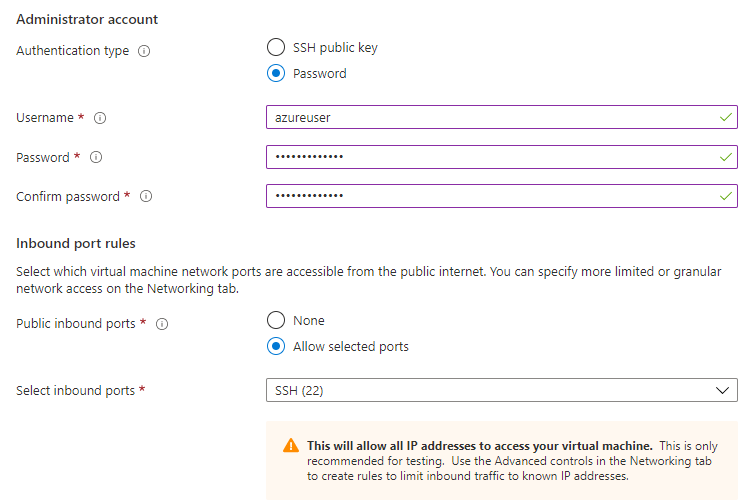
Since we are deploying an Ubuntu VM, let’s use SSH for our access. If you’ve never logged into a Linux vm before don’t worry – this is going to be really fun for you. I can’t wait to show you how to SSH into this vm from a Windows desktop!
Ok, so here let’s choose Password here and enter the username and password. Make sure to enter a strong password please. Click the little “i” for a tooltip on password requirements for this vm image.
Next select Allow selected ports and ensure SSH 22 is selected so we can connect to the vm. Click on NEXT when you’re ready and we’ll configure the disk for this vm.
Once the Disks tab comes up go ahead and select the OS Disk type and change it to Standard SSD.
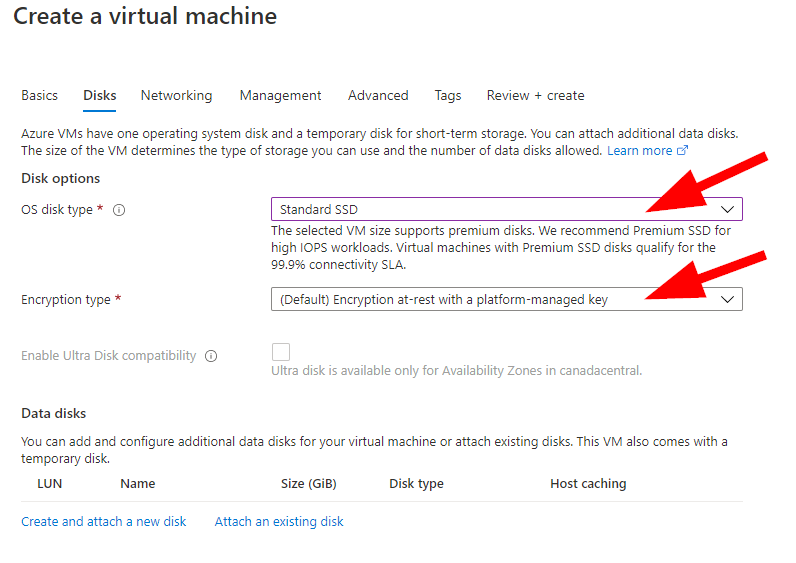
I’ve found the cost isn’t much different from a Standard HDD but it’s way faster. For our testing we definitely don’t need the Premium SSD. I also use the default Azure encryption at rest with the platform managed key, it’s easy and I know that the data is encrypted on the physical disk automatically. Go ahead and click on Review + Create now.
Now, you should see some cool things here. Notice that the cost/hour is plainly displayed right at the top. This is a good check-point if you are selecting larger sizes so that you understand clearly that these resources cost money.
Next, scroll down through the Settings listed and notice our new resource group is called out, plus it list networking and management options and will automatically configure a basic network configuration for us. We will also us a public IP and have some other options set. Go ahead and review them and feel free to change them based on your requirements.
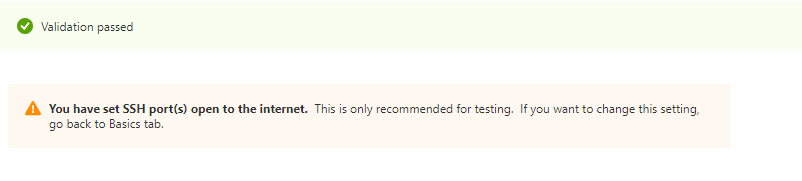
Notice we also see a notice to let us know about our SSH port being open to the internet and that we should use this only for testing. Today we’re ok. Go ahead and click on CREATE.
If you selected SSH Keys in the setup only > Once you click on Create you will be prompted to download the SSH Key pair. Go ahead and download it and save it to your favourite local storage.
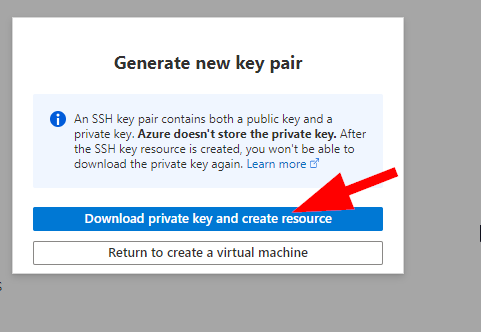
We’ll use this key to connect in a moment. Next you can go grab a cup of coffee or watch the deployment happen.
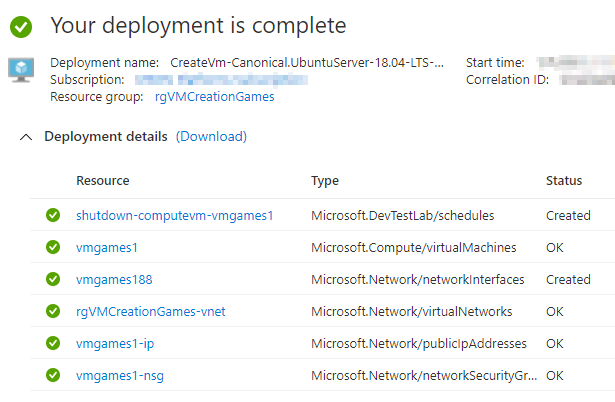
Looks like we are good to go! Now let’s connect to the virtual machine. Remember your username? Let’s connect now….
Jump back to the Virtual Machines blade in the Azure Portal and notice that you now have a vm in here that is running. Well done! Let’s select it and get the public IP address so we can connect to it.
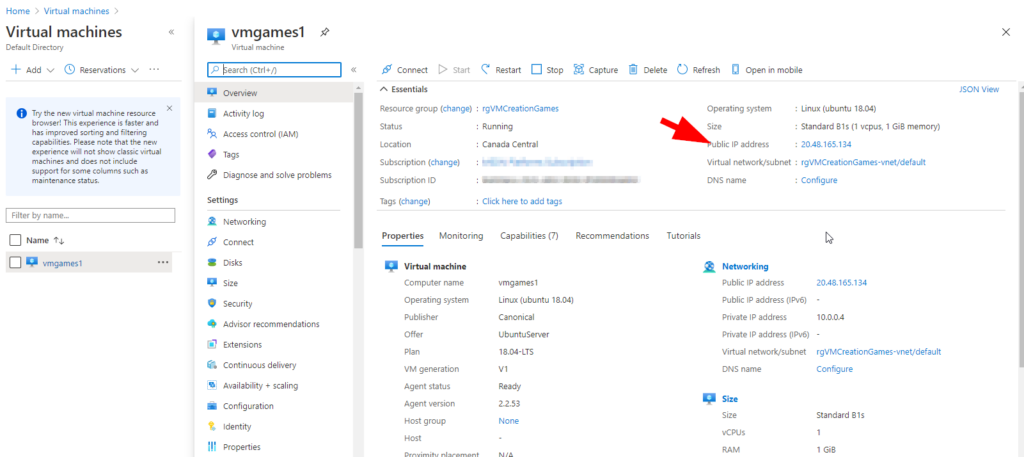
Copy the public IP address and let’s connect to this vm now.
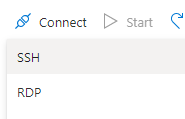
Click on Connect in the navigation bar near the top, then select SSH.
You should now see the instructions you need to connect to the vm. I’ll get mine set here and be right back….ok let’s see what this looks like:
I used Putty so here is what I see:
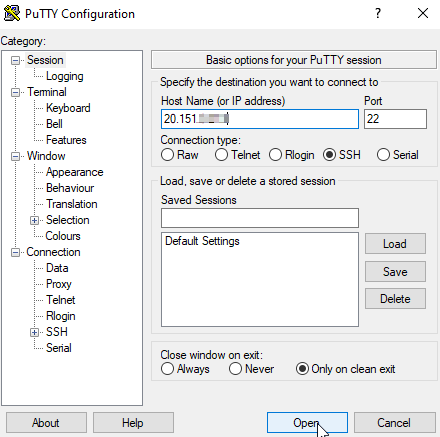
Enter your Azure vm IP address (public) and select SSH then click OPEN.
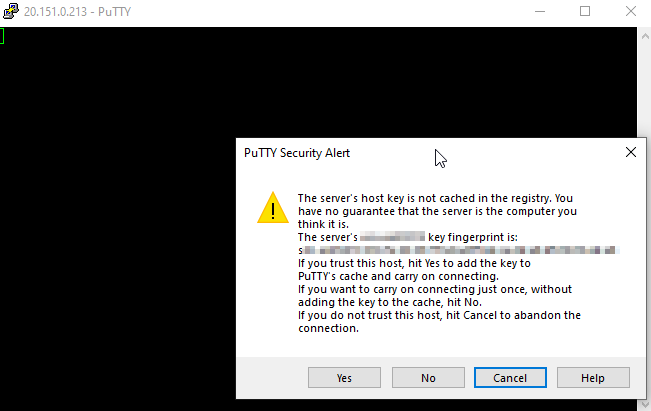
Click on YES to accept the keys from the server so we can connect to it.
Enter your username and then your password used to create the vm. Now you should connect to your Ubuntu vm!
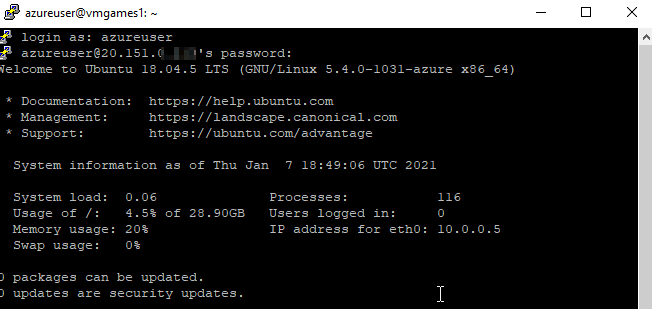
Pretty cool stuff! Well done for getting all this done in one shot! Remember to ‘logout’ when you are done in Putty.
Next article we’ll look at another way to create a virtual machine so check back in again and we’ll do some more fun configurations and deployment!