How to Use Tags to Identify Resources
In Azure, we can use tags attached to different resources to help us classify them for lots of different reasons. The most common are uses for tags are security, management, and billing. Today we’ll take a short look at how to setup your tags to get started.
In our demo today we’ll set it up Department and UpdateGroup — so like it sounds the company we’re helping here has different departments and updates their resources in Azure based on the values in these tags. We’ll set the ground-work today to pull billing information by department; one of the most common and best uses for tags.
Let’s get logged into your dev / test subscription at https://portal.azure.com or go get yourself a free trial https://azure.microsoft.com/en-us/free/ instead. Once you’re logged in, go to your testing resource group or create one. I’ll wait for you…
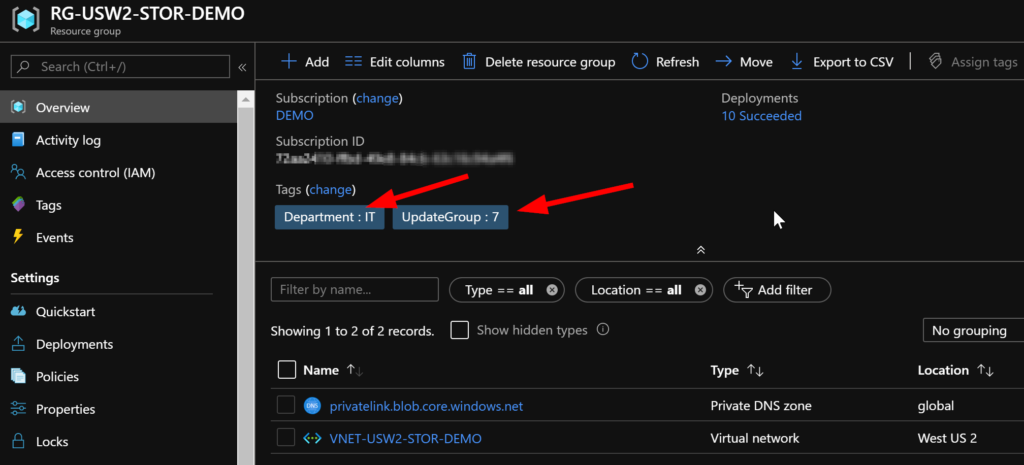
Here you can see I’ve added 2 tags to my resource group: Department and UpdateGroup. To do this go to Tags and click on Add.
Let’s add a resource and see what happens….let’s go with an Ubuntu server today just for some fun!

Click on Add > Ubunto Server XX > Then Create.
For today’s exercise try to think about how you would deploy this in production and choose some options that would be compliant with your organizations standard practices. If those practices are not current, take a moment to reflect on that and think about how can start to change that and bring your people along with that change…just have a think about it.
Let’s finish this VM configuration and setup. Enter a name for your Ubuntu Server, make sure you have the image that you would like selected.
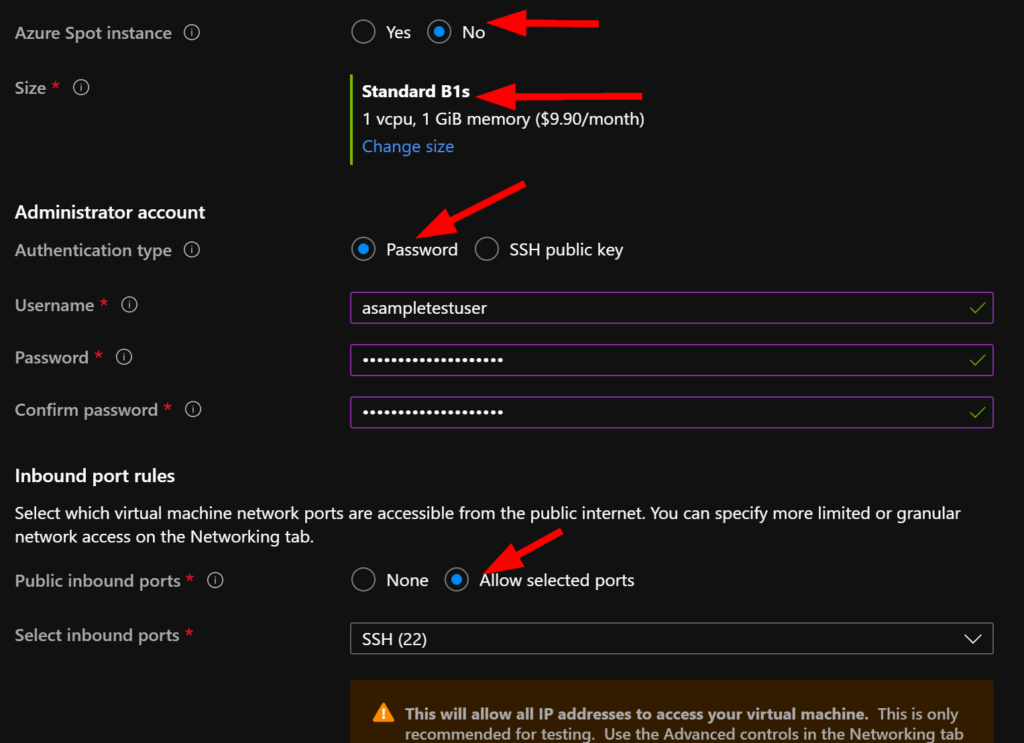
Select No for Azure spot instance, change your Size to B1s or other as needed. I like the B1s for Ubuntu testing machines as it is just so cheap to run them and it doesn’t take too long to load up so you can use it via SSH. Select Password instead of SSH today, enter a username and password and make sure you have the ports allowed as needed.
Click on Next and proceed to Disks.
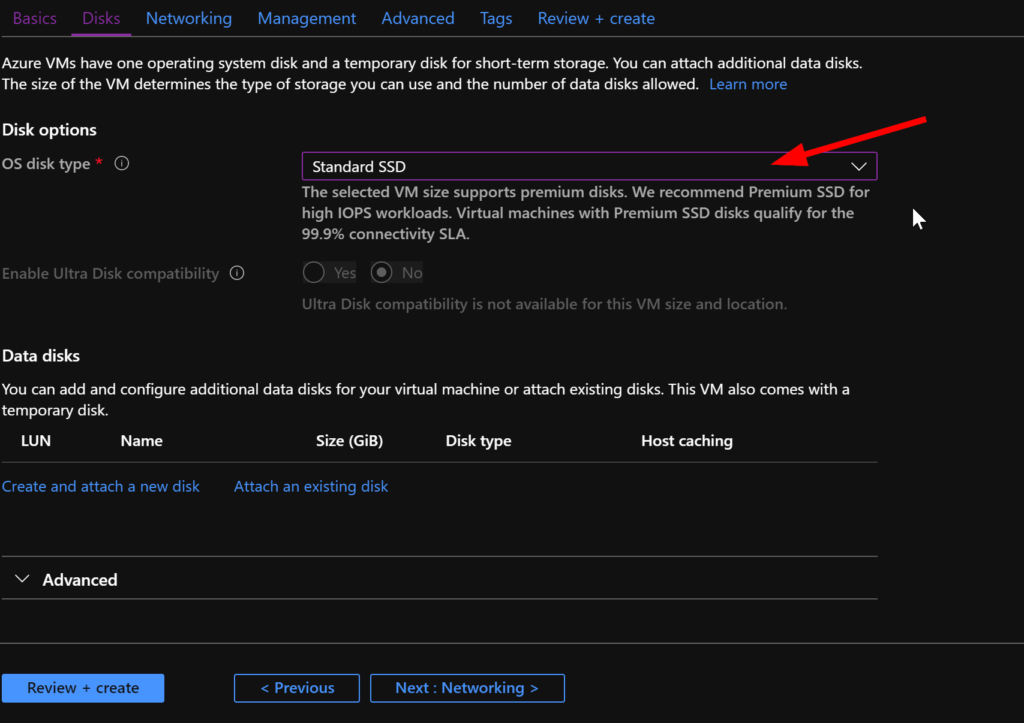
I tend to choose Standard SSD as it’s fairly low cost and lets the machine load faster – the cost is low and as always I suggest shutting down resources and deleting them when no longer being used. Click on Next when you’re ready.
Today, I’m going to accept the defaults here. Fair disclosure that I already have my VNET and Subnets defined for my resource group.
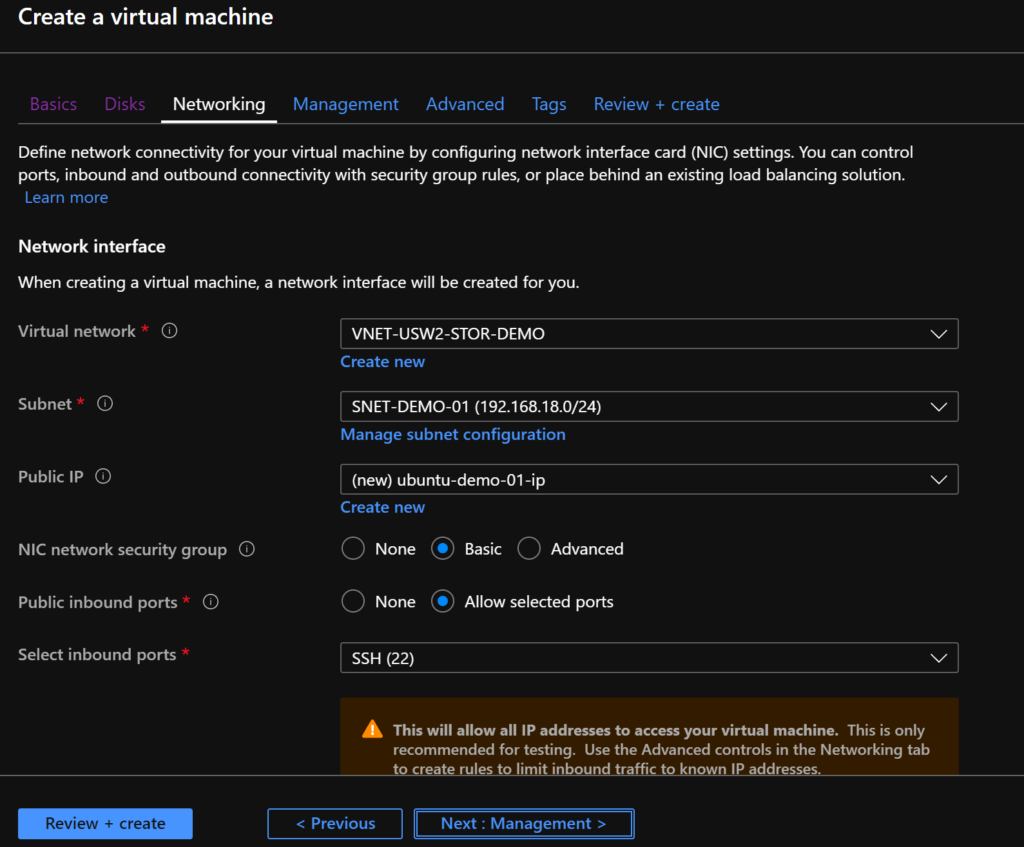
Jump ahead to the Tags tab….
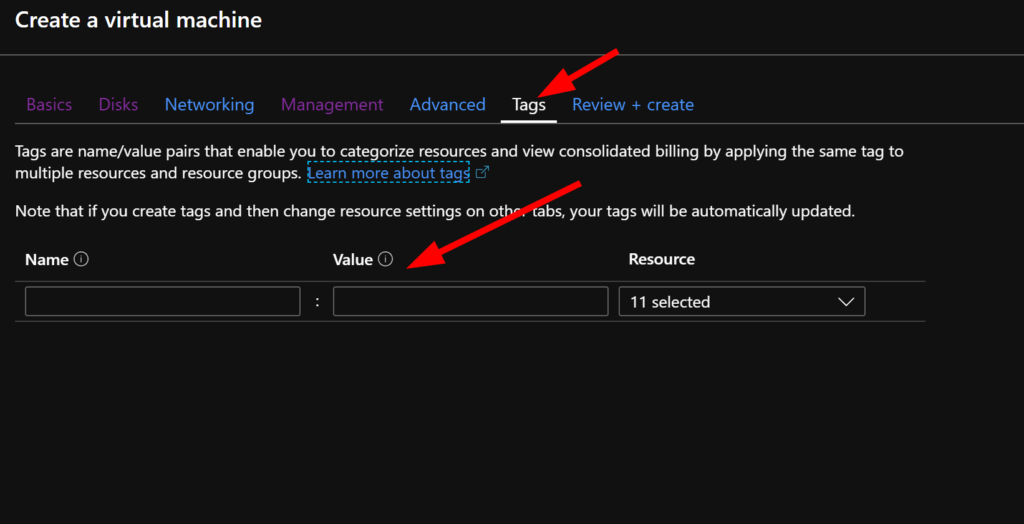
Notice that our tags from the resource group aren’t showing here…what’s up with that anyways? Ok, let’s Review, validate, then Create this server. Click on Create. It will take a few minutes to deploy all the associated objects with your new Ubuntu VM so grab a coffee.
Let’s look at our resource group again:

Cool! We have lots of objects added now. Let’s open up the VM and see what we have:
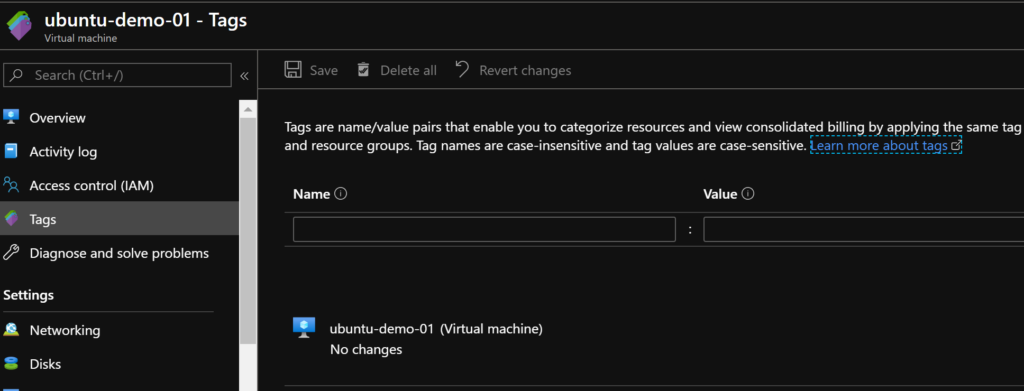
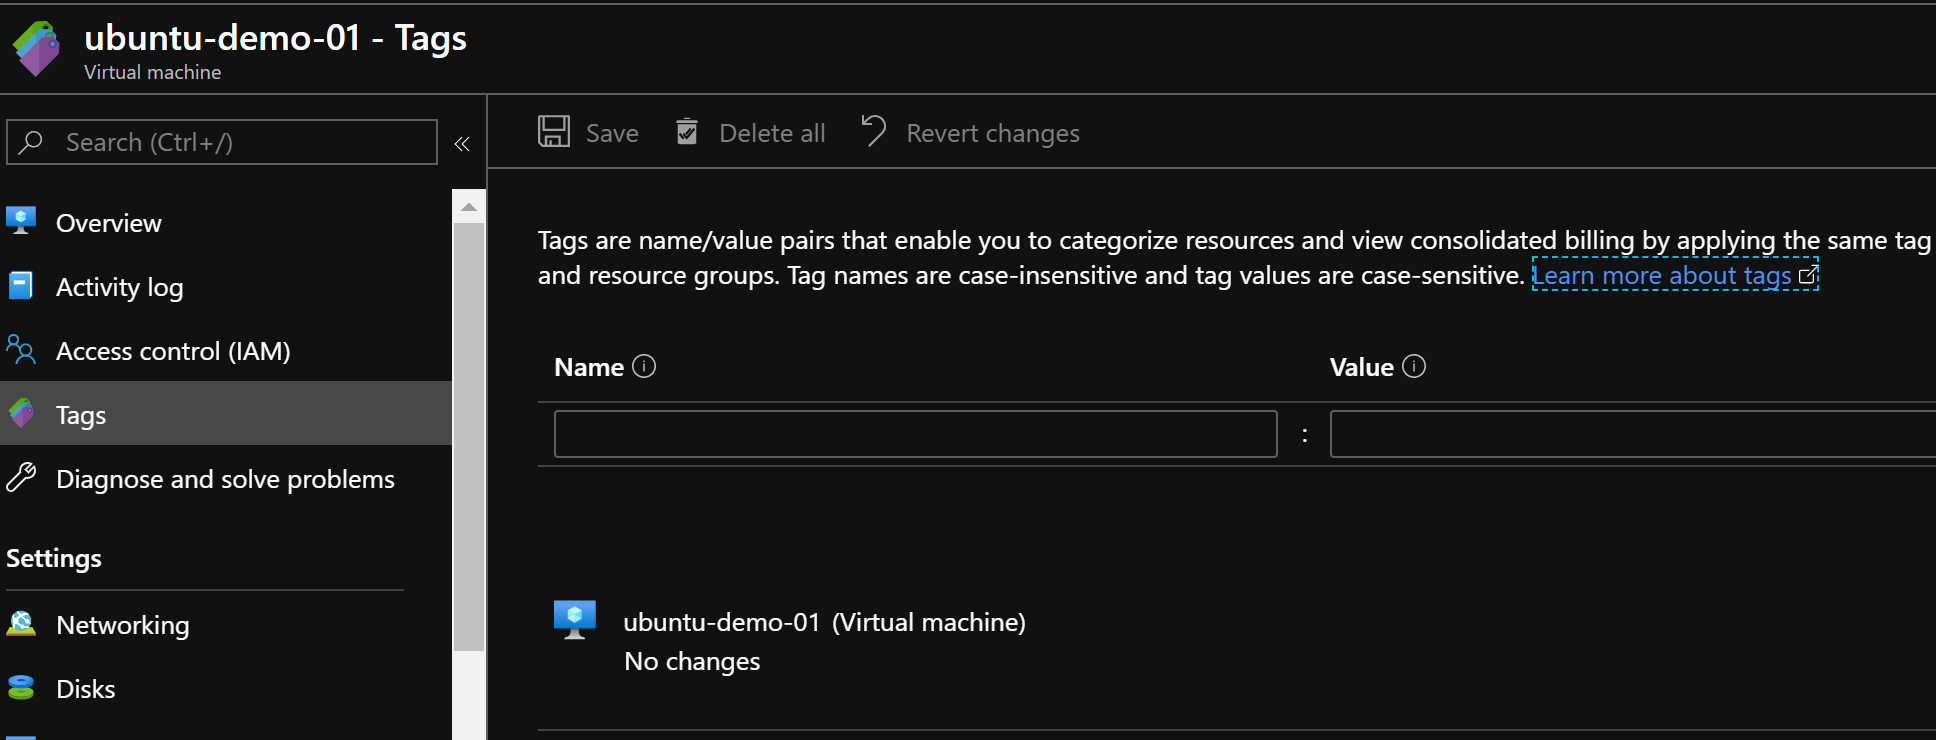
What gives? We have no tags inherited to our VM.
That is correct. Resources do not inherit Tags, so we need to add some here. Notice that on the Overview tab nothing is showing there for Tags. Let’s give this VM to the Sales department and say it’s in UpdateGroup 7 as well.
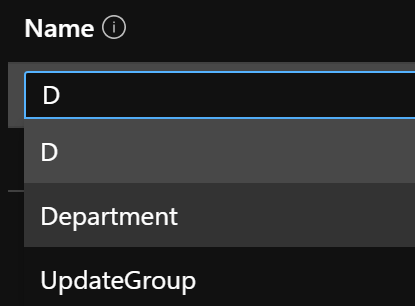
Click on Tags then add a new tag for Department, then UpdateGroup. Notice here that because the Tags already exist all you have to do is start typing and you get that awesome Microsoft Intellisense drop-down.
Save your 2 tags. Go back to the Overview for your VM and you may need to click on Refresh, but note that you now have the tags that you want for your VM resource.
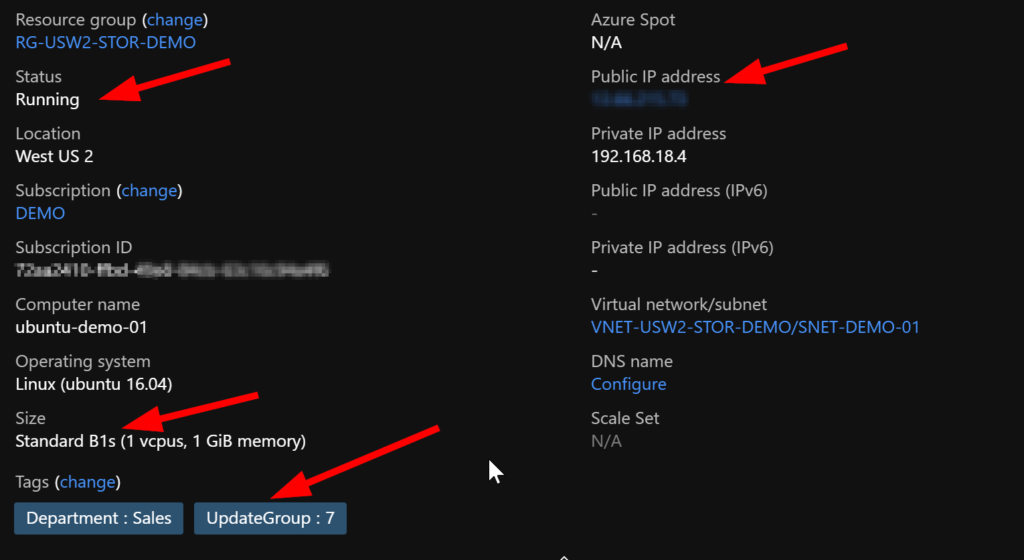
So, our tags are all setup now so that we can look at them next time to associate resource costs for billing back to the correct department. Remember that we chose that nice low-cost VM size? Well, note that we also have an allocated Public IP so be sure to shut down your unused resources if you’re waiting a few days for the next article! See you next time!