Promote a Windows Server to a Domain Controller
Today, we’re going to promote a domain controller in Windows Server Active Directory from being a member server of the domain into a leadership role — the Domain Controller. If you missed the last article on domain joining a Windows Server you can catch up right here. It’s important to have a domain controller placed in strategic places on your network (subnets) so that authentication of users and services can happen with the least latency and that there is some redundancy created between the domain controllers in your domain. Without getting into the architecture too much here, let’s begin today’s task of promoting our Windows Server 2016 vm to a domain controller!
Get logged into your Azure portal at https://portal.azure.com and go to your server that we joined to the domain last time. Log into that server and let’s get started.
Open Server Manager then Manage > Add Roles and Features.
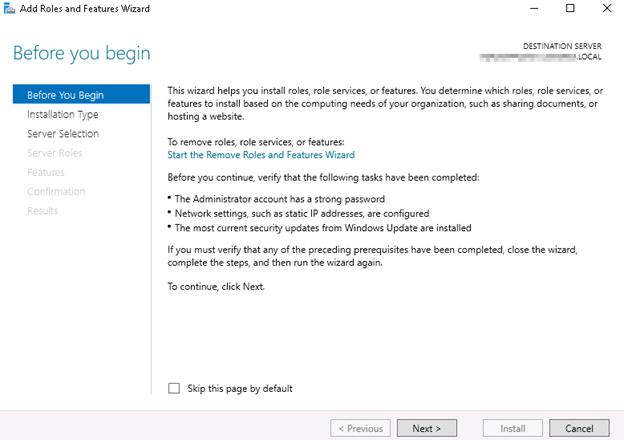
Once the Roles and Features Wizard opens for you, let’s proceed.
Choose Next, select your server if needed but it should already be selected, choose next once more.
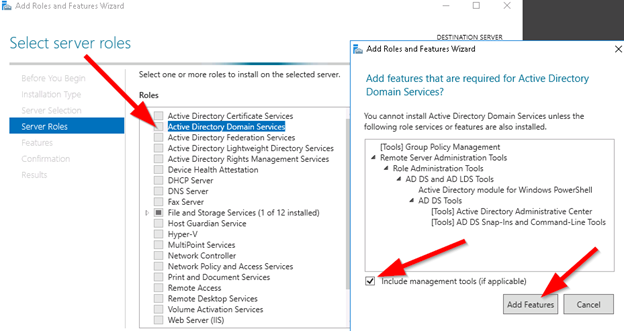
Select from Roles > Active directory Domain Services and a pop-up will show.
Ensure that the box is checked for ‘Include management…’ and click on Add Features.
Choose Next, next, next, and keep the default selected options that have some requirements for our installation such as Group Policy management tools and a few others (.Net too!).
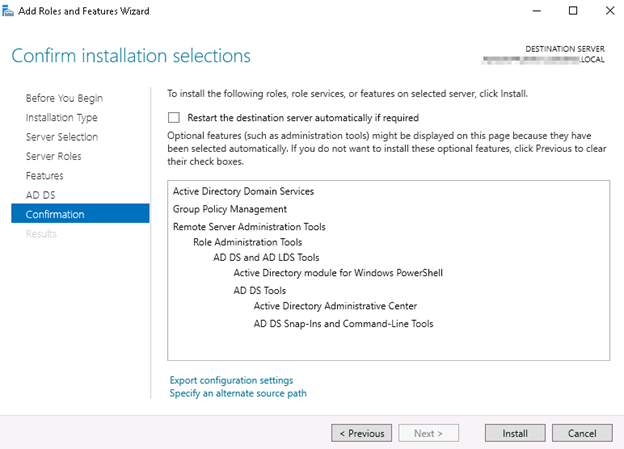
Now the Magic window opens. Let’s take a minute to look at our options here at the end of the road!
Check that box that says ‘Restart the destination….’ And you will see this:
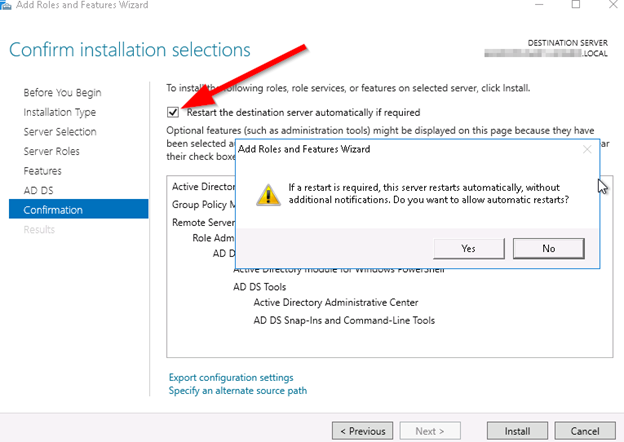
Choose YES.
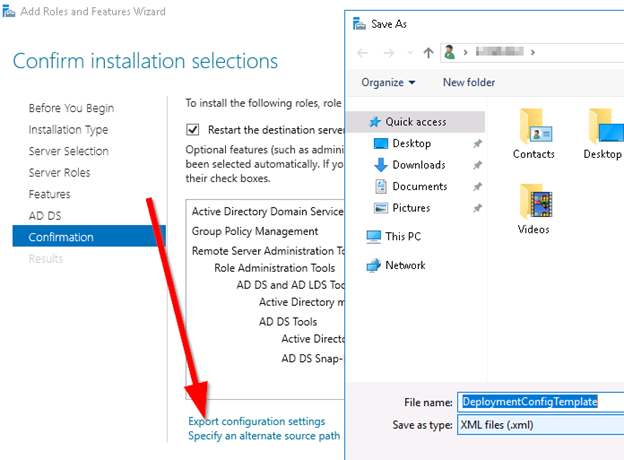
If you select ‘Export configuration settings’ near the bottom, you can save your configuration before committing these changes so that you can replicate this more easily next time!
Now, click on INSTALL.
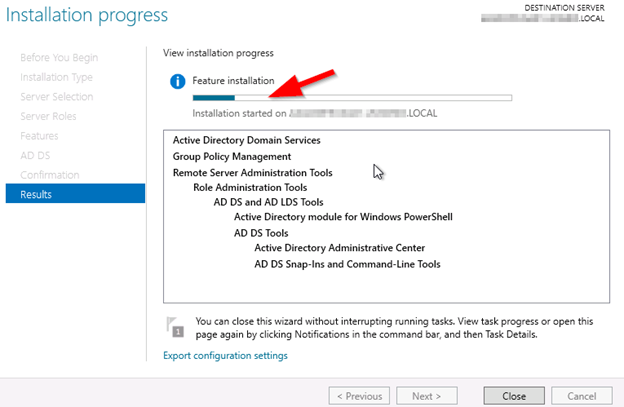
You will see the installation progress:
Like the wizard says, you can close this screen and Server Manager will prompt you as needed for anything. Remember that we selected automatic reboots, so expect the server to restart on it’s own once the installation procedure calls for this.
Once done, you should see this if everything is happy!
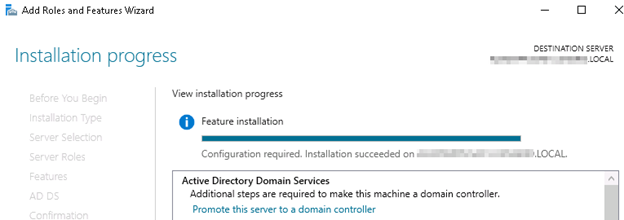
Installation Succeeded! Good times!
Ok, now Server 2016 and 2019 do not require a reboot at this stage technically, but I do suggest it. I have rebooted server one time, logged back in, and now I’m ready to promote the server to a domain controller:
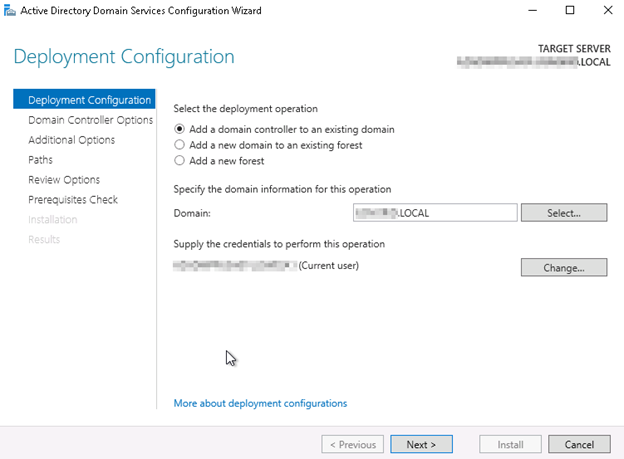
Choose Add a domain controller to an existing domain.
The domain should already be showing in the ‘Domain’ field. Click on Next.
Choose your options as needed, in our example today we will select:

Domain name Server and Global Catalog, then enter a DSRM recovery password and save it in your password manager.
Click on Next.
Choose your DNS options as needed.
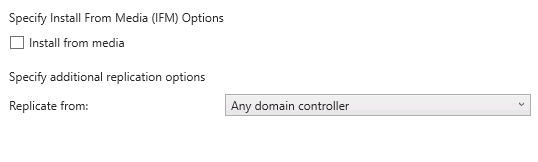
Replication should be from any domain controller whenever possible for the most redundant architecture, but if you had a specific requirement for specifying the replication path or origins; you can do that here. In our case we will leave it at ‘Any’. Click on next.
Now, here’s where life can get interesting with Azure.
The reality is that we may not assign a static IP address in our Azure design, but rather a DHCP reservation from the Virtual Network. When the pre-requisites check is completed, you will likely see a couple of warnings – do not be alarmed – but do read them fully and understand them.
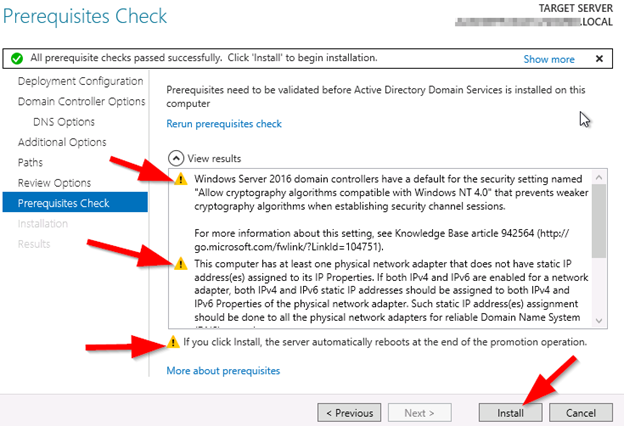
Here, we can see that the cryptography configuration will be changed to something less secure and more backwards compatible. We are ok with that today.
Second, we can see that the wizard is warning us about the non-Static IP configuration. We are ok with that today too.
Click on Install.

Wait patiently….

You will see some messages about replicating, setting up, security, then the server will kick you out of your RDP session and reboot.
When I start Server Manager, I can see that we have no outstanding issues or errors:

Let’s check Active Directory Sites and Services to see if our server has been added correctly:
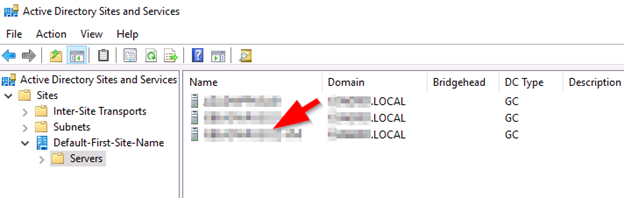
Now, for obvious reasons I grey-out the server and domain names most times, but here we are checking to ensure that the name of our newly promoted domain controller is now listed.
Huzzah! Success. We had 2 servers, and now we have 3. You can see on the menu at the left side where to look for your member Domain Servers under the Default First Site Name option.
In this set of steps, you have joined a server to a domain and then promoted a domain member server to a domain controller. Great job!