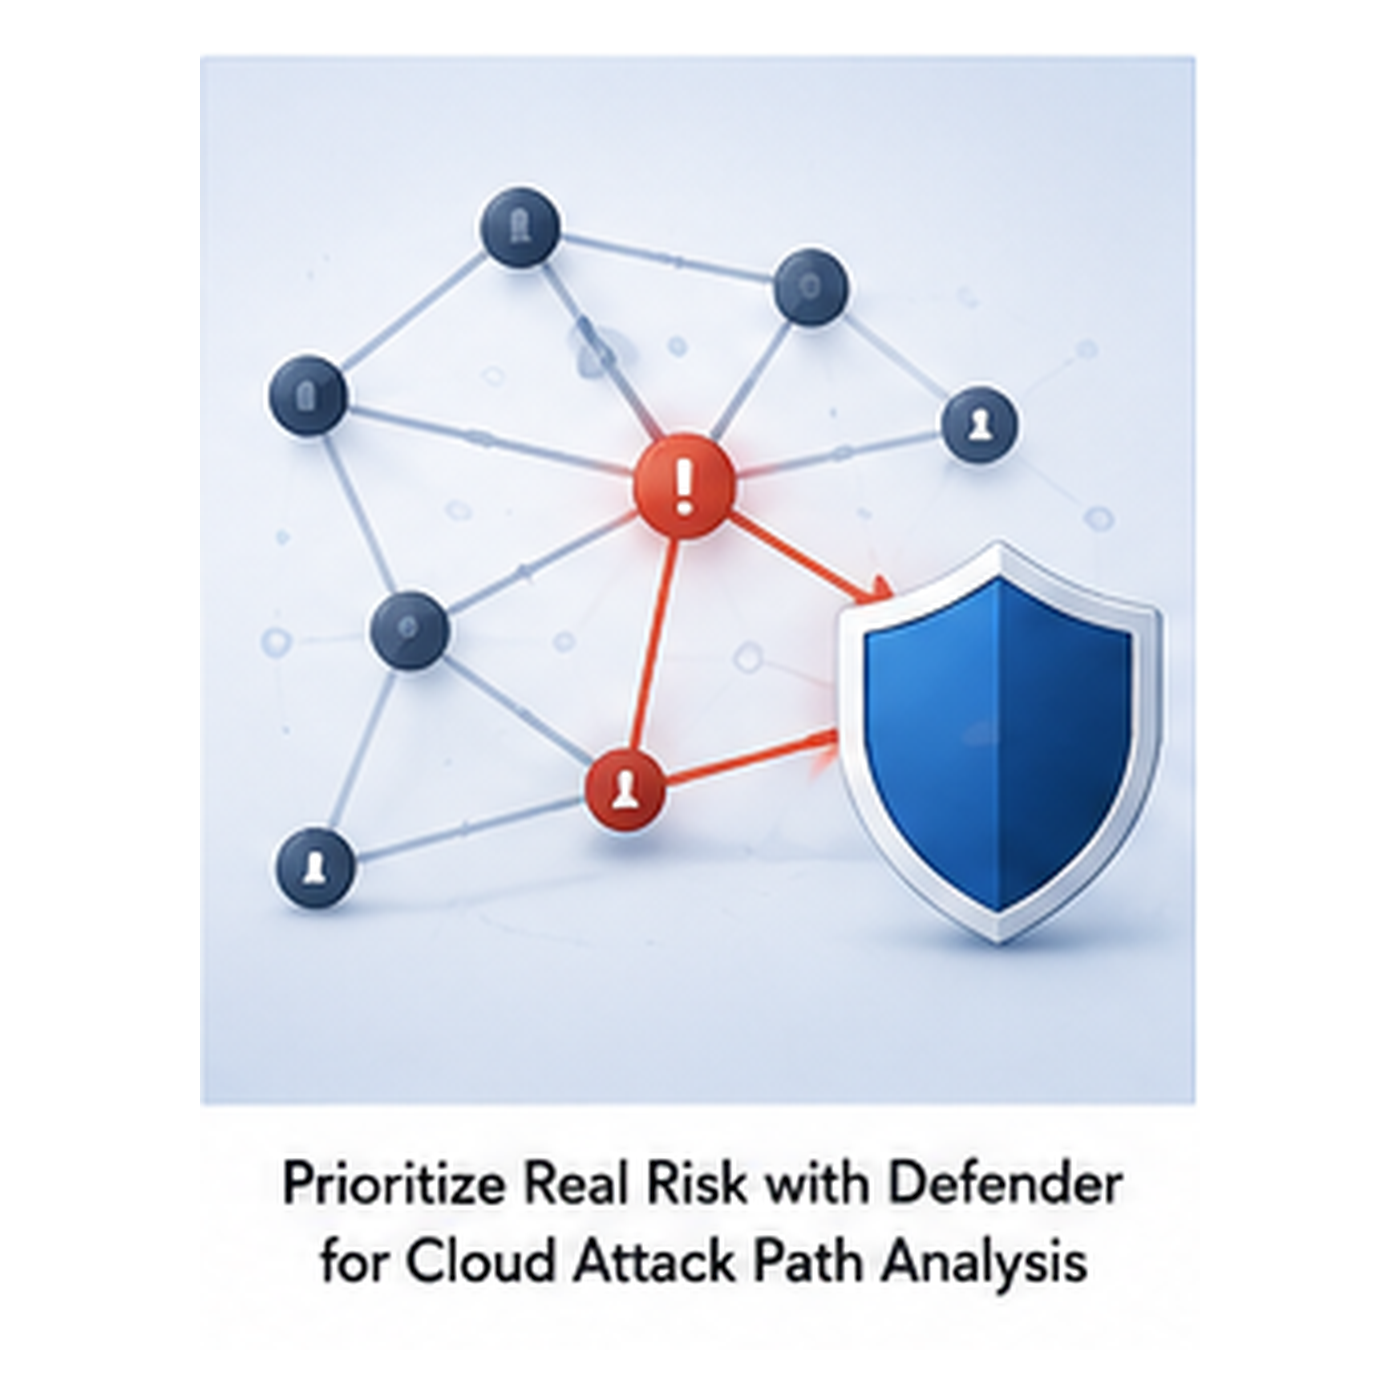
Cloud security programs often drown in recommendations. The hard part is not finding misconfigurations; it is deciding which combinations of exposure, identity, vulnerability, and business impact create the most realistic attack path.
This article shows how to use Defender for Cloud attack path analysis as a prioritization tool. We review detected paths, inspect the affected resources, pick a remediation order, and validate that the attack path is reduced instead of simply closing a single recommendation.
Goal: Use Defender for Cloud attack path analysis to prioritize exploitable cloud risk and build an evidence-based remediation order.
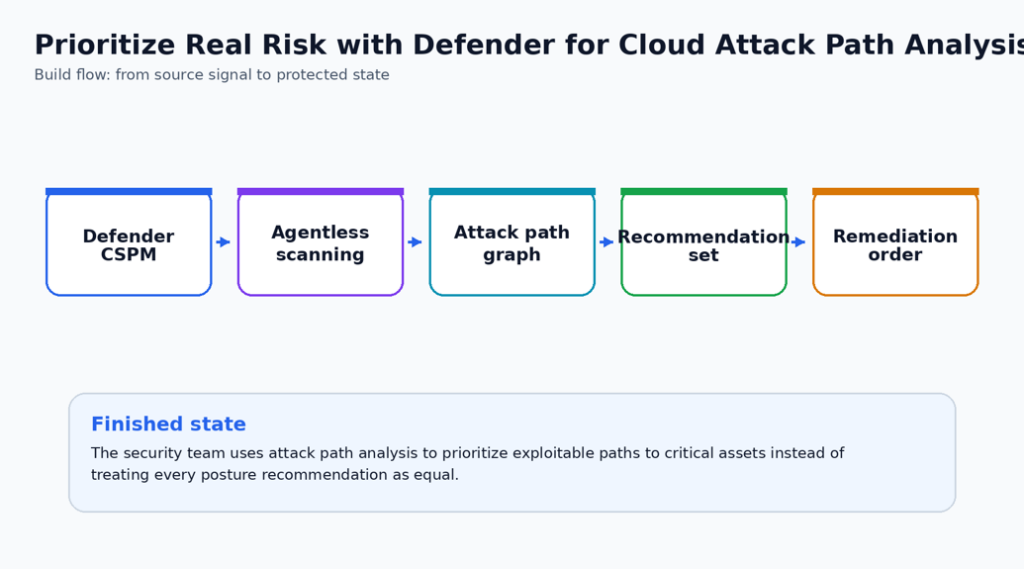
Why build this
Attack path analysis is useful when a single risky setting is less important than the chain it enables. A public endpoint, vulnerable workload, overly privileged identity, and sensitive resource may each look manageable alone but critical together.
The practical value comes from turning the path into a remediation plan that platform, workload, and identity owners can act on in sequence.
Security outcome
- Remediation work is prioritized by exploitable path instead of raw recommendation count.
- Infrastructure and security teams get a common view of which resource relationships create material risk.
- Validation focuses on breaking the attack path, not just marking one recommendation complete.
What you will deploy or configure
- Defender CSPM and agentless scanning prerequisites verified.
- Attack path review workflow.
- A remediation order based on path breakpoints.
- Evidence of risk reduction after remediation.
| Microsoft baseline: Microsoft requires Defender CSPM and agentless scanning for attack path analysis. Use the graph to remediate the breakpoint that most directly breaks the path to the critical asset. |
| Special Highlight: Pair attack path analysis with asset criticality tags. The graph becomes much more actionable when business-critical targets are marked accurately. |
Prerequisites
- Defender CSPM enabled.
- Agentless scanning enabled.
- Security Reader or higher permissions across relevant subscriptions.
- Critical resources tagged or documented.
- Onboarded resources in your Defender CSPM enabled environment (VMs, Gateways, etc).
Important Note on Cost: Ensure you activate Defender as a trial on your testing subscription (or other subscription that you are using for this lab) and turn off functionality when done testing. There is costs associated to enabling these advanced features. You can control costs by using trials -as intended- to do PoC’s and testing.
Before-state checklist
Capture the before state first. This creates documentation that you and administrators can use to determine what has been changed, and helps with Change Approval Board (CAB) requests when you or your team are ready to move changes to production.
- Record the current plan, policy, connector, rule, identity, or workspace setting before making changes.
- Capture current access behavior or alert visibility so the final validation has a clear before/after comparison.
- Confirm the owner for the resource and the person who can approve rollback if the pilot exposes a dependency.
- Check whether existing logs, alerts, or recommendations already exist so the article does not confuse old data with new validation evidence.
Lab build
This lab uses Defender for Cloud attack path analysis as a practical remediation planning tool. Start with one visible attack path, one resource owner, and one change that can be validated. The goal is not to clear every recommendation in one session. The goal is to identify the path components, choose the safest breakpoint, complete that fix, and prove that the path has been reduced or removed.
Use an environment with enough resources to produce meaningful posture context. Very small subscriptions, newly created subscriptions, or environments without internet exposure, vulnerabilities, identity relationships, or critical assets might not produce attack paths. That is acceptable; an empty view can mean Defender for Cloud did not find a current externally driven exploitable path, not that the environment has no risk.
Lab scenario
For the walkthrough, use a non-production subscription or a production pilot scope that already has Defender CSPM enabled. Pick one path that starts from an external entry point and moves toward a critical target. A common example is an internet-exposed virtual machine, application endpoint, API, container workload, or serverless resource that has a vulnerability, risky credential, excessive identity permission, or access path to sensitive data.
Record the path before making any change. The before-state evidence should include the path title, risk level, entry point, target asset, affected resources, associated recommendations, and the resource owner who will validate application behavior after remediation.
Step 1 – Confirm the required Defender for Cloud signal path
Required before starting:
- Defender CSPM is enabled on the subscription, management group, AWS connector, or GCP connector in scope.
- Agentless machine scanning is enabled where VM or server vulnerability, software inventory, secret, or malware context is needed.
- The operator has Security Reader or higher across every subscription that may appear in the path. Limited permissions can hide part of the graph.
- Critical assets are identified with tags, naming standards, data classifications, or an approved business-critical asset list.
- The lab has at least one resource owner available to validate business impact after the change.
In the Azure portal, open Microsoft Defender for Cloud > Environment settings. Select the subscription or cloud connector used for the lab and confirm the Defender CSPM plan is On. Open the plan settings and confirm the required agentless components are enabled. If the attack path relates to containers, also confirm the required container posture capabilities are enabled for the environment.
Expected result: Defender CSPM and the required agentless components are enabled. If the plan was enabled recently, allow time for resource inventory and graph context to populate before assuming the feature is not working.
Step 2 – Open Attack path analysis and choose one path
In the Azure portal, open Microsoft Defender for Cloud > Attack path analysis. Sort or filter by risk level and start with externally exposed paths that lead to critical targets. In the Microsoft Defender portal, the same investigation can be started from Exposure Management > Attack surface > Attack paths, where the list, path map, choke points, entry points, and target assets can be reviewed together.
Choose one path that has a clear owner and a practical first change. Do not start with the path that crosses the most teams unless the change window already has all owners available. A narrower path with a verified outcome is better for the first article lab than a large path that cannot be validated.
Selection guidance:
- Prefer High or Critical risk paths first.
- Prefer paths with an external entry point and a sensitive or business-critical target.
- Prefer a path with a single obvious breakpoint for the pilot, such as a public endpoint, exposed management port, vulnerable package, leaked secret, or over-privileged managed identity.
- Avoid remediation that could affect broad production traffic unless rollback has been documented and the application owner is present.
Step 3 – Map every node before assigning work
Open the path map and select every node. Document what each node contributes to the path. The point of this step is to avoid assigning a generic recommendation without explaining why the specific resource matters. Defender for Cloud attack paths are graph-based, so each node should be treated as part of a chain rather than as an isolated issue.
| Path component | What to capture | Why it matters |
| Entry point | Public IP, endpoint, API, exposed workload, internet reachability, or unmanaged repository | This is where the attacker starts. Closing or restricting this point can break the path early. |
| Vulnerable node | Recommendation, CVE or misconfiguration, affected resource, severity, and owner | This explains what makes the entry point exploitable. |
| Identity or credential link | Managed identity, service principal, local secret, role assignment, or permission chain | This often explains how the attacker moves from the initial resource to a higher-value target. |
| Target asset | Database, storage account, key vault, container registry, workload, or sensitive data resource | This explains the business impact and helps prioritize remediation. |
| Recommended fix | Associated Defender for Cloud recommendation, remediation status, due date, and owner | This turns the graph into a work item that can be tracked. |
Step 4 – Choose the safest breakpoint
A breakpoint is the control that interrupts the attack chain. Pick the breakpoint that reduces the most risk with the least operational risk. Do not assume patching is always the best first action. If the path begins with unnecessary public exposure, closing or restricting that exposure may break several paths faster than patching one downstream workload.
| Breakpoint option | When to use it first | Validation evidence |
| Close or restrict exposure | The resource does not require broad public access, or management access can move to approved IPs, Bastion, Private Link, or a controlled admin path. | External test fails from an unapproved location and the application owner confirms expected access still works. |
| Fix vulnerability or insecure setting | The exposed resource must remain reachable and the vulnerability is directly part of the path. | Recommendation state improves after remediation and workload health checks pass. |
| Remove credential or secret risk | The path uses a discovered secret, local credential, connection string, or insecure automation credential. | Secret is rotated or removed, dependent service is updated, and no plaintext copy remains in the inspected location. |
| Reduce identity privilege | The path relies on excessive RBAC, managed identity permission, or service principal permission. | Permission is scoped down and the workload still performs only the required operations. |
Special Highlight: Break the path as high in the chain as possible. If one public endpoint feeds five downstream paths, fixing exposure first can reduce executive risk faster than remediating five individual recommendations. Only use this approach when the owner can validate that legitimate traffic is not broken.
Step 5 – Create remediation tasks that include path context
Open the associated recommendations from the path and create remediation tasks for the correct resource owners. The assignment should include the path context, not just the recommendation name. A good task explains the entry point, target asset, business impact, exact requested change, validation method, rollback owner, and expected evidence.
Include this minimum task detail:
- Attack path title and risk level.
- Resource ID or resource group for the affected node.
- Why the resource is in the path and what target it can lead to.
- Recommended fix from Defender for Cloud.
- Chosen breakpoint and reason for selecting it first.
- Change owner, validator, rollback approver, due date, and evidence required.
Step 6 – Remediate the first breakpoint
Complete the first remediation using the Microsoft guidance shown in the recommendation. Keep the first change narrow. For example, if the path begins with a VM management port exposed to the internet, remove broad inbound access or restrict it to the approved administrative source instead of redesigning the entire network during the pilot. If the path depends on an over-privileged managed identity, reduce the role assignment to the minimum scope that still supports the workload.
During the change, capture the exact before and after configuration. The article should show what was changed, why the change was chosen, and how the resource owner confirmed the workload still functions.
Recommended implementation sequence:
- Export or screenshot the current setting before changing it.
- Apply the smallest effective change that breaks the path.
- Have the resource owner run the application or operational test immediately.
- Capture the new setting and the validation result.
- Leave broader cleanup for the next change after the first breakpoint is proven.
Step 7 – Validate Defender for Cloud and the application outcome
Return to Attack path analysis after the remediation. If the path still appears immediately, do not assume the change failed. Defender for Cloud notes that after an attack path is resolved, it can take up to 24 hours for the path to be removed from the list. Use application validation and the underlying recommendation state as immediate evidence while waiting for the graph to refresh.
| Validation check | Expected result | Evidence to capture |
| Application validation | Business or admin workflow still works from approved paths | Owner sign-off, test result, or change ticket comment |
| Blocked path validation | Unapproved exposure, credential, or privilege path no longer works | Failed connection test, reduced role assignment, rotated secret, or updated access control |
| Recommendation review | Associated recommendation is fixed, in progress, or has a clear remaining dependency | Recommendation screenshot or exported task details |
| Attack path review | Path disappears, risk decreases, or remaining nodes identify the next remediation | Before and after attack path screenshots |
| Executive evidence | Risk reduction can be explained in one sentence | Before/after summary with affected target and owner |
Step 8 – Document the before and after risk story
Finish the lab by writing a short risk story. This is useful for executive reporting because it explains the chain and the control outcome without requiring the reader to understand every node in the graph.
Example summary:
Before remediation, Defender for Cloud identified an externally exposed workload that could lead to a sensitive target through a vulnerable resource and excessive identity permission. We remediated the first practical breakpoint by restricting the exposed path. Application validation passed, the associated recommendation is in progress or resolved, and the path will be reviewed again after the Defender for Cloud graph refresh window.
Step 9 – Move from pilot to production by path pattern
Do not expand by subscription-wide bulk change first. Expand by resource class and path pattern. For example, finish externally exposed VMs first, then externally exposed application endpoints, then identity privilege paths, then sensitive-data target paths. This keeps each rollout understandable and gives owners a repeatable validation plan.
Production expansion order:
- Review top choke points first because one choke point can appear in multiple attack paths.
- Group similar paths by resource class, owner team, and remediation type.
- Apply one approved remediation pattern at a time.
- Capture validation evidence before moving to the next path pattern.
- Track exceptions with owner, expiry date, compensating control, and business justification.
Change-window notes
- Schedule the pilot when a resource owner can validate application behavior immediately after the change.
- Keep the first production change intentionally narrow. A smaller but verified rollout is better than a broad rollout with uncertain impact.
- Do not remove the old control path until the new validation evidence is captured and reviewed.
- For controls that can affect traffic flow, authentication, backup retention, or alert volume, pre-stage the rollback steps in the change ticket.
- If the first breakpoint is identity-related, confirm who can restore the previous role assignment and who can approve that restoration.
- If the first breakpoint is network-related, define the exact source, destination, port, protocol, and test endpoint before the change starts.
- If the first breakpoint is vulnerability-related, confirm the patch owner, maintenance window, reboot expectation, and health check before remediation.
- If Defender for Cloud still shows the old path after the change, wait for the documented refresh window and use recommendation state plus workload validation as interim evidence.
Reader copy/paste block
Use the following block as a starting point for validation or implementation. Replace names, scopes, and resource identifiers before using it in production.// Query recommendations related to externally exposed resources for local triage
SecurityRecommendation
| where TimeGenerated > ago(14d)
| where RecommendationState == “Unhealthy”
| project TimeGenerated, RecommendationName, RecommendationSeverity, AssessedResourceId
Production hardening
In production, use attack paths as a governance queue. Review critical paths weekly, assign owners by path segment, and document whether the path is remediated, accepted, or blocked by a dependency.
- Treat this control as part of the normal security operations backlog, not as a one-time portal configuration. Assign a named owner and review cadence before wider rollout.
- Use tags or a documented inventory to identify owner, environment, data sensitivity, and business criticality before expanding beyond the pilot.
- Separate deployment permission from approval permission. Security controls are stronger when one identity cannot both weaken and approve the control.
- Send logs, alerts, or audit evidence to the existing SOC workflow instead of creating a new place that nobody checks.
- Create an exception process with owner, expiry date, business justification, and compensating controls.
- Add the configuration to your normal change-management and monthly control-review process.
Operational handoff
- Add the new control to the monthly security review or platform operations checklist.
- Record the expected alert owner, escalation path, and response time for findings created by the control.
- Store the validation query, screenshot checklist, and rollback notes with the service runbook.
- Review exceptions quarterly and remove any exception that no longer has a business owner or expiry date.
Finished-state validation
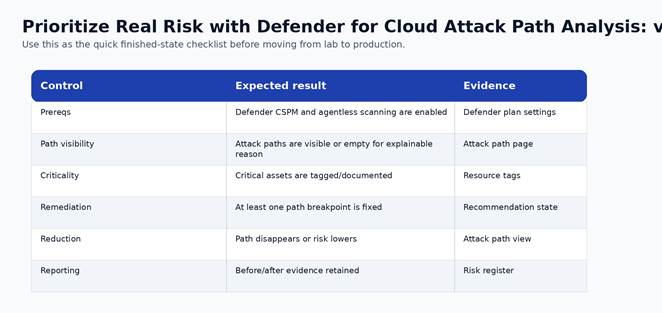
Figure 2. Finished-state validation chart for the completed build.
| Control | Expected result | Evidence to capture |
| Prereqs | Defender CSPM and agentless scanning are enabled | Defender plan settings |
| Path visibility | Attack paths are visible or empty for explainable reason | Attack path page |
| Criticality | Critical assets are tagged/documented | Resource tags |
| Remediation | At least one path breakpoint is fixed | Recommendation state |
| Reduction | Path disappears or risk lowers | Attack path view |
| Reporting | Before/after evidence retained | Risk register |
Cost and licensing notes
Attack path analysis depends on Defender CSPM. Treat it as a prioritization capability that can reduce remediation waste by focusing effort on exploitable paths.
To gain quick value with Defender CSPM Attack Path Analysis, start utilizing the paths identified in an operational way; which is to say simply dig right in and get started with it once your test or PoC is underway. You will quickly see the value in the analysis. Follow good operational practices and review the value of CSPM a couple times per year, ensure that it is part of process for your SOC Analysts and relevant Team Members.
Known limitations and edge cases
- An empty attack path view does not mean the environment is risk-free.**
- Limited permissions can hide path details.
- Paths depend on available Defender signals and current resource context.
Troubleshooting
- If the control does not appear enabled, re-check RBAC at the subscription and resource scope before changing the configuration again.
- If logs or recommendations do not appear immediately, confirm documented data latency before assuming the deployment failed.
- If a production dependency breaks, stop expansion, capture the failing path, and compare it against the before-state inventory.
- If an alert is noisy, tune scope and ownership first. Do not suppress security signals globally without a review record.
Rollback or cleanup
- For lab resources, remove the pilot association, policy assignment, connector, rule, or configuration after screenshots and validation are complete.
- For production resources, rollback should be a controlled change that restores the last known-good configuration and preserves audit evidence.
- For irreversible settings, such as locked backup immutability, rollback is not available. Treat the approval step as the control point.